Garmin 1200 Quick Start Manual Download Page 3

nüvi 100 series Quick Start Manual 


Setting Up Your nüvi

Before mounting the nüvi, see the 

Important Safety and Product Information

 guide for information 

about laws pertaining to windshield mounting.
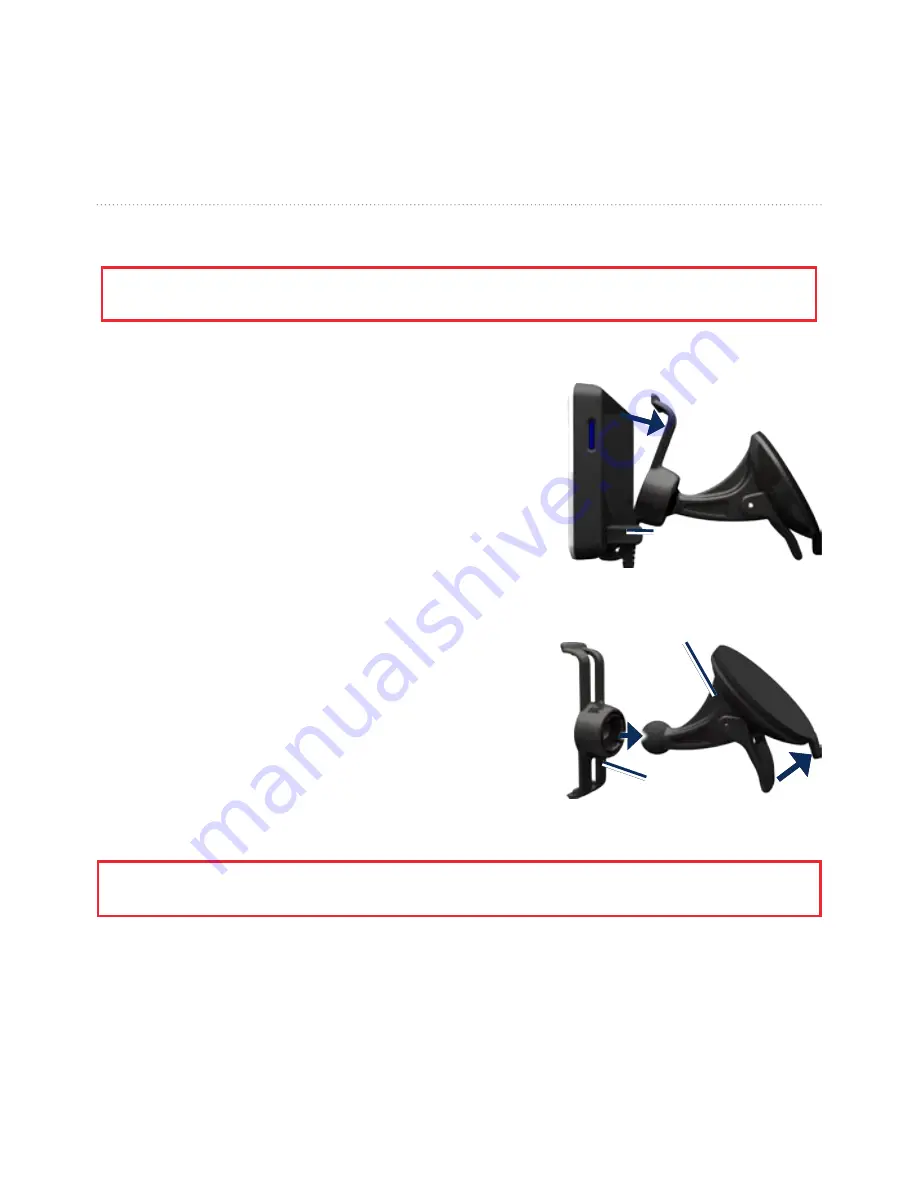
Mount your nüvi

1.  Plug the vehicle power cable into the back of your nüvi. 
2.  Snap the cradle onto the suction cup arm. 
3.  Remove the clear plastic from the suction cup. 

Place the suction cup on the windshield.

4.  Flip the lever back toward the windshield.
5.  Plug the other end of the vehicle power cable 

into a power outlet in your vehicle. Your unit 

should turn on automatically if it is plugged in and the vehicle is running. 

Follow the on-screen instructions.

6.  Tilt your nüvi back until it snaps into place. 
7.  Fit the bottom of your nüvi into the cradle.

8.  If you are using a traffic receiver in Europe, 

connect the external antenna to the traffic 

receiver and secure it to the windshield using 

the suction cups. (Traffic receivers are included 

in some nüvi 205 series packages.)

Vehicle power 

cable

Vehicle power 

cable

Suction cup mount

Cradle

Suction cup mount

Cradle

Warning

: This product contains a lithium-ion battery. To prevent damage, remove the unit from the 

vehicle when exiting or store it out of direct sunlight. 

Summary of Contents for 1200

Page 1: ...n vi 1200 series quick start manual for use with these n vi models 1200 1210 1250 1260...

Page 2: ...card slot Power button Press button to turn the n vi on off Microphone Using the Main Menu GPS satellite strength Bluetooth technology status Touch to select a usage mode Current time Touch to change...

Page 3: ...ower outlet in your vehicle Your unit should turn on automatically if it is plugged in and the vehicle is running Follow the on screen instructions 6 Tilt your n vi back until it snaps into place 7 Fi...

Page 4: ...ry Connect a USB cable included in some packages Using the Power Button Press and quickly release the Power button to view additional options Touch and to adjust the screen brightness Touch Lock Scree...

Page 5: ...ge Touch to view the Turn List page Touch and to zoom in and out Touch to view the Where Am I page Touch to view the Trip Computer Touch to return to the Main Menu Touch and drag the map to view a dif...

Page 6: ...y service provider Visit www garmin com traffic or www garmin com for more information Avoiding Traffic on Your Route 1 On the Map page touch the traffic icon The traffic icon changes color to indicat...

Page 7: ...ings Bluetooth 3 Touch the button below Bluetooth and touch Enabled OK 4 Touch the button below Phone 5 Touch Add Device OK 6 Select your phone and touch OK 7 Enter the Bluetooth PIN 1234 for your n v...

Page 8: ...phone or wait longer than 60 days after the first time you drive with your n vi More Information For more information about your n vi select Tools Help Download the latest version of the owner s manua...

Reviews: