background image

EN © 2020 GARDERNIC


 All Rights Reserved        

2-in-1 verticutter and aerator 1500W


22 


Children should remain under supervision to ensure that they do 
not play with the device. 


Unattended children must not clean or maintain the unit. 


Use the device only when it has been properly assembled. 


Use the device only as described in these user manual! 


Use  the  device  away  from  other  people,  especially  children,  and 
pets. 


Use the device only during the day or in good lighting conditions. 


When operating, pay attention to the stable position of the device, 
especially on slopes. On slopes, move across them, never from top 
to  bottom  or  vice  versa.  Be  particularly  careful  when  changing 
direction on a slope. Do not use the device on too steep a slope. 


Avoid using the device during harsh weather, wet grass or humid 
environment. 


Do  not  use  the  device  on  hardened  or  gravel  surfaces  where 
ejected material can cause injuries. 


Before using the device, make sure that elements of the device are 
not blocked by anything. Carefully check the area where the device 
will  be used  and  remove  any objects that  may be  ejected  by  the 
device. 


To avoid endangering life and health of the users, in the event of 
damage  to  the  device  or  any  of  its  components,  return  it 
immediately  to  an  authorized  service  centre  or  contact 
manufacturer's service department. 


Protect the device from flooding. Every time a cable or appliance 
gets  wet,  even  when  it  is  switched  off,  the  user  is  exposed  to 
electric shock. Never immerse the device in any kind of fluid. If, for 
any  reason,  any  kind  of  fluid  enters  the  housing  of  the  unit, 
immediately unplug the mains plug from the mains socket and take 
the unit for repair to an authorized service centre or contact the 
manufacturer's hotline. 


Cleaning and maintenance of the appliance must be carried out as 
described in chapter 9. CLEANING AND CONSERVATION. 


Never  turn  the  unit  upside  down  or  put  it  on  its  side  when  it  is 
turned on. 


Do not use water to extinguish the fire in case the device stands 
ablaze.  Suppress  the  flames  with  a  fire  blanket  or  suitable 
extinguisher. 

Summary of Contents for GN-0313

Page 1: ...EZNACZENIEM 2 3 DANE TECHNICZNE 2 4 ZASADY BEZPIECZNEGO U YTKOWANIA 3 5 OBJA NIENIA SYMBOLI 6 6 ZAWARTO ZESTAWU 9 7 BUDOWA 9 8 U YTKOWANIE 10 9 CZYSZCZENIE I KONSERWACJA 15 10 ROZWI ZYWANI PROBLEM W 1...

Page 2: ...przestrzega zalece zawartych w niniejszej instrukcji obs ugi Urz dzenie nie nadaje si do u ytku komercyjnego Producent nie ponosi odpowiedzialno ci za szkody wynikaj ce z u ycia urz dzenia w spos b ni...

Page 3: ...BEZPIECZNEGO U YTKOWANIA OSTRZE ENIE Przed u yciem nale y uwa nie przeczyta ca oryginaln instrukcj obs ugi OSTRZE ENIE Uwa aj na ostre z by zespo w tn cych trzymaj r ce i nogi z dala Rotacja walca ma...

Page 4: ...nie by nigdy niczym przygniatany zginany zbyt mocno ani nie by nara ony na kontakt z ostrymi lub gor cymi powierzchniami kt re mog yby go uszkodzi Przew d zasilaj cy prowad tak aby nie nara a nikogo n...

Page 5: ...y zwr uwag na stabiln pozycj urz dzenia zw aszcza na pochy o ciach Na pochy o ciach przemieszczaj si w ich poprzek nigdy z g ry na d lub odwrotnie Zachowaj szczeg ln ostro no zmieniaj c kierunek jazdy...

Page 6: ...yka resztkowego tj ryzyka pozostaj cego mimo zastosowania konstrukcji bezpiecznej z samego za o enia rodk w zabezpieczaj cych oraz dodatkowych rodk w ochronnych W razie wypadku lub awarii urz dzenia n...

Page 7: ...e y wyrzuci do odpowiednich kontener w Oznaczenie kontenera do kt rego nale y wyrzuci karton papier Symbol oznaczaj cy tektur falist zawieszka IPX4 Ochrona przed bryzgami wody ze wszystkich stron obud...

Page 8: ...nd Electronic Equipment WEEE Produkt w oznaczonych tym symbolem po up ywie okresu u ytkowania nie nale y utylizowa lub wyrzuca wraz z innymi odpadami z gospodarstwa domowego U ytkownik ma obowi zek po...

Page 9: ...lna cz uchwytu 2 szt ruba z nakr tk r czn 4 szt Klipsy mocuj ce 2 szt Uchwyt na przew d zasilaj cy Walec aeratora Kosz Klucz imbusowy Instrukcja obs ugi Je li brakuje kt rejkolwiek z powy szych pozycj...

Page 10: ...nuj tylko gdy urz dzenie jest od czone od sieci energetycznej Wszystkie czynno ci wykonuj delikatnie aby nie uszkodzi element w Wyjmij urz dzenie z opakowania Sprawd czy aden z element w nie jest uszk...

Page 11: ...ty typu Philips A znajduj ce si pod spodem blokady bezpiecze stwa a nast pnie odczep doln cz obudowy blokady B Zamocuj blokad na g rnej cz ci uchwytu 12 od g ry a doln cz obudowy blokady od do u Skr...

Page 12: ...za imbusowego 15 Unie lekko walec przy uchwycie i odci gnij go w kierunku przedstawionym na poni szej ilustracji demontuj c go w ten spos b z urz dzenia Zdejmij uchwyt o yska walca z walca W razie pot...

Page 13: ...edn r k a drug odczep kosz poci gaj c za jego uchwyt do g ry Podczas u ytkowania urz dzenia operator powinien korzysta z rodk w ochrony s uchu oraz okular w ochronnych Nie s one cz ci zestawu Przed ro...

Page 14: ...owania Nie transportuj urz dzenia przy pod czonym r dle zasilania Trzymaj przew d zasilaj cy oraz przed u aj cy z dala od zespo u tn cego Nie zbli aj d oni ani st p do obracaj cego si zespo u tn cego...

Page 15: ...o zwil onej letni wod i mocno wy tej z jej nadmiaru Po tym niezw ocznie nale y przetrze myte miejsce such ciereczk lub papierowym r cznikiem i pozostawi urz dzenie do pe nego wyschni cia 10 ROZWI ZYWA...

Page 16: ...trycznego wyczyszczeniu urz dzenia i jego akcesori w przechowuj je w suchym pomieszczeniu z dala od r de ciep a i wilgoci Najlepiej gdy urz dzenie umie cisz w oryginalnym opakowaniu z daleka od dost p...

Page 17: ...ne Wertykulator i aerator 2w1 17 13 DEKLARACJI ZGODNO CI Z NORMAMI EUROPEJSKIMI 14 PRODUCENT mPTech Sp z o o ul Nowogrodzka 31 00 511 Warszawa Polska Infolinia 48 71 71 77 400 E mail pomoc mptech eu W...

Page 18: ...NDED USE 19 3 TECHNICAL DATA 19 4 PRINCIPLES OF SAFE USE 20 5 EXPLANATION OF SYMBOLS 23 6 CONTENTS OF THE SET 25 7 CONSTRUCTION 26 8 USE 26 9 CLEANING AND MAINTENANCE 31 10 SOLVING PROBLEMS 32 11 STOR...

Page 19: ...device is not suitable for commercial use The manufacturer is not liable for damages resulting from the use of the device in a manner inconsistent with its intended use Any claims for damages resulti...

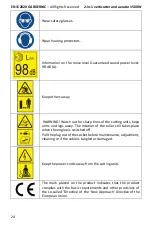
Page 20: ...he above 4 PRINCIPLES OF SAFE USE WARNING Read the entire original user manual carefully before use WARNING Watch out for sharp tines of the cutting units keep arms and legs away The rotation of the r...

Page 21: ...losing balance Always fully unwind the power cord before using the device and inserting the mains plug into the socket If the power cord is damaged it should be replaced To avoid danger it should be...

Page 22: ...sure that elements of the device are not blocked by anything Carefully check the area where the device will be used and remove any objects that may be ejected by the device To avoid endangering life a...

Page 23: ...warnings carefully Failure to do so may result in damage to the device and in extreme cases in loss of health or life Important information on the use of the device Symbol for Class II equipment Equi...

Page 24: ...its keep arms and legs away The rotation of the roller still takes place when the engine is switched off Pull the plug out of the socket before maintenance adjustment cleaning or if the cable is tangl...

Page 25: ...eficial to human health and environment To obtain information on where and how to dispose of used electrical and electronic equipment in an environmentally friendly manner user should contact their lo...

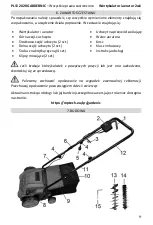
Page 26: ...part of the handle 12 Upper part of the handle 13 Verticutter roller 14 Aerator roller 15 Allen key 8 USE BEFORE THE FIRST START All installation disassembly cleaning and maintenance operations should...

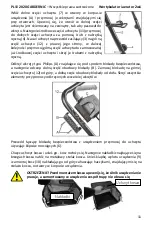
Page 27: ...ure it with the screws located at the holes Make sure that the hole in the lower part of the handle is facing outwards to fit the screw Then attach the middle parts of the handle 11 to the lower parts...

Page 28: ...will unfold Then apply the overlays on the edges of the basket to the metal frame of the basket Lift the outlet flap of the unit 9 and mount the basket 10 by hooking it from above with the hooks on t...

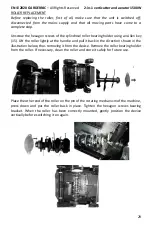
Page 29: ...llen key 15 Lift the roller lightly at the handle and pull it back in the direction shown in the illustration below thus removing it from the device Remove the roller bearing holder from the roller If...

Page 30: ...n order to keep work efficient To remove the basket lift the outlet flap with one hand and pull up the basket handle with the other The operator should wear hearing protection and safety glasses when...

Page 31: ...ion cord away from the cutting unit Do not bring your hands or feet near the rotating cutting unit Always stay away from the outlet Do not tilt the device when the engine starts except when the device...

Page 32: ...connection to the power supply Check the plug or power cord for damage Check whether the electrical outlet is damaged select another one Check that the cutting unit is not blocked Defective activatin...

Page 33: ...d pets TRANSPORT OF THE DEVICE It is recommended to transport the device in its original packaging after it has been switched off with the power switch and cooled down its electric cord wound up the d...

Page 34: ...rticutter and aerator 1500W 34 13 DECLARATION OF CONFORMITY WITH EUROPEAN STANDARDS 14 MANUFACTURER mPTech Sp z o o Nowogrodzka 31 street 00 511 Warsaw Poland Helpline 48 71 71 77 400 E mail pomoc mpt...

Reviews: