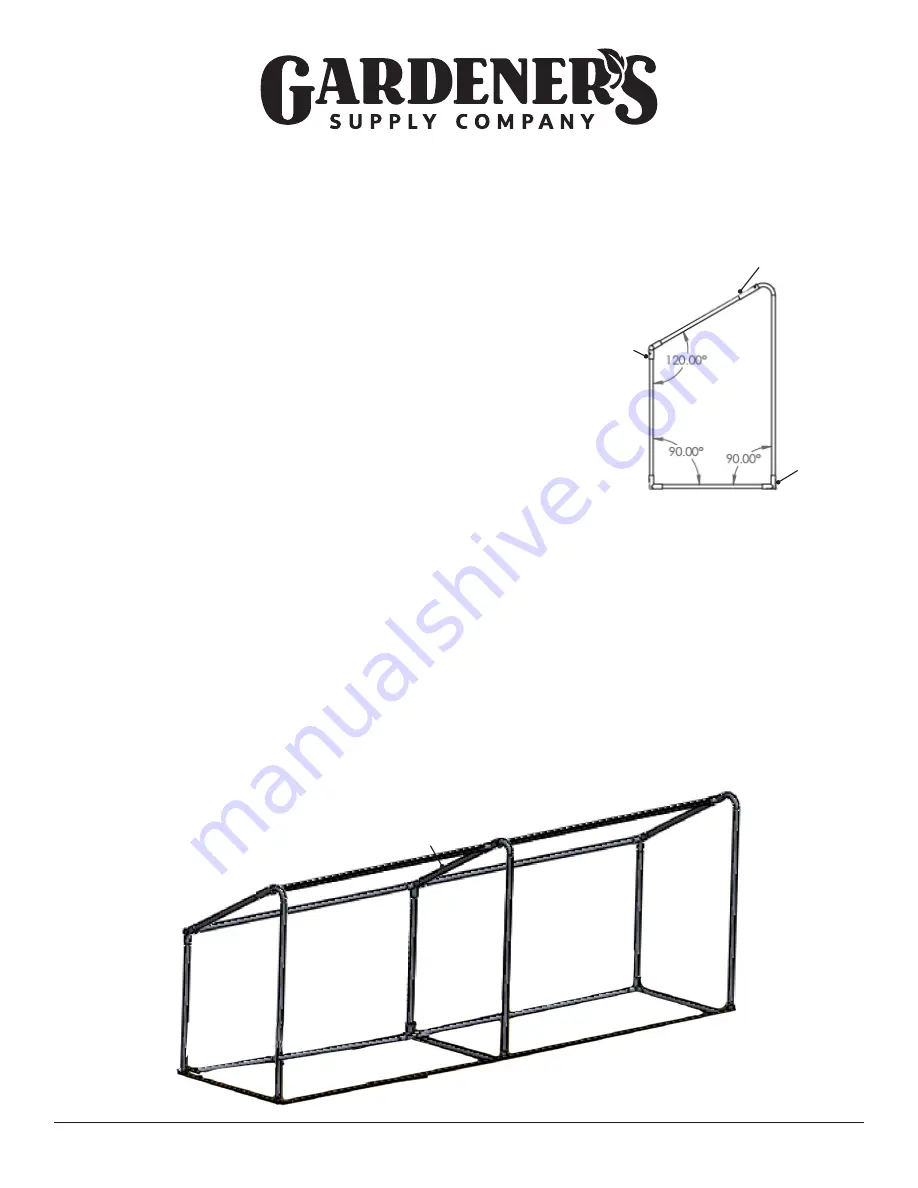
C. D
C. E
C. G
T. A
T. C
C. G
C. A
C. D
C. D
C. D
T. D
T. E
T. B
Figure 2
T. = Tube
C. = Corner/Connector
C. E
C. A
C. C
C. F
T. A
T. A
T. A
T. A
T. A
T. A
T. A
T. B
T. B
T. C
T. C
T. D
T. D
T. E
T. E
Protection Frame and Covers, 2' x 8'
Protect your plants from chilly weather and pests with our Protection Frame and Covers. The kit includes a frame, greenhouse
cover and insect netting.
Parts Included
(8) 44 1/2" Tubes A
(4) 3-Way 90º Corners D
(3) 23" Tubes B
(2) 4-Way 90º Corners E
(3) 15" Tubes C
(2) 3-Way 120º Corners G
(3) 19 1/2" Tubes D
(1) 4-Way 120º Connector F
(3) 33" Curved Tubes E
(2) 3-Way 90º T-Connector A
(1) Greenhouse Cover
(1) 4-Way 90º Connector C
(1) Insect Netting
(10) U-Shaped Earth Staples
Assembly
Important:
When assembling the frame, make sure to fully seat each Tube into the
Connectors and Corners. The Cover will fit snugly when all parts are fully seated.
Step 1.
Identify and organize all parts on a clean, level surface.
NOTE:
The Corners,
Connectors and Tubes are marked with their letters to make assembly easier. Some
letters are used to identify both a Tube and a Corner/Connector.
Step 2.
Refering to Figure 2, assemble the bottom of the frame using the four 3-Way 90º Corners D, two 4-Way 90º Corners E, four
Tubes A and three Tubes D. Orient all the Corners so that the open sides are facing up after assembly.
Note:
All 4-Way Corners and
Connectors are installed in the center of the frame.
Step 3.
Insert three Curved Tubes E and three Tubes B into the open sides of the 3-Way 90º Corners D and 4-Way 90º Corners E, as
shown in Figure 2.
Step 4.
Slide the two 3-Way 120º Corners G and one 4-Way 120º Connector F onto the tops of the Tubes B. Insert two Tubes A
between them.
Step 5.
Slide two 3-Way 90º T Connectors A and one 4-Way 90º Connector C onto the top of the Curved Tubes E. Insert two Tubes A
between them.
Step 6.
Insert three Tubes C into the remaining open Corners and Connectors. The frame assembly is complete. Installing the Cover
continues on the next page.
0696V Rev 09/16
8590159
Figure 1
15" Tube C
23
"
Tube B
19 1/2" Tube D
33" Curved
Tube E
3-Way 90º T
Connector A
3-Way 90º
Corner D
3-Way 120º
Corner G
over please


