12
G
Motor – power consumption
1400 W (max. 1500 W)
Mains voltage
230 V
Frequency 50 / 60
Hz
Vacuum power
max. 12.5 m
3
/ min.
Blow power
max. 260 km / h
Weight
approx. 4.5 kg
Contents of the catcher
70 l
Workplace related sound
pressure level L
pA
1)
92 dB (A)
Noise emission value L
WA
2)
measured 100 dB (A) / guaranteed 102 dB (A)
Hand / arm vibration a
vhw
1)
< 2.5 ms
- 2
Measuring method according to 1) EN 50144 -1 2) directive 2000 / 14 / EC
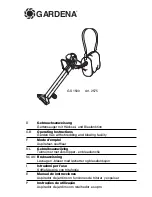
GARDENA Garden Vac
with shredding and blowing facility
1. Technical data
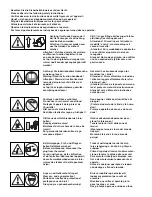
Please read and follow these
operating instructions carefully.
Familiarise yourself with the unit’s
features, its proper use and the
safety instructions included.
A
For safety reasons child-
ren under the age of 16
or people who are not familiar
with these operating instruc-
tions should not use this
Garden Vac.
Please keep these operating
instructions in a safe place.
2. Operating instructions information
Contents check
The carton contains the
following items:
.
motor part of the Garden Vac
.
vacuum tube
.
connection angle
.
tube runner
.
surface vacuum tube
.
catcher
.
vacuum hose
.
additional handle
(two handle halves)
.
1 dust filter
.
fixing parts (screws, nuts,
caps)
.
operating instructions
.
counter ring
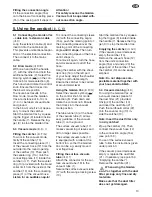
Fitting the vacuum tube
Before starting work, fit the
vacuum tube (1) provided onto
the vacuum tube connector of
the unit (1a). Now slide the two
handle halves of the additional
handle (2) over the junction point
of the vacuum tube (1) and
vacuum tube connector (1a).
Take care that the angled addi-
tional handle (2) faces towards
the motor casing.
Secure the additional handle (2),
using the three screws provided.
Cover the bore holes with the
caps.
Attention!
For safety reasons you should
not disassemble the vacuum
tube once assembled!
Fitting the tube runner
Lock the tube runner (3) provided
by inserting it into the recess (4)
of the vacuum tube (1). Secure it
with the screw and nut provided.
4. Assembly
(ill. B)
The GARDENA Garden Vac
is designed for vacuuming and
blowing leaves and dirt as well
as for vacuum cleaning together
with the dust filter in private
gardens.
This Garden Vac is not designed
for use in public facilities, parks,
sporting grounds, on roads, in
agriculture or forestry.
It is essential to observe the
manufacturer’s operating instruc-
tions to ensure the unit’s proper
functioning. These instructions
also contain advice for service,
maintenance and repair.
A
Attention! For health
and safety reasons the
Garden Vac must not be used
in areas with health-endanger-
ing dusts or for vacuuming
wet materials.
3. Product use


