Garden Lights 6009011 Manual Download Page 9

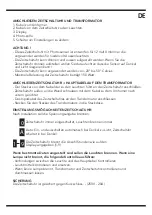
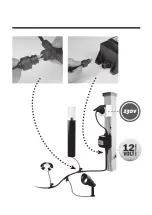
INSTALLATION AV TIMER OCH TRANSFORMATOR

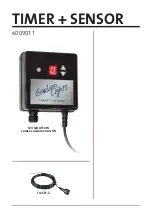
1. Cable to transformer.

2. Cable from the timer to the lights.
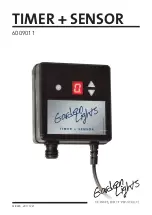
3. Display

4. Photo-cell

5. Up/Down Switch Setting

CHECK ! 

-  This is a photo-timer switch which has been designed to be connected to 12 Volt Trans-

formers. This timer can be used for low voltage outdoor lighting.

-  This timer can be installed in- and outdoor uncovered. When you install the timer indoor 

you must take care that the timer can respond on dusk and dawn influences!

- This timer works at a temperature between -20°C and 50°C.

- Maximum Wattage to be connected to the timer is 150 Watt.

CONNECTION OF TIMER AND MAIN CABLE TO THE TRANSFORMER

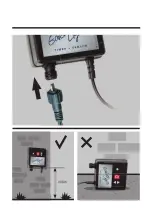
- Connect the cable with the lights to the photo timer switch

-  This timer should be screwed to the wall with the cable to be connected to the transfor-

mer pointing down.

- Connect the input cable of the photo timer switch to the transformer

- Insert the plug of the transformer into the electric outlet

OPERATION PROCEDURES:

Efter installationen är strömindikatorn på.


Timer switch is on, lights always burn.


 Auto: From Dusk to Dawn automatically


 Timer automatically switches on at Dusk. Timer will be switched on during the 

time mentioned on the display (1-9)

With certain installation the lights should work now. If not, check the following 

things:

- Connections between the main cable and the wire from the lamp.

- Check the lamps.

-  When no single light is working, check the transformer and/or timer and let a specialist 

measure them both.

FUSE

This timer is secured against short circuiting. - (250V - 20A)

EN

0

A

9

1

Summary of Contents for 6009011

Page 1: ...TIMER SENSOR 6009011 MI3885 20171221 ...

Page 2: ...TIMER SENSOR 6009011 1m SPT 2 12V MAX 150W power consumption 1W ...

Page 3: ...2m www gardenlights 2m Mi38 www gardenlights nl MAX 150W 2m Mi38 www gardenlights nl 1m ...

Page 4: ... 0 5m ...

Page 5: ...1 2 4 3 5 ...

Page 6: ...dient aan de wand geschroefd te worden met de kabel die naar de transformator leidt naar onder gericht Sluit de inputkabel van de timer aan op de transformator Stekker van de transformator in het stopcontact steken INSTELMOGELIJKHEDEN TIMER Na installatie brand het controlelampje van de spanning Timer altijd ingeschakeld Lampen branden altijd Auto In en uitschakeling automatisch bij schemer en lic...

Page 7: ... Zeitschaltuhr außen an die Wand schrauben mit dem Kabel zu dem Umformer nach untern gerichtet Das Inputkabel des Zeitschaltuhres an den Transformator anschliessen Stecken Sie den Stecker des Transformators in die Steckdose EINSTELLUNGS MÖGLICHKEITEN ZEITSCHALTUHR Nach Installation soll die Spannungsangabe brennen Zeitschaltuhr immer eingeschaltet Leuchten brennen immer Auto Ein und ausschalten au...

Page 8: ...ur la câble qui va au transformateur pointé vers le bas Raccordez la câble d entrée de la minuterie au transformateur Branchez la prise mâle du transformateur dans la prise de contact POSSIBILITES D INITIALISATION DE LA MINUTERIE Après l installation la lampe de contrôle de la tension est allumée Minuterie mise en circuit les lampes sont toujours allumées Auto Enclenchement et déclenchement automa...

Page 9: ...lights to the photo timer switch This timer should be screwed to the wall with the cable to be connected to the transfor mer pointing down Connect the input cable of the photo timer switch to the transformer Insert the plug of the transformer into the electric outlet OPERATION PROCEDURES Efter installationen är strömindikatorn på Timer switch is on lights always burn Auto From Dusk to Dawn automat...

Page 10: ......

Page 11: ... andere Hinweise übermitteln möchten können Sie sich jederzeit an uns wenden E Mail info techmar nl GB For questions about parts service any complaints or other matters you can contact us at any time E mail info techmar nl FR Pour tout renseignement concernant les pièces de rechange et les réparations ou pour les éventuelles plaintes et autres problèmes n hésitez pas à nous contacter à l adres se ...

Page 12: ......

Reviews: