background image

2

Step 1 

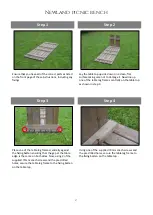
Step 2 

Ensure that you have all of the correct parts as listed 
on the front page of these instructions, including any 
fixings. 

Lay the table top upside down on a clean, flat 
surface taking care not to damage it. Now line up 
one of the table leg frames centrally on the table top 
as shown in step 3. 

Step 3 

Step 4 

Place one of the table leg frames centrally against 
the fixing batten ensuring that the gap at the table 
edge is the same on both sides. Now, using 2 of the 
supplied 70mm coach screws and the pre drilled 
holes, secure the table leg frame to the fixing batten 
on the table top.  

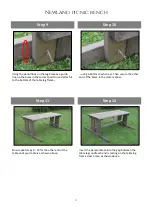
Using one of the supplied 70mm coach screws and 
the pre drilled holes, secure the table leg frame to 
the fixing batten on the table top... 

Newland

 picnic bench

Summary of Contents for Newland Picnic Bench

Page 1: ...urface if possible and that you use another person to assist you if necessary Package contents Tools required 1 x Table top 2 x Seats 2 x Table leg frames 2 x Seats 4 x Seat leg frames 1 x Parasol support 2 x A frames 4 x Seat leg braces not junior version 2 x Table leg braces not junior version 28 x M8 Coach screws 60mm 12 x M8 Coach screws 70mm 40 Cover caps 8ft version additionally includes 2 x...

Page 2: ...e table top as shown in step 3 Step 3 Step 4 Place one of the table leg frames centrally against the fixing batten ensuring that the gap at the table edge is the same on both sides Now using 2 of the supplied 70mm coach screws and the pre drilled holes secure the table leg frame to the fixing batten on the table top Using one of the supplied 70mm coach screws and the pre drilled holes secure the t...

Page 3: ...the same fashion Repeat steps 2 5 for the other table leg frame Now both ends are attached Step 7 Step 8 turn the table right side up Place one of the leg braces centrally against table leg frame as shown and proceed to step 9 Newland picnic bench ...

Page 4: ...eg frame using a 60mm coach screw Then secure the other end of the brace in the same manner Step 11 Step 12 Now repeat steps 8 10 for the other end of the table until your table is as shown above Insert the parasol brace into the gap between the table legs until each end is resting on the table leg frame cross brace as shown above Newland picnic bench ...

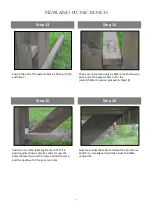
Page 5: ...children s version proceed to Step 18 Step 15 Step 16 Position one of the table leg braces so that it is positioned as shown and also central across the parasol brace then hold it in place Omit this step and the next two for the junior version Now look under the table and adjust the position so that this is also aligned centrally across the table centre slat Newland picnic bench ...

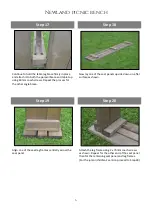
Page 6: ...ngle brace Now lay one of the seat panels upside down on a flat surface as shown Step 19 Step 20 Align one of the seat leg frames centrally across the seat panel Attach the leg frame using 2 x 70mm coach screws as shown Repeat for the other end of the seat panel then for the remaining seat panel and leg frames For the junior children s version proceed to Step 28 Newland picnic bench ...

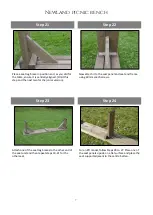
Page 7: ... attach it to the seat panel and seat end frame using 60mm coach screws Step 23 Step 24 Attach one of the seat leg braces to the other end of the seat unit and then repeat steps 19 21 for the other seat For an 8ft model follow Steps 24 to 27 Place one of the seat panels upside on a flat surface and place the seat support adjacent to the centre batten Newland picnic bench ...

Page 8: ... the brace set support brace as shown so that it is also aligned centrally Step 27 Step 28 before fixing into place with a 60mm coach through the brace into both the support and the underside of the seat panel Place the completed seat units in position ready to be secured to the main table assembly as shown Newland picnic bench ...

Page 9: ...r caps supplied over any exposed screw heads Your bench is now complete Newland picnic bench GardenFurniture Direct is a trading style of LTK Scott Limited Registered in England Wales Registered No 6282947 We hope that you found your product quick and easy to assemble However if you require any further assistance or have any questions you can contact us by telephone on 03333 448 121 or visit www g...

Reviews: