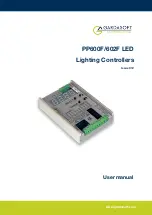
PP600F/602F LED lighting controllers - User Manual
1
Getting started
This user manual describes the setting up and operation of thePP600F
and PP602F lighting controllers.
The P600F and PP602F lighting controllers differ from the standard
controllers in the following respects:
They are faster with more repeatable pulse widths,
Pulsing on output channel 1 can only be triggered from input 1,
Pulsing on output channel 2 can only be triggered from input 2,
Pulse widths and delays are a maximum of 9.9ms,
When setting up pulsing using the buttons, the output current is set before
the pulse delay.
The specific controller variant is referred to in this manual when necessary,
otherwise the controllers are referred to as PP600F.
Read
(or
, or
)
and
Section 10, Reference information
, and check the PP600F fulfils your
requirements.
Connect the PP600F up to a supply and an LED lighting unit as described
in
. Note that the supply voltage must be
connected to three terminals. When the PP600F powers up, it should
show two alternating lines on the display to indicate that it is operating
properly.
Read
and use the Simple Set Up to make the
PP600F supply a small continuous current to the LED unit. Check that the
LED unit illuminates.
Mount the PP600F as described in
, using a
DIN rail or the mounting holes. In particular, read the notes on heatsinking
in
.
For additional information on the use of the PP600F. Visit
to download a range of Application Notes.
—
5
—


