


PixelPro GXi Series
ZN-DNT352XE Series Installation Guide
03-2014-B
8
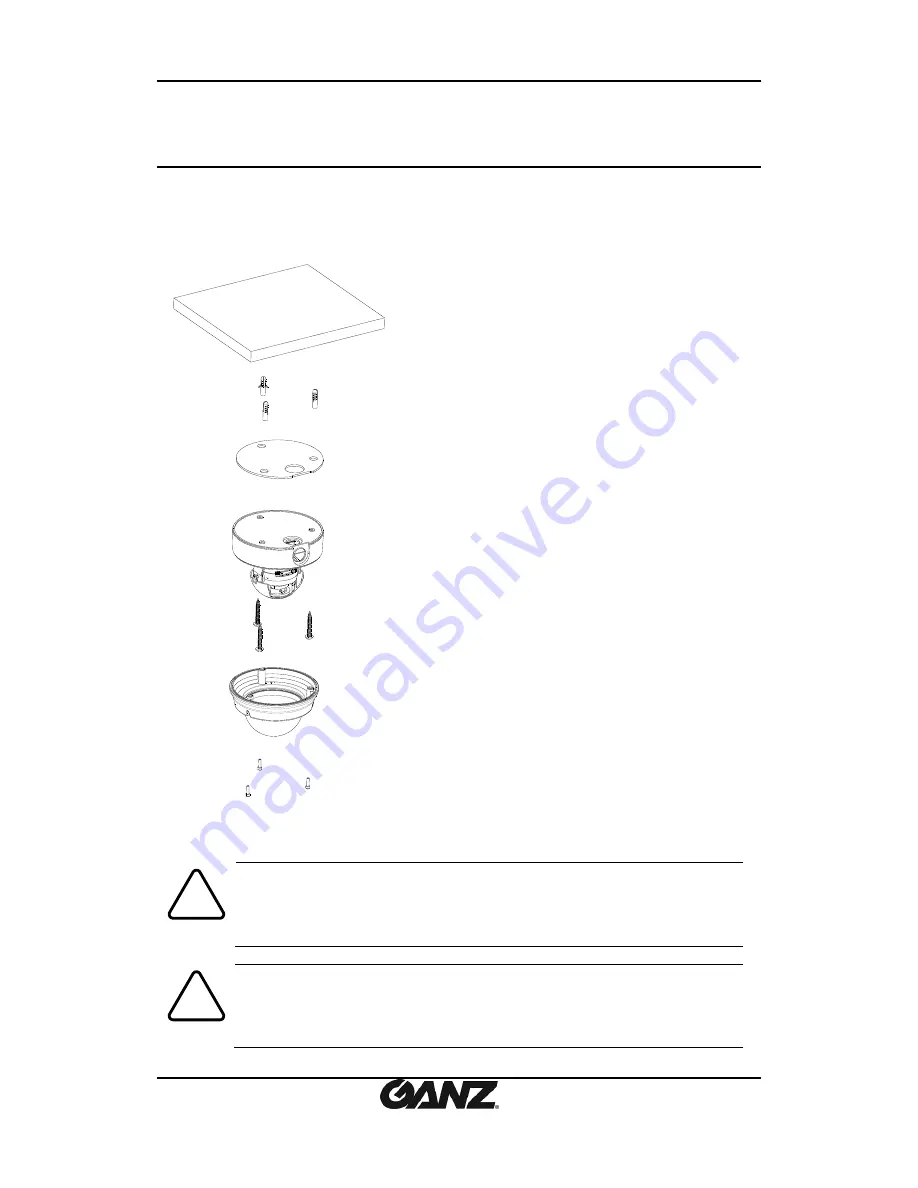
4. INSTALLATION
4.1. Installing the camera
Caution
!
Sealing gaps is recommended as gaps may appear after the camera
installation. Gaps may cause problems such as moisture, water leakage, and
etc., which negatively affect the operation of the camera if gaps appear but
remain unsealed.
Caution
!
To prevent products from damage, place the camera on stable and non-vibratin
g surfaces. If the stability is in doubt, consult safety personnel for reinforcemen
ts, and then proceed with the installation.
1)
Place the installation template (outline
shown on the next page) included in the
package on the desired installation
surface.
2)
Drill holes in correct positions based on
the template paper, and insert anchor
blocks into the holes.
3)
Make sure the necessary cables including
a LAN cable and a power cable are
properly connected to the camera either
thru the ceiling or thru the groove around
the mounting plate.
4)
Place the camera body and match the
alignment holes with the corresponding
anchor blocks and hold against the
mounting surface.
5)
Tighten the anchor blocks with screws.
6)
Adjust the angle of the camera. Refer to
“
4.2.Adjusting the angle of the camera”
for more details.
7)
Adjust zoom and focus of the camera.
Refer to “
4.3. Adjusting zoom and focus”
for more details.
8)
Place the dome cover on the main body
of the camera. Dome cover has three
alignment holes that match camera
body’s alignment holes.
9)
Once properly placed, insert screws into
the three holes of the body and tighten
them up.
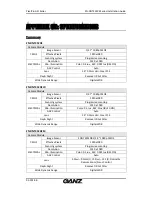
Summary of Contents for ZN-DNT352XE SERIES
Page 1: ...03 2014 B 1 ...


