


Page 10 of 19
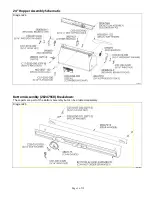
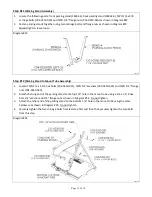
Step# 8
(Mount Tube to Hopper Assembly)
1.
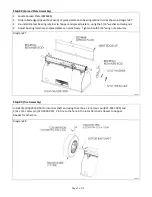
Note:
Lay something down (piece of cardboard or blanket) to protect hopper from being scratched up.
Lay hopper on its side so the cam gauge is up & pivot the spread plate down out of the way as shown in
Diagram #19.
2. Remove the 5/16
”
flange nut from the stud above and to the right of the cam gauge as shown
in Diagram #19.
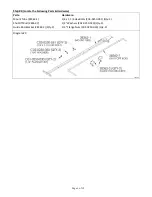
3. Attach the mount tube with shut-
off rod in place to the 5/16” stud
& re-use the 5/16
”
flange nut.
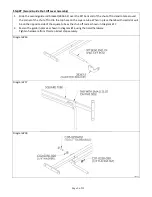
Make sure the end of the shut-off lever goes into the U-notch as shown in Diagram #20.
Do not tighten, leave nut loose.
Diagram #19
Diagram #20
2824-A2


