


Acquaer Ltd.
www.gamagarden.eu
H-
4900, Fehérgyarmat, Szatmári út 11.
15
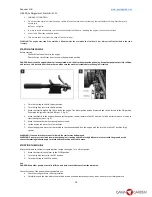
WARNING: Never rinse the machine, especially not the gearbox, with a water jet or high pressure washer.
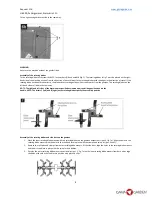
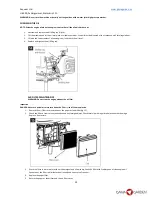
CHANGING THE OIL
NOTE: Drain the engine oil when the engine is hot so that all the oil quickly runs out.
1.
Unscrew and remove the oil filling cap (fig. 14).
2.
Tilt the machine and let the oil drain into a suitable container. Used oil must be disposed of in accordance with local regulations.
3.
Fill with the correct amount of new engine oil and check the oil level.
4.
Replace and tighten the oil filling cap.
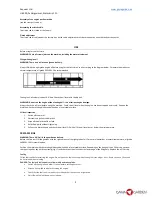
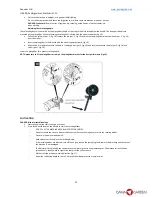
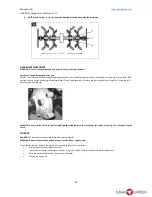
AIR FILTER MAINTENANCE
WARNING: Do not start the engine without the air filter.
Inspection
DANGER: Never use petrol or solvents to clean the filter
–
risk of fire or explosion.
1.
Remove the air filter cover and take out the paper or foam filter (fig. 15).
2.
Check the filter in terms of contamination and any foreign objects. Check carefully with regard to holes and other damage.
Replace, if necessary.
3.
Wash the filter in warm water with a mild detergent and allow to dry. Soak the filter with 1 tablespoon of clean engine oil.
Squeeze out the filter to distribute the oil evenly and so excess oil runs out.
4.
Replace the paper filter.
5.
Return the paper or foam filter and the air filter cover.


