6
Version 1, 15 June 2020, 6 of 16
7.0
COMMISSIONING
Upon completion of the installation, the TMV must be tested and commissioned as per the procedure outlined below.
The entire procedure should be read through thoroughly prior to the commissioning of the TMV. A calibrated digital
thermometer having rapid response time with maximum temperature hold, a small flat bladed screwdriver, adjustable
spanner and the adjusting key (supplied with the TMV) will be required to check and set out the outlet mixed temperature
of the TMV.
−
Ensure all outlets that will be serviced by the TMV have adequate warning signs posted to ensure that no outlet
is used during commissioning.
−
Open the cold supply line to the valve, and then open the hot water supply line, ensuring there are no leaks.
−
Open the outlet that is serviced by the shortest length of pipe work between the mixing valve and outlet fixture.
−
Allow the mixed outlet to flow for at least 60 seconds to allow the temperature to stabilise before taking a
temperature reading at the outlet with a digital thermometer. The flow rate should be at least 6 L/min. The flow
rate can be checked with the aid of a known size container and a stopwatch.
−
If the outlet temperature requires adjustment the following steps are requires;
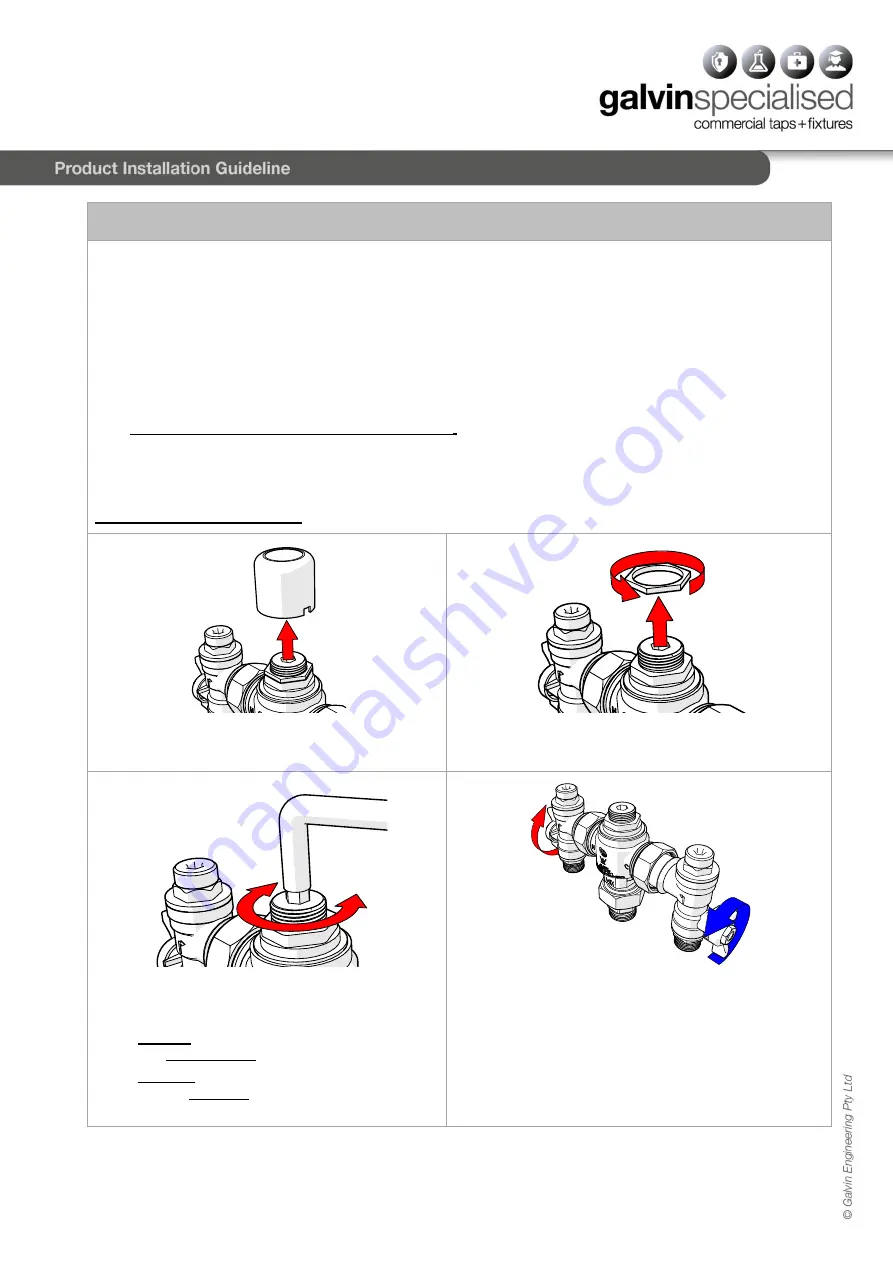
TEMPERATURE ADJUSTMENT
1. Using a small flat bladed screwdriver lever the
protected cover off the Thermostatic Mixing Valve.
2. Release the Temperature Locking Nut with an
adjustable spanner.
3. Fit the supplied key over the adjusting spindle
(figure 3).
To increase the mixed outlet temperature, rotate the
spindle anti-clockwise.
To decrease the mixed outlet temperature, rotate
the spindle clockwise.
4. Allow the mixed outlet temperature to stabilize for 60
seconds and once again take a temperature reading.
Repeat the procedure until the desired temperature has
been reached.


