


Visual-ICE
™
MRI Cryoablation System
5-3
5.
ToallowforeasieridentificationoftheneedlewhenmultipleMRIcryoablationneedlesareused
during a cryoablation procedure, it is recommended to place a label on the needle tubing.
NOTE:
Contact Galil Medical Customer Service to order labels for the MRI cryoablation needles.
6. Repeat Steps 2 through for each MRI cryoablation needle that will be tested.
CAUTION.
Galil Medical recommends that only needles of the same type be placed together in a
singlechannel.Usingneedlesofdifferingtypesinachannelmayaffecttheaccuracyofthe
Gas
Indicator
on the
Navigation Tool Bar
.
When a channel is locked, the software detects connection of the needle and the channel opens for
testing. A dark grey channel button indicates a channel with needles connected.
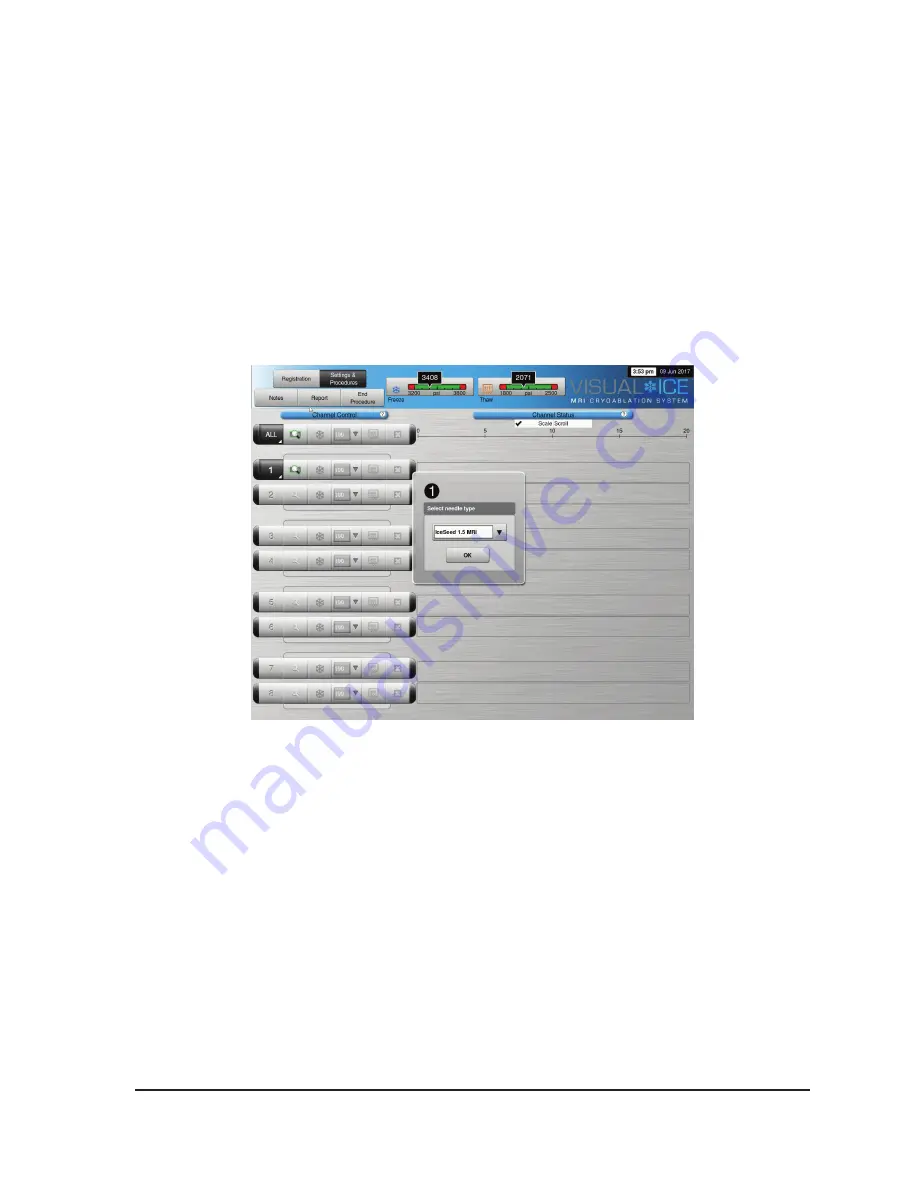
7. A menu appears with a selection of needle types (Screen 5-2). Select the proper needle type from
the drop-down menu.
Screen 5-2. Select Needle Type Menu
8.
Afterselectingthefirstneedle,theselectionforsubsequentneedlesdefaultstotheinitial
selection.Confirmtheneedletypedisplayedineachchannelmatchestheneedletypeconnected.
9. Press and hold the
Channel
button to open Advanced Channel Controls, which allows you to
change the needle type for a channel, as needed. Reference Section 6.2 for more information on
Advanced Channel Controls.
10. Prepare to conduct Needle Integrity and Functionality Testing.
CAUTION.
Take care to maintain sterility of each needle during testing.
•
Secure the needle tubing to the sterile table prior to beginning the needle testing process.
•
Fill a large basin (at least 30 cm in diameter) halfway with sterile water or saline.
•
Place the needles, individually or in groups, in the basin such that the full length of the needle
shaft is submerged in the water or saline.
Summary of Contents for Visual-ICE MRI
Page 1: ...M R I C R Y O A B L A T I O N S Y S T E M RX Only User Manual...
Page 20: ...1 10 User Manual This page intentionally left blank...
Page 42: ...3 12 User Manual Screen 3 12 Successful Upload Download...
Page 56: ...4 14 User Manual This page intentionally left blank...
Page 66: ...5 10 User Manual This page intentionally left blank...
Page 80: ...9 2 User Manual This page intentionally left blank...
Page 118: ...12 2 User Manual This page intentionally left blank...
Page 120: ...13 2 User Manual This page intentionally left blank...
Page 121: ......


