


OPERATION MANUAL
RADIO PROJECTION CLOCK
EAN 4 0 1 7 8 0 5 4 2 4 9 7 5
4
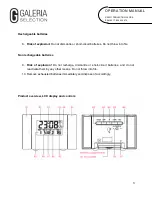
A1:
Time
B1:
Projection arms
A2:
Alarm icon
B2:
SNOOZE button
A3:
Radio signal display
B3:
DOWN button
A4:
Seconds display
B4:
UP button
A5:
Temperature display
B5:
ALARM button
A6:
Weekday display
B6:
MODE button
A7:
Snooze display
B7:
Power adapter socket
A8:
Day
B8:
24-hour projection switch
A9:
Month
Operation
Remove the battery compartment cover located on the bottom of the device. Insert 2
new batteries (type: 1,5 V, AAA) observing the correct polarity.
Replace the batteries when the display quality weakens.
You may also operate this device using only the supplied mains adapter. Remove the
batteries when doing so.
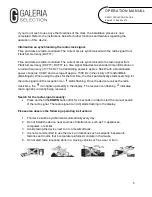
Once the power supply has been connected, the clock starts searching for the radio clock signal
transmitted by the atomic clock in Frankfurt/Mainflingen. This will take approx. 5 to 8 minutes,
provided there is no interference with the radio communication.
When receiving the radio signal, the device will automatically set the data and time
(DCF77), with the radio signal icon being displayed at the same time.
If the clock cannot receive the time signal, the radio signal icon (A3) does not light up. In such a
case you may adjust the time manually.
Note:
When the system is searching for the radio clock signal and the radio clock icon (A3) is flashing,
you can only control the background light. All other buttons are not available during that time.
Press the
DOWN
button (B3) at any time to cancel searching for the radio clock signal.
The radio clock signal search will be cancelled automatically, if an alarm gets activated.