


20
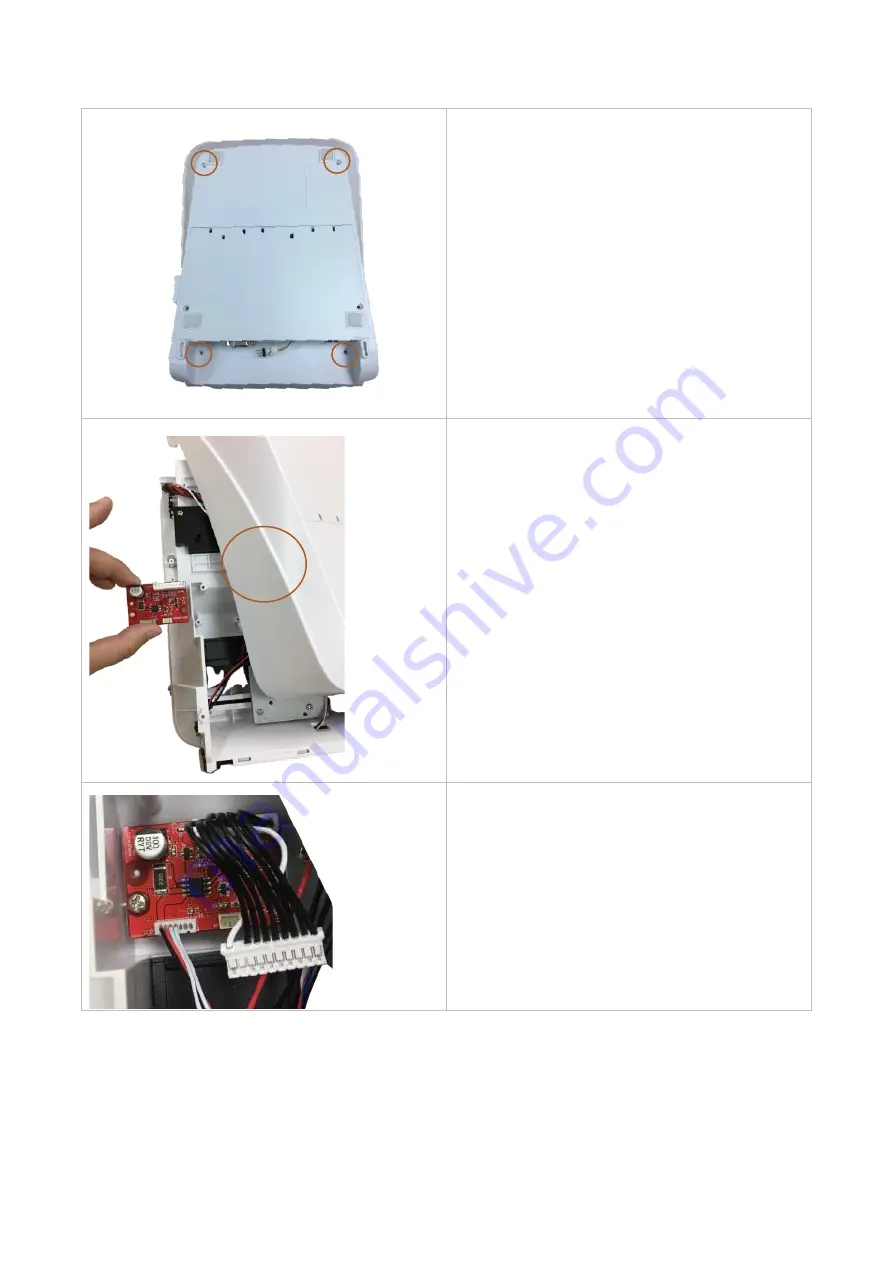
4.
Turn the printer upside down, remove the
four screws located on the bottom cover,
and open the bottom cover
5.
After opening, insert this cutter board and
lock the cutter board with two screws
6.
Make sure the wafer 1X10P P2.0 connector
is plugged into the cutter board
7.
Pull out the wire just put into the hole and
insert it into the wafer 1x7P P1.25 connector
on the cutter board
8.
After inserting it, cover the bottom cover
and lock the screws