background image

CARE SHEET

PAGE 8

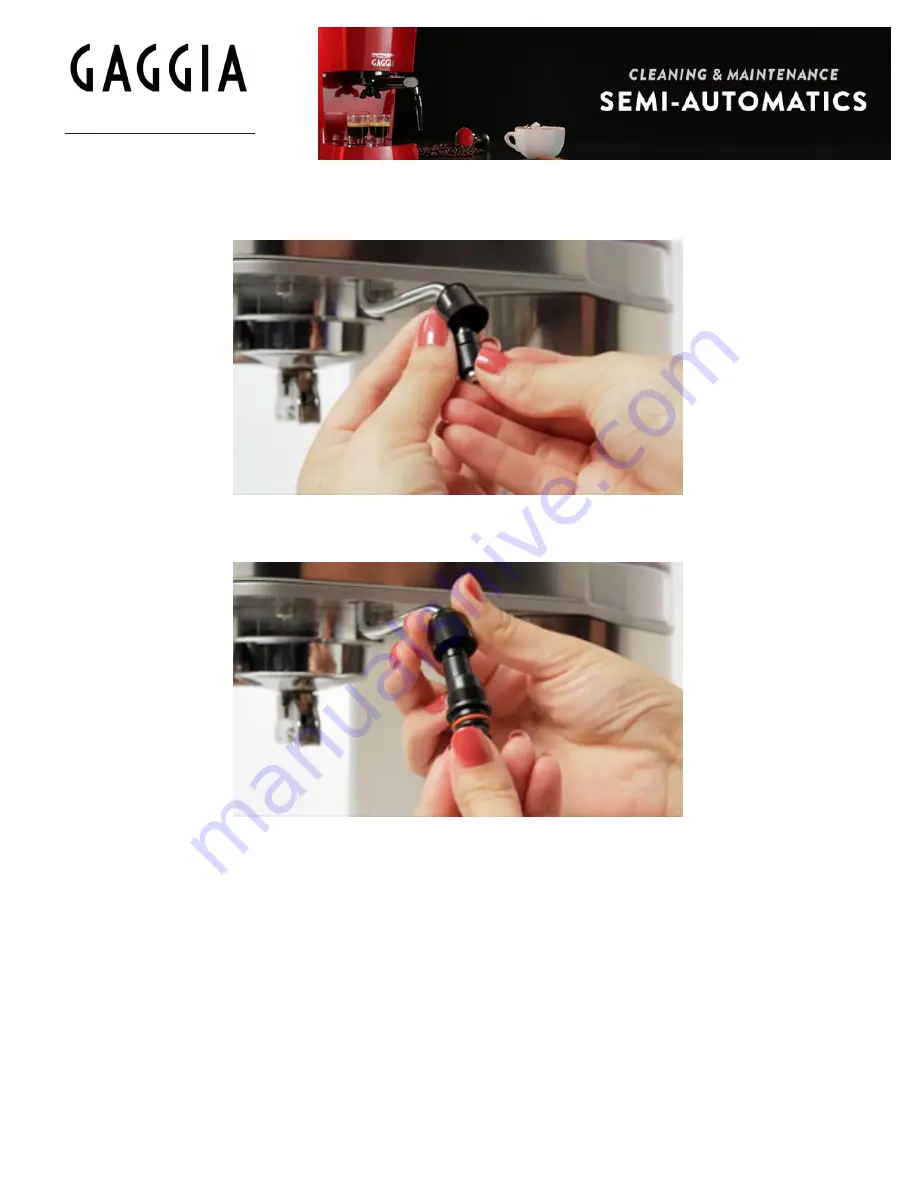
When you have cleaned your wand and it comes time to replace it, begin by sliding the cap nut, back onto the 

steam arm, followed by the small gasket, and then the large gasket.

6.  With the gaskets and cap nut in place, slide the inner wand back up the arm and back into the cap nut.

7.   Tighten the cap nut until the inner wand is secure and replace the frothing sleeve. When everything is back in 

place, gently tug on the wand to make sure that it is secure and won’t slide off during frothing.

8.  There may be some slight variation in the designs of the wands that come with each machine, but the process 

outlined above applies to all varieties of Pannarello Wands currently offered by Gaggia.

Summary of Contents for semi automatic

Page 1: ...arge flat blade screwdriver to gently pry out the shower holding plate Be careful not to damage the ridge that the shower screen fits up into If you do a new holding plate is available Sometimes the s...

Page 2: ...wing process When this happens the group gasket must be replaced to ensure that the machine continues to function properly The following tutorial outlines the process of properly replacing a worn grou...

Page 3: ...CARE SHEET PAGE 3 2 When all of these parts have been removed lay the machine down on its back...

Page 4: ...the shower screen and the shower holding plate must be removed before hand The shower screen is held in place by a number 2 Phillips head screw and the plate behind it by a set of 5mm Allen screws Re...

Page 5: ...e 5 With the screen and plate removed the group gasket will now be accessible Depending on the state of the gasket one of several methods may be employed in its removal Most commonly though the gasket...

Page 6: ...have returned all of the machine s components to their proper places lock the portafilter into the group head Remove it and lock it several more times to help secure the gasket Steam Wand Cleaning As...

Page 7: ...ve components The cap nut the inner wand a small plastic gasket a large rubber gasket and the frothing sleeve The following steps outline how to remove a Pannarello wand 1 To remove the Pannarello Wan...

Page 8: ...lide the inner wand off of the steam arm when you do take care not to lose the small plastic gasket located between the inner wand and the cap nut 4 There is a second larger rubber gasket that often r...

Page 9: ...d back up the arm and back into the cap nut 7 Tighten the cap nut until the inner wand is secure and replace the frothing sleeve When everything is back in place gently tug on the wand to make sure th...

Page 10: ...team valve 12 Now press your brewing button and allow about 2 oz to of solution to be dispensed from the group head 13 Allow the machine to sit for the amount of time specified on the cleaner packagin...

Reviews: