ENGLISH
POLSKI
NEDERLANDS
RI8702 (SUP 051U)
GAGGIA MAGENTA
PRESTIGE
Operating instructions
Gebruiksaanwijzing
Instrukcja obsługi
4219-465-03691 MAN. GAG.MAGENTA PRESTIGE EN-NL-PL Rev 01.indd 1
21/01/2021 12:40:55
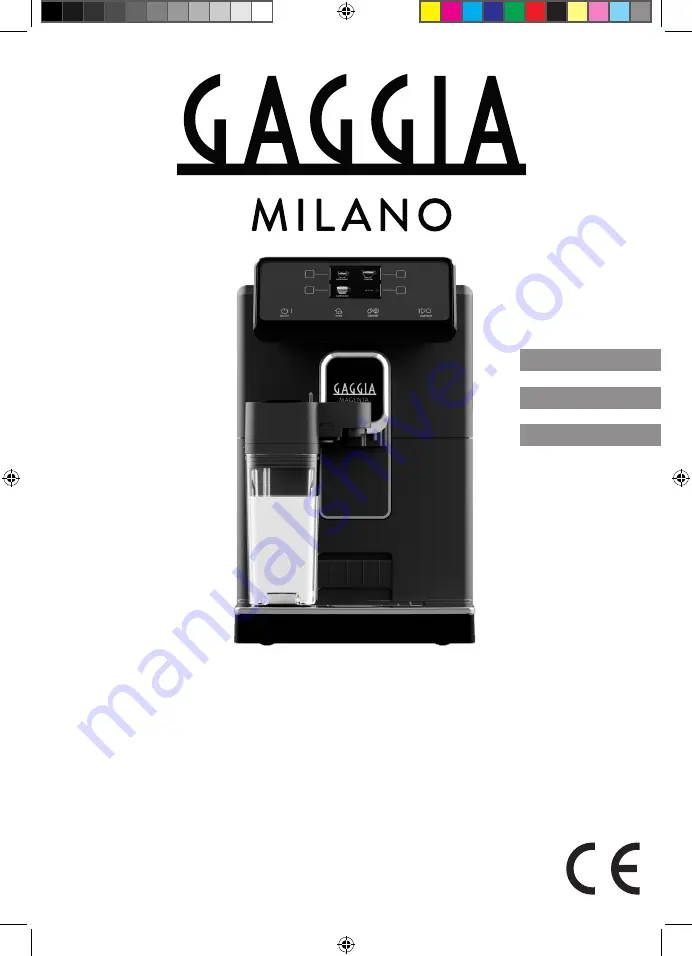
Page 1: ...ISH POLSKI NEDERLANDS RI8702 SUP 051U GAGGIA MAGENTA PRESTIGE Operating instructions Gebruiksaanwijzing Instrukcja obsługi 4219 465 03691 MAN GAG MAGENTA PRESTIGE EN NL PL Rev 01 indd 1 21 01 2021 12 40 55 ...
Page 2: ...23 22 24 25 L 14 15 13 3 28 1 27 16 26 9 17 18 10 20 19 12 11 2 29 8 5 4 7 6 21 02 4219 465 03691 MAN GAG MAGENTA PRESTIGE EN NL PL Rev 01 indd 2 21 01 2021 12 41 00 ...
Page 3: ...s het testen ook koffie gebruikt dus het is mogelijk dat er wat residu achterblijft Dit doet geen afbreuk aan de integriteit van het product het is een volledig nieuwe machine In deze handleiding vindt u alle nodige informatie om uw machine te installeren te gebruiken schoon te maken en te ontkalken Lees de aparte veiligheidsbrochure zorgvuldig door voordat u de machine voor het eerst gebruikt en ...
Page 4: ... na mleko 23 26 23 Confermi di voler cambiare la lingua in Italiano In the next steps we will set the correct water hardness level 1 sec 1 min 03 09 25 15 22 21 24 12 16 18 17 19 20 10 11 13 14 05 04 06 07 08 4219 465 03691 MAN GAG MAGENTA PRESTIGE EN NL PL Rev 01 indd 4 21 01 2021 12 41 11 ...
Page 5: ...ilk carafe 15 Dispensing frothed milk based coffee beverages 15 Dispensing hot water 16 Customising beverages and saving settings MEMO 17 Beverage Customisation 17 Adjusting the grind settings 18 Cleaning and maintenance 19 Cleaning table 19 Cleaning the milk carafe 20 Cleaning the brew group 21 Lubricating the brew group 24 Descaling 25 Descaling procedure 25 What to do if the descaling procedure...
Page 6: ...ot water dispensing spout 7 Power cord socket 22 Milk container 8 Espresso tray insertion slot 23 Milk dispensing unit 9 Full drip tray indicator 24 Milk dispensing unit lid 10 Water tank 25 Milk dispensing spout 11 Aroma lid 26 Water hardness tester 12 Coffee grinder adjustment knob 27 Pre ground coffee measuring scoop 13 Coffee bean container 28 Lubricant 14 Brew group 29 Power cord 15 Service d...
Page 7: ... SET clean setting button To open the cleaning and settings menu 6 START STOP START STOP button To start stop dispensing of the selected beverage or to start stop the procedure indicated on the display Note HOME HOME and CLEAN SET clean setting also work as ESC buttons You can exit the screens by pressing one of the two buttons to go back to the main menu This will not be possible if you have alre...
Page 8: ...g spout scroll through the different pages and select an ESPRESSO LUNGO 2 Press the button until is selected without adding pre ground coffee LUNGO LUNGO 3 Press the START STOP START STOP button to start dispensing The machine will dispense hot water 4 Empty the container and make sure that the hot water dispensing spout is installed 5 Place the container under the hot water dispensing spout and s...
Page 9: ...y squares turn red 3 Use the green and buttons to select the water hardness according to the table below Confirm the setting by pressing Small red squares Value to set Water hardness INTENZA 1 very soft water A 2 soft water A 3 hard water B 4 very hard water C INTENZA water filter We recommend the use of an INTENZA water filter to limit limescale formation This ensures a longer operating life of y...
Page 10: ...on again to resume the filter activation procedure Remove the INTENZA water filter from the water Set the machine according to the measured water hardness see the Measuring water hardness section On the filter base please set one of the following A soft water 1 or 2 small squares B hard water standard 3 small squares C very hard water 4 small squares Replacing the INTENZA water filter When the INT...
Page 11: ...g the most loved in the world It is made with espresso milk and milk foam which must be no less than 1 cm thick It is served in a large cup Milk Coffee 120 ml 40 ml Latte macchiato Latte macchiato is made with hot milk one part of milk foam and a small quantity of espresso It is served in a tall transparent glass to allow the separation of the three different layers to be seen Milk Coffee 240 ml 4...
Page 12: ...rawing Coffee Brewing Brewing coffee using coffee beans Warning only use coffee beans when making espresso Do not put any ground unroasted freeze dried or instant coffee in the coffee beans container as they may damage the machine Tip Preheat the cups with hot water to enjoy a warmer coffee 1 Upon positioning the espresso tray place a cup under the coffee dispensing spout raise or lower the coffee...
Page 13: ...by pressing the START STOP START STOP button Brewing coffee using pre ground coffee Use the measuring scoop provided to insert the correct dose in the pre ground coffee compartment 1 Lift the lid of the pre ground coffee compartment and add a little less than one level measuring scoop of pre ground coffee Warning do not insert anything other than pre ground coffee as it may damage the machine 2 Pl...
Page 14: ... may spray steam or hot milk 2 Pour the milk into the milk carafe the milk level must be between the minimum MIN and the maximum MAX level indicators shown on the carafe Reposition the lid Filling the milk carafe Note Before using the milk carafe clean it thoroughly as described in the Cleaning and Maintenance chapter The milk carafe can be filled before or during use 1 Lift the milk dispensing un...
Page 15: ... milk dispensing spout to the right up to the icon Note if the milk dispensing spout has not been pulled all the way out the milk may not be properly frothed 2 Place a cup under the open milk dispensing spout 3 Press the HOMEbutton HOME andchoose the desired beverage from the menu Press the button corresponding to the desired beverage Press the START STOP START STOP button to start dispensing the ...
Page 16: ...rm or to carry out the procedure later Dispensing hot water Warning when preparation starts the hot water dispensing spout may spray steam and hot water Before removing the hot water dispensing spout wait until the preparation has ended 1 Insert the hot water dispensing spout 2 Press the HOME HOME button browse the various screens using the green button and select hot water 3 Press the HOT WATER b...
Page 17: ...antity will be displayed 5 Press the TEMP button repeatedly to adjust the temperature of the beverage to one of the following options low medium high 6 Press to brew two cups or for a single cup The picture of the beverage in the middle of the display will indicate the number of cups selected Note this function is not available for beverages with milk AMERICANO and HOT WATER 7 To change the aroma ...
Page 18: ... preparation of every cup of coffee The aroma is thus preserved ensuring a perfect flavour every time Note the grind setting can only be adjusted while the machine is grinding the coffee beans The difference in taste will be perceived after brewing 2 3 cups of coffee Warning to avoid damaging the coffee grinder do not rotate the grinder adjustment knob more than one notch at a time 1 Place a cup u...
Page 19: ...bed in Cleaning the milk carafe section For this cleaning cycle use the Philips Milk Circuit Cleaner Disassemble the milk carafe and clean all its parts under running water Brew group Weekly Remove the brew group and clean it under running water Depending on usage See the Cleaning and lubricating the brew group section Monthly Clean the brew group with Gaggia coffee oil remover to remove any oily ...
Page 20: ...ilk carafe quick clean and deep clean Both programmes can be selected with the CLEAN SET clean setting button Press the CLEANING button upon selection Quick clean is also recommended after dispensing milk based beverages For both programmes follow the instructions shown on the display Quick clean programme The quick clean programme includes the milk circuit cleaning with hot water Deep clean progr...
Page 21: ... out the milk tub from the holder fig 24 Press the release buttons on the Pannarello and remove the Pannarello from the rubber holder fig 25 Pull out the connector from the Pannarello fig 26 5 Wash all components under running water 6 After cleaning reassemble all the components by following the same procedure in reverse order Cleaning the brew group Warning do not wash the brew group in the dishw...
Page 22: ... brew group air dry Note to avoid the build up of fibres inside do not dry the brew group with cloths Reinserting the brew group 1 Before reinserting the brew group back into the machine make sure that the two yellow reference marks on the side match If this is not the case perform the following steps Make sure that the lever is in contact with the base of the brew group 5 Remove the coffee residu...
Page 23: ...r the removal of oily coffee residues Warning only use Gaggia cleaning tablets to remove any oily coffee residues 1 Place a container under the coffee dispensing spout 2 Press the CLEAN SET clean setting button and select the CLEAN button shown on the display 3 Select CLEANING THE BREW GROUP and press the button then press START STOP START STOP to start the cleaning procedure 4 Follow the instruct...
Page 24: ...f the appliance and disconnect the power cord 2 Remove the brew group and rinse it using lukewarm water see the Cleaning the brew group under running water chapter 3 Apply a thin layer of the lubricant supplied around the insertion pin on the lower part of the brew group 4 Apply a thin layer of lubricant to the guides on both sides see figure 5 Reinsert the brew group see the Reinserting the brew ...
Page 25: ...olution into the water tank and fill the tank with water up to the CALC CLEAN level Reinsert it into the machine 5 Fill the milk carafe halfway with water and insert it in the machine 6 Place a large container 1 5l under the milk and coffee dispensing spouts 7 Follow the instructions shown on the display to launch the descaling procedure This procedure lasts approximately 25 minutes and consists o...
Page 26: ... if the procedure has not been completed another descaling procedure must be carried out as soon as possible Different settings By pressing the CLEAN SET clean setting button and selecting SETTINGS on the display some of the machine settings can be reset or modified including Language Water filter Stand by Time Measurement units Water hardness Beverage counter Button sound Default settings Languag...
Page 27: ...in ml or oz SETTING WATER HARDNESS BEVERAGE COUNTER BUTTON SOUND UNITS Beverage counter It is possible to display the number of cups of each beverage that have been dispensed since the first operation of the machine These data cannot be reset Default settings The machine can be reset to the default factory settings The machine will require a double confirmation before proceeding Water hardness Whe...
Page 28: ...ed Switch off the machine Remove the brew group and clean it thoroughly Refer to the Cleaning the Brew Group chapter The brew group is not positioned correctly Switch off the machine Remove the brew group and reinsert it Ensure that the brew group is in the correct position before inserting it Refer to the Reinserting the Brew Group chapter 05 A problem occurred in the water circuit There is air i...
Page 29: ...cycle counter does not reset In this case the display shows the icon even if the container is not full The coffee grounds drawer has been put back too quickly Always wait about 5 seconds when you replace the coffee pucks container This way the counter will reset to zero The machine requests the coffee pucks container to be emptied even if it is not full The machine has not reset the counter the la...
Page 30: ...machine grinds the coffee beans but the coffee does not come out The coffee grinder is set to an overly fine grind Adjust the coffee grinder to a coarser grind The coffee dispensing spout is clogged Dispense a pre ground long coffee but without actually adding pre ground coffee The nozzles of the coffee dispensing spout are clogged Clean the nozzles of the coffee dispensing spout with a small bott...
Page 31: ...filter There is some water under the machine The drip tray is too full and has spilled over Empty the drip tray when the indicator appears though the tray Always empty the drip tray before starting the descaling procedure The machine is in DEMO mode Once switching on the machine a combination of HOME HOME CLEAN SET clean setting HOME HOME CLEAN SET clean setting buttons had been pressed Switch the...
Page 32: ...ons 224 x 357 x 435 mm Weight 7 7 kg Power cord length 1200 mm Control panel Front panel Water tank 1 8 litres Removable type Coffee beans container capacity 250 g Coffee pucks container capacity 15 Pump pressure 15 bar Boiler Stainless steel boiler Safety devices Thermal Fuse 4219 465 03691 MAN GAG MAGENTA PRESTIGE EN NL PL Rev 01 indd 32 21 01 2021 12 42 22 ...
Page 33: ...lkkan 43 Afgifte van dranken op basis van koffie en opgeschuimde melk 43 Afgifte van heet water 44 Aanpassing van de dranken en opslag van de instellingen MEMO 45 Aanpassing van de dranken 45 Aanpassing van de maalfijnheid 46 Reiniging en onderhoud 47 Reinigingstabel 47 Reiniging van de melkkan 48 Reiniging van de zetgroep 49 Smering van de zetgroep 52 Ontkalking 53 Ontkalkingsprocedure 53 Wat te ...
Page 34: ...richting voor heet water 7 Aansluiting voor voedingskabel 22 Melkreservoir 8 Gleuf plaatsing espresso tray 23 Melkafgifte unit 9 Indicator lekbakje vol 24 Deksel melkafgifte unit 10 Waterreservoir 25 Schenkinrichting voor melk 11 Aromabeschermdeksel 26 Tester van de waterhardheid 12 Instelknop van de koffiemolen 27 Maatlepel voor voorgemalen koffie 13 Koffiebonenreservoir 28 Smeervet 14 Zetgroep 2...
Page 35: ...T clean setting Voor toegang tot het reinigings en instellingenmenu 6 Toets START STOP START STOP Om de afgifte van de geselecteerde drank te starten stoppen of de op het display weergegeven procedure te starten stoppen Opmerking de toetsen HOME HOME CLEAN SET clean setting zijn ook toetsen voor ESC De schermen kunnen verlaten worden door te drukken op een van deze twee toetsen die u terugbrengen ...
Page 36: ...erschillende pagina s en selecteer een ESPRESSO LUNGO 2 Druk op de toets tot selectie van zonder voorgemalen koffie toe te voegen LUNGO LUNGO 3 Druk op de toets START STOP START STOP om de afgifte te starten de machine begint met de afgifte van heet water 4 Leeg het bakje en verzeker u ervan dat de schenkinrichting voor heet water geïnstalleerd is 5 Plaats een bakje onder de schenkinrichting voor ...
Page 37: ...e groene toetsen en om de waarde te kiezen van de hardheid die ingesteld moet worden volgens de hiernavolgende tabel en bevestig dan met de toets Aantal rode vierkantjes In te stellen waarde Waterhardheid INTENZA 1 zeer zacht water A 2 zacht water A 3 hard water B 4 zeer hard water C Waterfilter INTENZA Wij raden u aan het waterfilter INTENZA te installeren om kalkvorming te beperken Dit zorgt voo...
Page 38: ...t u opnieuw op de toets START STOP START STOP Verwijder het waterfilter INTENZA uit het water en stel het in op basis van de gedetecteerde hardheid van het water zie het hoofdstuk Meting van de waterhardheid en gespecificeerd aan de onderkant van het filter A zacht water komt overeen met 1 of 2 vierkantjes B hard water standaard komt overeen met 3 vierkantjes C zeer hard water komt overeen met 4 v...
Page 39: ...e klassiekers ter wereld Hij wordt bereid met espresso melk en melkschuim dat minstens 1 cm dik moet zijn Deze wordt in een groot kopje geserveerd Melk Koffie 120 ml 40 ml Latte macchiato Latte macchiato is een drank die bereid wordt met warme melk een deel melkschuim en een kleine hoeveelheid espresso Deze koffie wordt geserveerd in een hoog transparant glas waarin men de drie verschillende lagen...
Page 40: ...geven in de tekening Koffieafgifte Afgifte van koffie met koffiebonen Let op gebruik enkel koffiebonen voor espresso Plaats geen gemalen koffie ongebrande koffie of oploskoffie in de koffiebonencontainer omdat deze de machine kunnen beschadigen Tip verwarm de kopjes voor met heet water voor hetere koffie 1 Plaats de Espresso tray zet een kopje onder de koffietuit en beweeg de koffietuit omhoog of ...
Page 41: ...oken worden door op de toets START STOP START STOP te drukken Koffie afgifte met voorgemalen koffie Gebruik de speciale meegeleverde maatlepel en doe de juiste dosis in het reservoir voor voorgemalen koffie 1 Open het deksel van het reservoir voor voorgemalen koffie en voeg een afgestreken maatlepel voorgemalen koffie toe Let op doe er niets anders dan voorgemalen koffie in om de machine niet te b...
Page 42: ...oor melk stoom of hete melk sproeien 2 Schenk de melk in de kan de hoeveelheid melk dient tussen het minimumniveau MIN en het maximumniveau MAX aangeduid op de melkkan te liggen Doe het deksel er weer op Vullen van de melkkan Opmerking Maak de melkkaraf grondig schoon voordat u hem gebruikt zoals beschreven in het hoofdstuk Reiniging van de melkkan De melkkan kan voor of tijdens het gebruik gevuld...
Page 43: ...e melk gebruiken 1 Trek de schenkinrichting van de melk naar rechts tot het symbool Opmerking als de schenkinrichting van de melk er niet helemaal uitgetrokken wordt kan het zijn dat de melk niet goed opgeschuimd wordt 2 Plaats een kopje onder de geopende schenkinrichting van de melk 3 Druk op de toets HOME HOME en kies uw drank op het menu Druk op de toets van de gewenste drank Druk op de toets S...
Page 44: ...eren Afgifte van heet water Let op wanneer de bereiding begint kan er uit de schenkinrichting voor heet water stoom en heet water sproeien Wacht tot het einde van de bereiding voordat u de schenkinrichting voor heet water verwijdert 1 Plaats de schenkinrichting voor heet water 2 Druk op de toets HOME HOME doorloop de verschillende schermen met de groene toets en selecteer heet water 3 Druk op de t...
Page 45: ...te keren naar het vorige scherm waar de nieuwe ingestelde hoeveelheid weergegeven wordt 5 Druk de toets TEMP meerdere malen in om de temperatuur van de drank te wijzigen met de volgende opties laag gemidd hoog 6 Druk op de toets om twee kopjes te zetten of op de toets om slechts een kopje te zetten De afbeelding van de drank in het midden van het display geeft het gekozen aantal kopjes weer Opmerk...
Page 46: ...oma blijft zo behouden waardoor een altijd perfecte smaak wordt gegarandeerd Opmerking de maalfijnheid kan enkel afgesteld worden terwijl de machine de koffiebonen maalt Het verschil in smaak zal na de afgifte van 2 3 kopjes koffie geproefd worden Let op om beschadiging van de koffiemolen te voorkomen de selectieknop van de maalfijnheid niet meer dan één klik tegelijk draaien 1 Plaats een kopje on...
Page 47: ...ebruik voor deze reinigingscyclus het reinigingsmiddel voor het melkcircuit Milk Circuit Cleaner van Philips Demonteer de melkkan en reinig alle onderdelen onder stromend water Zetgroep Wekelijks Verwijder de zetgroep en reinig hem onder stromend water Afhankelijk van het type gebruik Zie het hoofdstuk Reiniging en smering van de zetgroep Maandelijks Reinig de zetgroep met de koffieolieverwijderin...
Page 48: ...ramma s kunnen gekozen worden met de toets CLEAN SET clean setting en door vervolgens op de toets REINIGING te drukken De snelle reiniging wordt ook aan het einde van de afgifte van dranken op basis van melk voorgesteld Volg voor beide programma s de instructies weergegeven op het display Programma voor de snelle reiniging Het programma voor snelle reiniging bestaat uit de reiniging van het melkci...
Page 49: ... de hand Trek de melkslang uit de houder afb 24 Druk op de ontgrendelingsknoppen op de Pannarello en haal de Pannarello uit de rubberen houder afb 25 Trek de aansluiting uit de Pannarello afb 26 5 Was alle onderdelen onder stromend water 6 Plaats na de reiniging alle onderdelen terug door de procedure in omgekeerde volgorde uit te voeren Reiniging van de zetgroep Let op reinig de zetgroep niet in ...
Page 50: ...ucht drogen Opmerking droog de zetgroep niet af met doeken om de ophoping van stofvezels erin te vermijden Terugplaatsen van de zetgroep 1 Voordat u de zetgroep opnieuw in de machine plaatst moet u ervoor zorgen dat de twee gele referentietekens aan de zijkant overeenkomen Indien dit niet zo is doet u als volgt Zorg ervoor dat de hendel in aanraking komt met de basis van de zetgroep 5 Verwijder de...
Page 51: ...wijderen Let op Gebruik voor het schoonmaken alleen Gaggia tabletten om de olieachtige resten van de koffie te verwijderen 1 Plaats een bakje onder de koffietuit 2 Druk op de toets CLEAN SET clean setting en selecteer de toets REINIGING die op het display weergegeven wordt 3 Kies REINIGING ZETGROEP en druk op de toets en druk vervolgens op de toets START STOP START STOP om de reinigingsprocedure t...
Page 52: ...skabel los 2 Verwijder de zetgroep en spoel deze af met lauw water zie het hoofdstuk Reiniging van de zetgroep onder stromend water 3 Breng een dunne laag van het meegeleverde smeervet aan rond de pin die in de machine gestoken wordt onderaan de zetgroep 4 Breng een dunne laag smeervet aan op de geleiders aan beide kanten zie afbeelding 5 Plaats de zetgroep terug zie het hoofdstuk Terugplaatsen va...
Page 53: ...Giet de hele fles Gaggia ontkalkingsoplossing in het waterreservoir en vul het met water tot u het niveau CALC CLEAN bereikt Plaats het vervolgens weer in de machine 5 Vul de melkkan voor de helft met water en plaats hem in de machine 6 Plaats een grote bak 1 5l onder de schenkinrichting voor melk en de koffietuit 7 Volg de aanwijzingen die weergegeven worden op het display om de ontkalkingsproced...
Page 54: ... betreffende hoofdstuk Opmerking als de procedure niet voltooid is moet er zo snel mogelijk nog een ontkalkingsprocedure uitgevoerd worden Verschillende instellingen Door op de toets CLEAN SET clean setting te drukken en INSTELLINGEN te selecteren op het display kunnen sommige machineparameters hersteld of gewijzigd worden zoals Taal Waterfilter Stand by tijd Meeteenheid Waterhardheid Drankentelle...
Page 55: ...SETTING WATER HARDNESS BEVERAGE COUNTER BUTTON SOUND UNITS Drankenteller Voor elke drank kan het aantal kopjes weergegeven worden dat afgegeven werd sinds de eerste keer dat de machine werd gebruikt Deze gegevens kunnen niet gereset worden Standaardinstellingen De machine kan terug naar de fabriekswaarden ingesteld worden De machine vraagt om een dubbele bevestiging alvorens verder te gaan Waterha...
Page 56: ...t de machine uit Verwijder de zetgroep en reinig hem zorgvuldig Raadpleeg het hoofdstuk Reiniging van de zetgroep De zetgroep is niet correct geplaatst Zet de machine uit Verwijder de zetgroep en plaats hem terug Verzeker u ervan dat de zetgroep in de juiste positie staat alvorens deze te plaatsen Raadpleeg het hoofdstuk Terugplaatsen van de zetgroep 05 Er is een probleem in het watercircuit Er is...
Page 57: ...t geval toont het display het pictogram ook wanneer het reservoir niet vol is Het koffieresidureservoir werd te snel teruggeplaatst Wacht altijd 5 seconden voordat u het koffieresidureservoir terugplaatst Zo wordt de teller weer op nul gezet De machine vraagt u om het koffieresidureservoir leeg te maken ook als het reservoir niet vol is De machine heeft de teller niet gereset nadat het koffieresid...
Page 58: ...ratuur van het menu in op MAX De machine maalt de koffiebonen maar er wordt geen koffie afgegeven De koffiemolen is ingesteld op een te fijne maling Stel de koffiemolen in op een grovere maling De koffietuit is verstopt Zet een caffè lungo met voorgemalen koffie zonder de voorgemalen koffie toe te voegen De koffietuiten zijn verstopt Reinig de koffietuiten met een klein borsteltje De koffie stroom...
Page 59: ...anging van het INTENZA waterfilter Er ligt water onder de machine Het lekbakje is te vol en is overgelopen Leeg het lekbakje wanneer de indicator door het bakje heen verschijnt Leeg altijd het lekbakje alvorens de ontkalkingsprocedure te starten De machine is in DEMO modus Bij het aanzetten van de machine heeft u op een combinatie van de toetsen HOME HOME CLEAN SET clean setting HOME HOME CLEAN SE...
Page 60: ...rmoplast Afmetingen 224 x 357 x 435 mm Gewicht 7 7 kg Kabellengte 1200 mm Bedieningspaneel Front Waterreservoir 1 8 liter Uitneembaar Inhoud koffiebonenreservoir 250 g Inhoud koffiediklade 15 Pompdruk 15 bar Waterketel RVS ketel Veiligheidsinrichtingen Thermozekering 4219 465 03691 MAN GAG MAGENTA PRESTIGE EN NL PL Rev 01 indd 60 21 01 2021 12 43 27 ...
Page 61: ...na mleko 71 Nalewanie napojów na bazie kawy i spienionego mleka 71 Nalewanie gorącej wody 72 Indywidualne ustawienia napojów i zapisywanie ustawień MEMO 73 Indywidualne ustawienia napojów 73 Regulacja stopnia mielenia 74 Czyszczenie i konserwacja 75 Tabela czyszczenia 75 Czyszczenie dzbanka na mleko 76 Czyszczenie bloku zaparzającego 77 Smarowanie bloku zaparzającego 80 Odwapnianie 81 Procedura od...
Page 62: ...wody 7 Gniazdo do kabla zasilającego 22 Pojemnik na mleko 8 Szczelina na espresso tray 23 Jednostka nalewania mleka 9 Wskaźnik pełnej tacy ociekowej 24 Pokrywka jednostki nalewania mleka 10 Zbiornik na wodę 25 Dozownik mleka 11 Pokrywka zatrzymująca aromat 26 Tester twardości wody 12 Pokrętło regulacji młynka 27 Miarka do kawy wstępnie zmielonej 13 Pojemnik na kawę ziarnistą 28 Smar 14 Blok zaparz...
Page 63: ...ET clean setting Aby wejść do menu czyszczenia i ustawień 6 Przycisk START STOP START STOP Aby uruchomić zatrzymać nalewanie wybranego napoju lub uruchomić zatrzymać procedurę wskazaną na wyświetlaczu Ważne przyciski HOME HOME CLEAN SET clean setting działają również jako przyciski ESC Można wyjść z ekranów naciskając jeden z tych dwóch przycisków które powodują powrót do menu początkowego Nie jes...
Page 64: ...brać opcję ESPRESSO LUNGO 2 Nacisnąć przycisk aż do wybrania bez dodawania kawy wstępnie zmielonej LUNGO LUNGO 3 Nacisnąć przycisk START STOP START STOP w celu rozpoczęcia nalewania Urządzenie zacznie nalewać gorącą wodę 4 Opróżnić pojemnik i upewnić się że dozownik gorącej wody jest zainstalowany 5 Ustawić pojemnik pod dozownikiem gorącej wody i wybrać napój GORĄCA WODA 6 Nacisnąć przycisk START ...
Page 65: ...czerwony 3 Użyć zielonych przycisków i aby wybrać wartość twardości do ustawienia zgodnie z poniższą tabelą a następnie potwierdzić za pomocą przycisku Liczba czerwonych kwadracików Wartość do ustawienia Twardość wody INTENZA 1 woda bardzo miękka A 2 woda miękka A 3 woda twarda B 4 woda bardzo twarda C Filtr wody INTENZA Zaleca się zainstalowanie filtra wody INTENZA aby ograniczyć tworzenie się ka...
Page 66: ...acji filtra należy ponownie nacisnąć przycisk START STOP START STOP Wyjąć filtr wody INTENZA z wody i ustawić go zgodnie ze stwierdzoną twardością wody patrz rozdział Pomiar twardości wody i określić przy podstawie filtra poziom twardości A woda miękka 1 lub 2 kwadraciki B woda twarda standard 3 kwadraciki C woda bardzo twarda 4 kwadraciki Wymiana filtra wody INTENZA Gdy filtr wody INTENZA zużyje ...
Page 67: ...ym świecie klasyczny włoski napój Przygotowuje się je wykonując espresso z dodatkiem mleka i pianki mleka która powinna mieć co najmniej 1 cm wysokości Serwuje się je w dużej filiżance Mleko Kawa 120 ml 40 ml Latte macchiato Latte macchiato jest to napój przygotowywany z gorącego mleka z odrobiną pianki mleka i niewielką ilością espresso Serwowany jest w wysokiej przeźroczystej szklance dzięki któ...
Page 68: ...nej szczeliny jak pokazano na rysunku Parzenie kawy Parzenie kawy na bazie kawy ziarnistej Uwaga używać wyłącznie kawy ziarnistej do espresso Nie wsypywać do pojemnika na kawę ziarnistą kawy mielonej kawy niepalonej kawy liofilizowanej lub rozpuszczalnej ponieważ mogłyby one uszkodzić urządzenie Wskazówka aby kawa była cieplejsza należy podgrzać filiżanki gorącą wodą 1 Ustawić Espresso Tray umieśc...
Page 69: ...olnym momencie naciskając przycisk START STOP START STOP Parzenie kawy na bazie kawy wstępnie zmielonej Za pomocą specjalnej dołączonej miarki wsypać prawidłową dozę do pojemnika na kawę wstępnie zmieloną 1 Otworzyć pokrywkę pojemnika na kawę wstępnie zmieloną i wsypać jedną pełną miarkę kawy wstępnie zmielonej Uwaga nie wsypywać innych substancji niż kawa wstępnie zmielona aby nie uszkodzić urząd...
Page 70: ...lub gorące mleko 2 Wlać mleko do dzbanka mleko musi znajdować się między poziomem minimalnym MIN i poziomem maksymalnym MAX oznaczonym na dzbanku Założyć pokrywkę Napełnianie dzbanka na mleko Ważne przed użyciem dzbanka na mleko należy go dokładnie wyczyścić zgodnie z opisem zawartym w rozdziale Czyszczenie dzbanka na mleko Dzbanek na mleko można napełnić wcześniej lub podczas użycia 1 Podnieść po...
Page 71: ... bez laktozy 1 Wyjąć dozownik mleka poprzez obrócenie go w prawo aż do symbolu Ważne jeżeli dozownik mleka nie zostanie całkowicie wyciągnięty mleko może nie zostać prawidłowo spienione 2 Ustawić filiżankę pod otwartym dozownikiem mleka 3 Nacisnąć przycisk HOME HOME i wybrać napój z menu Nacisnąć przycisk żądanego napoju Nacisnąć przycisk START STOP START STOP aby rozpocząć dozowanie wybrane go na...
Page 72: ...isk aby wykonać ją później Nalewanie gorącej wody Uwaga podczas etapu przygotowywania z dozownika gorącej wody może się wydostawać para i gorąca woda Przed wyjęciem dozownika gorącej wody należy poczekać na zakończenie etapu przygotowywania 1 Włożyć dozownik gorącej wody 2 Nacisnąć przycisk HOME HOME przewinąć poszczególne ekrany za pomocą zielonego przycisku i wybrać gorącą wodę 3 Nacisnąć przyci...
Page 73: ...którym będzie wyświetlana nowa ustawiona ilość 5 Nacisnąć kilkukrotnie przycisk TEMP aby zmienić temperaturę napoju wybierając spośród dostępnych opcji niska średnia wysoka 6 Nacisnąć przycisk aby przygotować dwie filiżanki lub przycisk aby przygotować tylko jedną filiżankę Ilustracja napoju na środku wyświetlacza wskaże liczbę wybranych filiżanek Ważne z funkcji tej nie można korzystać w przypadk...
Page 74: ...przy przygotowywaniu każdej filiżanki kawy Zachowywany jest wówczas aromat który zapewnia zawsze doskonały smak Ważne stopień mielenia można regulować jedynie wówczas kiedy urządzenie mieli kawę ziarnistą Różnicę w smaku będzie można dostrzec po zaparzeniu 2 3 filiżanek kawy Uwaga aby uniknąć uszkodzenia młynka nie należy obracać pokrętłem wyboru mielenia więcej niż o jedną pozycję na raz 1 Ustawi...
Page 75: ... dzbanka na mleko W przypadku tego cyklu czyszczenia należy użyć produktu do czyszczenia obwodu mleka marki Philips Milk Circuit Cleaner Wymontować dzbanek na mleko i wyczyścić wszystkie jego części pod bieżącą wodą Blok zaparzający Co tydzień Wyjąć blok zaparzający i umyć go pod bieżącą wodą W zależności od sposobu użytkowania Patrz rozdział Czyszczenie i smarowanie bloku zaparzającego Co miesiąc...
Page 76: ...zczenie obwodu Oba programy można wybrać za pomocą przycisku CLEAN SET clean setting naciskając następnie przycisk CZYSZCZENIE Szybkie czyszczenie jest proponowane po zakończeniu nalewania napojów na bazie mleka Postępować w przypadku obu programów zgodnie z instrukcjami na wyświetlaczu Program szybkiego czyszczenia Program szybkiego czyszczenia przewiduje czyszczenie obwodu mleka gorącą wodą Prog...
Page 77: ...niające na przystawce Pannarello i zdjąć przystawkę Pannarello z gumowej podstawki Rys 25 Wyjąć złączkę z przystawki Pannarello Rys 26 5 Umyć wszystkie komponenty pod bieżącą wodą 6 Po ukończeniu czyszczenia zmontować wszystkie komponenty wykonując tę samą procedurę w odwrotnej kolejności Czyszczenie bloku zaparzającego Uwaga nie myć bloku zaparzającego w zmywarce i nie używać płynów do mycia nacz...
Page 78: ...moczynnego wyschnięcia Ważne nie suszyć bloku zaparzającego szmatkami aby uniknąć nagromadzenia się w jego wnętrzu włókien Wkładanie bloku zaparzającego na miejsce 1 Przed włożeniem bloku zaparzającego do urządzenia należy się upewnić że dwa żółte znaki odniesienia na części bocznej pokrywają się Gdyby tak nie było należy Upewnić się że dźwignia styka się z podstawą bloku zaparzającego 5 Wyjąć kas...
Page 79: ...tylek do usuwania oleistych pozostałości po kawie Uwaga do czyszczenia stosować wyłącznie pastylki Gaggia do usuwania oleistych pozostałości po kawie 1 Umieścić pojemnik pod dozownikiem kawy 2 Nacisnąć przycisk CLEAN SET clean setting i wybrać widoczny na wyświetlaczu przycisk CZYSZCZENIE 3 Wybrać CZYSZCZENIE BLOKU ZAPARZAJĄCEGO i nacisnąć przycisk a następnie nacisnąć przycisk START STOP START ST...
Page 80: ...ządzenie i odłączyć kabel zasilający 2 Wyjąć blok zaparzający i przepłukać go letnią wodą patrz rozdział Czyszczenie bloku zaparzającego pod bieżącą wodą 3 Nanieść cienką warstwę smaru z wyposażenia wokół sworznia wprowadzającego w części dolnej bloku zaparzającego 4 Nanieść cienką warstwę smaru na prowadnice po obu stronach patrz rysunek 5 Włożyć blok zaparzający na miejsce patrz rozdział Wkładan...
Page 81: ...jącego Gaggia do zbiornika na wodę a następnie wypełnić go wodą aż do poziomu CALC CLEAN Następnie włożyć go z powrotem do urządzenia 5 Wypełnić dzbanek na mleko do połowy wodą i włożyć go do urządzenia 6 Umieścić duży pojemnik 1 5 l pod dozownikiem mleka i dozownikiem kawy 7 Postępować zgodnie z instrukcjami na wyświetlaczu aby uruchomić procedurę odwapniania Procedura ta trwa około 25 minut a po...
Page 82: ...e została doprowadzona do końca możliwie jak najszybciej konieczne będzie wykonanie kolejnej procedury odwapniania Ustawienia różne Po naciśnięciu przycisku CLEAN SET clean setting i wybraniu USTAWIENIA na wyświetlaczu będzie można przywrócić lub zmienić niektóre parametry urządzenia takie jak język filtr wody czas czuwania jednostki miary twardość wody licznik napojów dźwięk przycisków ustawienia...
Page 83: ... lub uncjach SETTING WATER HARDNESS BEVERAGE COUNTER BUTTON SOUND UNITS Licznik napojów Dla każdego napoju można wyświetlić liczbę filiżanek przygotowanych od momentu pierwszego uruchomienia urządzenia Danych tych nie można zresetować Ustawienia fabryczne Ustawienia urządzenia można przywrócić do wartości fabrycznych Urządzenie zażąda podwójnego potwierdzenia zanim będzie można przejść dalej Tward...
Page 84: ...prawidłowo nasmarowany Wyłączyć urządzenie Wyjąć blok zaparzający i dokładnie go wyczyścić Patrz rozdział Czyszczenie bloku zaparzającego Blok zaparzający nie jest ustawiony prawidłowo Wyłączyć urządzenie Wyjąć blok zaparzający i włożyć go ponownie Przed włożeniem bloku zaparzającego upewnić się że znajduje się on w prawidłowej pozycji Patrz rozdział Wkładanie bloku zaparzającego na miejsce 05 Wys...
Page 85: ...ądzenie jest wyłączone wtedy licznik cykli kawy nie zeruje się Wówczas na wyświetlaczu widoczna jest wspomniana ikona nawet jeśli pojemnik nie jest pełny Pojemnik na fusy został ustawiony zbyt szybko Poczekać zawsze około 5 sekund kiedy ustawia się na miejscu pojemnik na fusy Wówczas licznik wyzeruje się Urządzenie żąda opróżnienia pojemnika na fusy chociaż pojemnik ten nie jest pełny Urządzenie n...
Page 86: ...est wystarczająco ciepła Ustawiona temperatura jest zbyt niska Sprawdzić ustawienia menu Ustawić temperaturę w menu na MAX Urządzenie mieli kawę ziarnistą ale kawa nie jest dozowana Młynek jest ustawiony na zbyt drobne mielenie Wyregulować młynek na mielenie grubsze Dozownik kawy jest zatkany Zaparzyć dużą kawę wstępnie zmieloną bez dodawania kawy wstępnie zmielonej Dysze dozownika kawy są zatkane...
Page 87: ...NTENZA Pod urządzeniem znajduje się woda Taca ociekowa była zbyt pełna i woda wylała się Opróżnić tacę ociekową kiedy wskaźnik zacznie wystawać poza tacę Zawsze opróżniać pojemnik przed uruchomieniem procedury odwapniania Urządzenie jest w trybie DEMO W momencie włączenia urządzenia przycisnęliście kombinację przycisków HOME HOME CLEAN SET clean setting HOME HOME CLEAN SET clean setting Wyłączyć u...
Page 88: ...miary 224 x 357 x 435 mm Masa 7 7 kg Długość kabla 1200 mm Panel sterowania Przedni Zbiornik na wodę 1 8 litra wyjmowany Pojemność pojemnika na kawę ziarnistą 250 g Pojemność pojemnika na fusy 15 Ciśnienie pompy 15 barów Bojler Bojler ze stali nierdzewnej Urządzenia zabezpieczające Bezpiecznik termiczny 4219 465 03691 MAN GAG MAGENTA PRESTIGE EN NL PL Rev 01 indd 88 21 01 2021 12 44 24 ...
Page 89: ...4219 465 03691 MAN GAG MAGENTA PRESTIGE EN NL PL Rev 01 indd 89 21 01 2021 12 44 24 ...
Page 90: ...4219 465 03691 MAN GAG MAGENTA PRESTIGE EN NL PL Rev 01 indd 90 21 01 2021 12 44 24 ...
Page 91: ...4219 465 03691 MAN GAG MAGENTA PRESTIGE EN NL PL Rev 01 indd 91 21 01 2021 12 44 25 ...
Page 92: ... i v REA MI1387376 R I Cod Fisc 02069680367 Part IVA IT 13054780153 www gaggia it www gaggia com COD Rev 01 21 01 21 GAGGIA S p A reserves the right to make any necessary modification GAGGIA S p a behoudt zich het recht voor om alle wijzigingen die zij noodzakelijk acht aan te brengen GAGGIA S p a zastrzega sobie prawo do wprowadzania dowolnych zmian 4219 465 03691 MAN GAG MAGENTA PRESTIGE EN NL P...