User Manual
FSM-S / FULL SWING
MOUNT
for Small Flat-Panel Displays
Page 1: ...UserManual FSM S FULL SWING MOUNT forSmallFlat PanelDisplays...
Page 2: ...ight of 77 pounds The mount offers post installation adjustments for tilt swivel pan screen depth and horizontal level so you can easily set up and comfortably view your display If you have safety con...
Page 3: ...riate mounting hardware and or accessories such as heavy duty anchors may be required The supplied mounting hardware is not intended for use on metal studs or cinder block walls and may not be appropr...
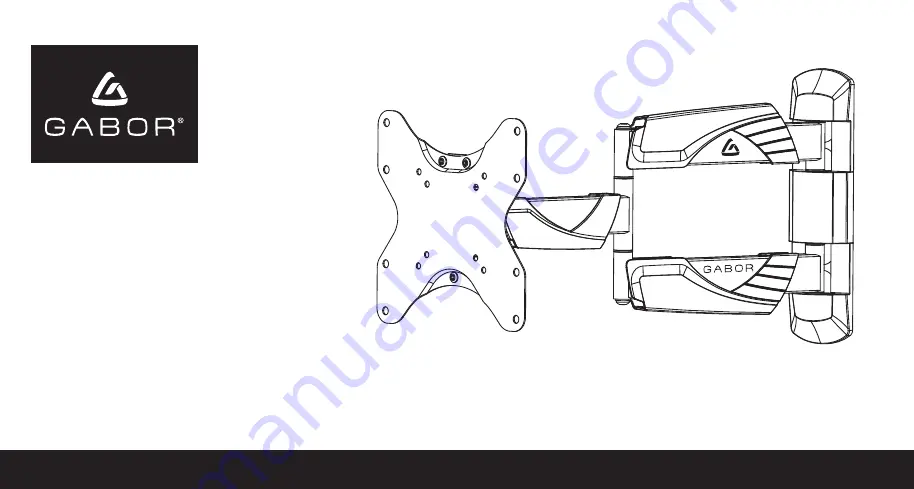
Page 4: ...20 in 4 6 to 50 8 cm Recommended Screen Sizes 20 to 45 in 50 8 to 114 3 cm VESA Mounting Patterns 75 75 mm 100 100 mm 200 100 mm 200 200 mm Max Weight Capacity 77 lb 34 9 kg Material Steel Weight 7 1...
Page 5: ...Wall bracket M5 14 mm screws M6 14 mm screws M4 14 mm screws A B C D M8 20 mm screws G 8X H 4X Anchor screws Spacers E 4X 4X 4X 4X 4X F 4X D8 washers D5 washers Anchor screw washers Wall bracket temp...
Page 6: ...is height in one of two ways 1 Measure the distance from the seating area to the viewing area The ideal position is when the center of the display where the diagonals meet is as close as possible to e...
Page 7: ...racket N 1X Remove the Display Mounting Plate Loosen the top nuts slightly then remove the bottom nut as shown Slide the plate out from the wall bracket Preparing the Wall Bracket VESA Patterns 75 200...
Page 8: ...o determine the correct diameter Install the mounting plate directly to your display C 4X A 4X B 4X D 4X E 4X F 4X G 8X If Your Display Has Recessed Mounting or a Curved Back Install the spacers betwe...
Page 9: ...en stud and mark the center 2 Place the wall bracket template up to the marked locations and tape it to the wall Use the included bubble level to make sure the template is level before drilling Use a...
Page 10: ...ews through the washers and the wall bracket s mounting holes and screw them into the predrilled support holes until secure Use the box end wrench to further tighten the anchor screws but do not overt...
Page 11: ...and tape it to the wall Use the included bubble level to make sure the template is level before drilling Use a pencil to mark the four drilling holes for the anchor screws and then apply a piece of ta...
Page 12: ...nchor screws through the washers and the wall bracket s mounting holes and screw them into the anchors until secure Use the box end wrench to further tighten the screws but do not overtighten 5 Attach...
Page 13: ...le perform this step 1 Make sure the two top nuts are attached and slightly loose Lift your display up to the wall bracket and seat the display into the mounting holes so that it hangs 2 Replace the b...
Page 14: ...to 20 inches tilt 10 to 15 and pivot 180 Horizontal Level Loosen the three hex nuts with the included box end wrench and adjust the horizontal level 3 to 3 Use the bubble level to make sure your displ...
Page 15: ...room or around an object Display Depth You can collapse or extend the mount so your display is 1 8 to 20 inches from the wall Run the power and A V cables through cable covers on the top or bottom of...
Page 16: ...e or defect caused by misuse neglect accident alteration abuse improper installation or maintenance EXCEPT AS PROVIDED HEREIN THE WARRANTY PROVIDER MAKES NEITHER ANY EXPRESS WARRANTIES NOR ANY IMPLIED...