Page 6
G-DRIVE Q Product Guide
6. INSTALLING G-DRIVE Q
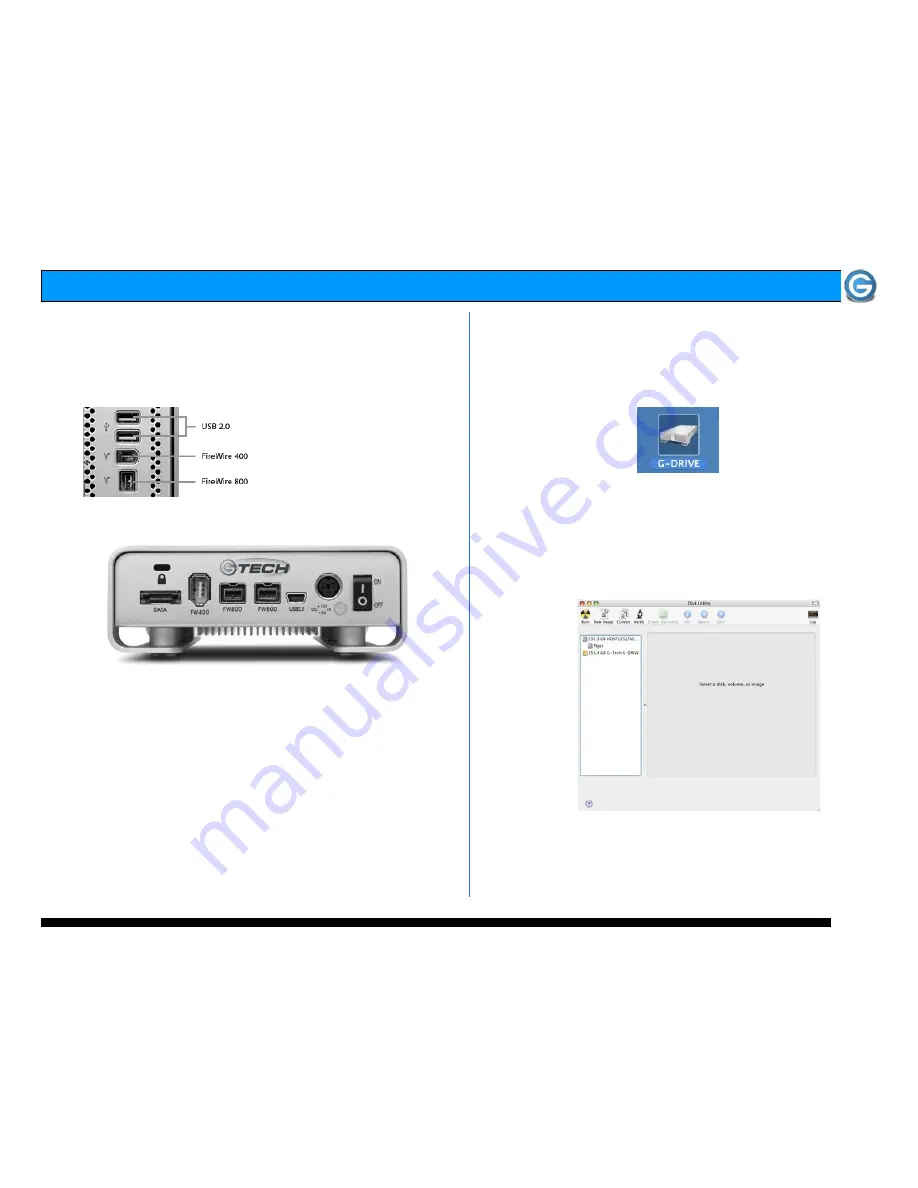
G-DRIVE Q attaches to your computer via USB 2.0, FireWire
400, FireWire 800 or eSATA. Choose the connection
appropriate for your system and connect G-DRIVE Q with
the supplied cable.
Connect the supplied power cord to the Power Supply “brick”
and plug the other end in to a surge protector or wall outlet.
7. INITIALIZING G-DRIVE Q
G-DRIVE mini is set up at the factory for use with Mac OS X
systems. If you are running Mac OS X, G-DRIVE mini will
mount on the OS X desktop right out of the box. If it becomes
necessary to re-format G-DRIVE mini, follow the instructions
below.
•
For Mac OS X installations, proceed to Section 7.1
•
For Windows 2000/XP installations, proceed to Section 7.2
•
For Cross-Platform use see section 7.3
7.1 Mac OS X (10.4)
G-DRIVE Q is initialized at the factory as a single Mac OS X
volume. Power on G-DRIVE, wait 10 seconds, then power
on your Mac. G-DRIVE Q will mount on the desktop as
shown below.
If it becomes necessary to re-initialize G-DRIVE Q for Mac
OS X, follow the instructions below.
1. Open the Apple Disk Utility. The Apple Disk Utility is in
the Utilities Folder located in the Applications Folder on
the Macintosh HD. A dialog box like the following will
appear. G-DRIVE Q will be displayed in the left-hand
column as shown.
2. Select G-DRIVE Q by clicking on the entry in the left-
hand column as shown below. Information about G-DRIVE
Q will be displayed at the bottom.


