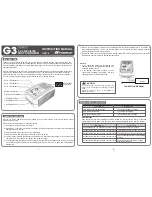
INSTRUCTION MANUAL
G0018
Thank you for your choice of the G-Force G3, 100-240V AC balance charger. This unit is simple to use
but its operation does require some knowledge on the part of the user. Please read this entire operating
manual completely and attentively before using this product, as it covers a wide range of information on
operating and safety.
G-Force G3 Charger is an economic, high quality 100-240V AC balance charger, designed for charging
LiPo and LiFe batteries from 1 to 3 cells in balance mode. The circuit power is 15W and max charge
current can reach to 1.5A. There are three kinds of charge current 0.5A/1A/1.5A that can be selected.
You could select the proper charge current according to your battery capacity.
INTRODUCTION
CHARGE PROCEDURES
G-Force G3 comes with the built in power supply. You can connect the AC power cord to the AC socket
(100-240V AC) directly.
Insert the AC power cord into the charger.
Insert the AC cord into a wall socket (100-240V). All LEDs will light green and flash red to indicate the
charger is ready to charge.
Select the battery type LiPo/LiFe by the slide switch.
Select the proper charging current 1A/2A/3A by the slide switch.
Connect battery balance wire to balance port which is in front side of the charger, after 2 seconds, the
charger detects the voltage of the battery and starts to charge.
The charger starts charging. The LEDs will glow constant red. If the battery pack is 2-cell, Cell 1 and
Cell 2 LEDs will glow constant red; if the battery pack is 3-cell, Cell 1, Cell 2 and Cell 3 LEDs will glow
constant red.
Please refer to following steps to charge the battery,
1)
2)
3)
4)
5)
6)
-
1
-
-
2
-
This diagram shows the correct way to connect your
battery to the G3 charger while charging in balance
mode.
Failure to connect as shown in this diagram will
damage this charger.
CAUTION:
EXPLANATION OF LED STATUS
If the charger encounters a problem, all LEDs will flash red to alert you the errors. In this case,
please disconnect the power cord from the wall socket and unplug the battery from the charger.
* Error Message
All LEDs flashes red 1 time and stop 1 second in cycle.
All LEDs flashes red 4 times and stop 1 second in cycle.
All LEDs flashes red 5 times and stop 1 second in cycle.
All LEDs flashes red 2 times and stop 1 second in cycle.
The battery connects incorrectly.
The voltage of single cell is too high or too low.
The user charges battery type in charging
process.
The charger encounters overload or short circuit.
Indicator
LED
If you unplug the battery while charging, the
charger will stop charging automatically and
enter into standby status.
If the charger encounters overload or short
circuit while charging, the charger will stop
charging and three LEDs will flash red.
1
2
Remark:
CONNECTION DIAGRAM
LED stays green and flashes red.
LED glows constant red.
LED glows constant green.
The charger is ready to charge.
The charger is charging.
The charging process finishes.
Charger Status
Cause of Error
Indicator
LED
2-Cell Balance Port
3-Cell Balance Port
When a cell is completely charged, its corresponding LED will glow constant green. A 2-cell pack is
fully charged when LEDs 1 and 2 are constant green. For 3-cell pack, all LEDs will glow constant
green to indicate the pack is fully charged.
Unplug the battery from the charger and the charge status LED will stay green and flash red which
indicates the charger is ready to charge another battery.
7)
8)
All LEDs flashes red 6 times and stop 1 second in cycle. There is a 300mv difference of voltage
between battery pack.
AC 100-240V
Power
Jack
Cell 1 LED Indicator
Cell 2 LED Indicator
Cell 3 LED Indicator
1-Cell Balance Port
Battery Type Switch
Charge Current Switch
Battery
1-3s LiPo/LiFe
FAST CHARGER
AC INPUT


