4. MARKS, LINES
4-8
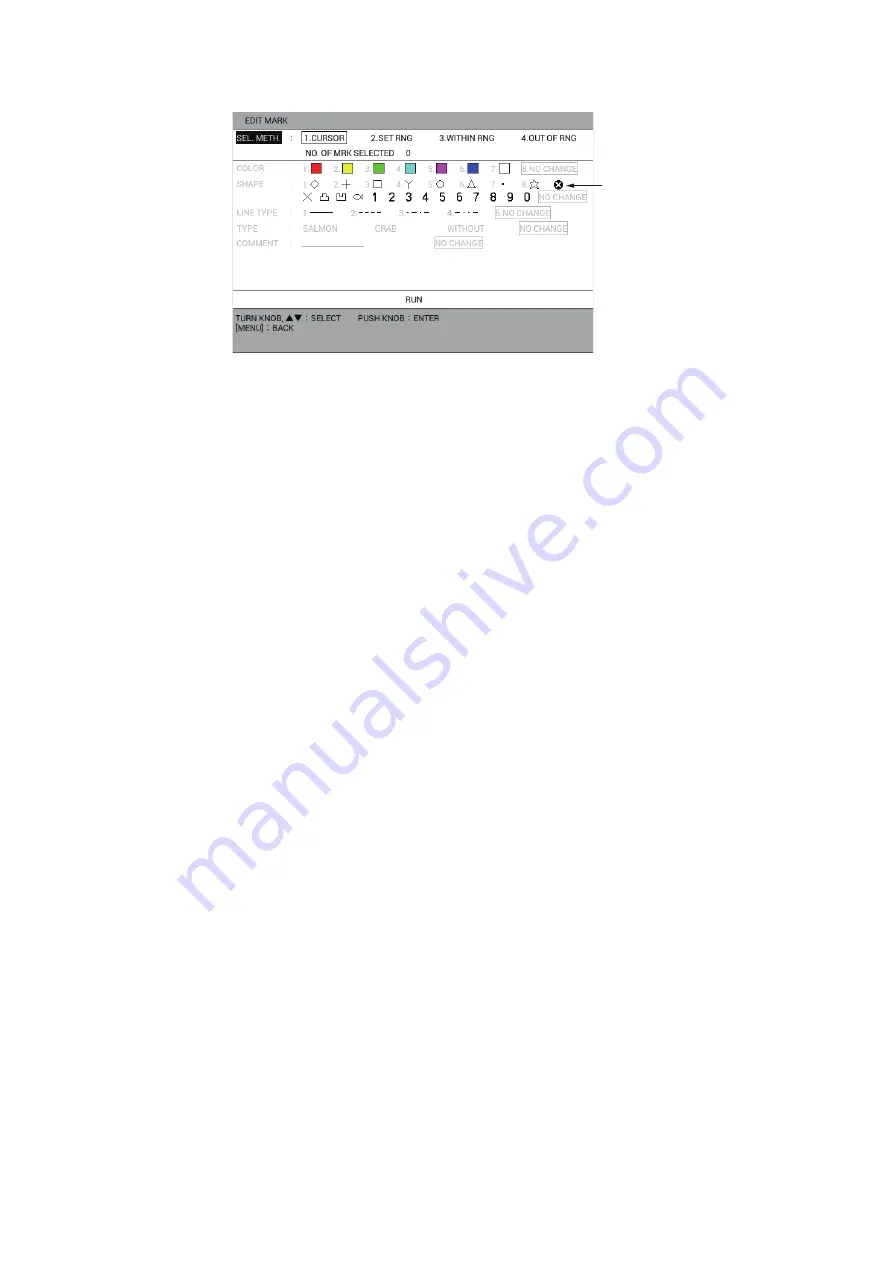
3. Select [1. EDIT MARK].
4. Select [SEL. METH.].
5. Press the applicable numeric key to select the method for editing range. For [1.
CURSOR] or [2. SET RNG], go to step 6. For [3. WITHIN RNG] or [4. OUT OF
RNG], go to step 7.
6. Do one of the following:
• [1. CURSOR]: Select the mark to edit.
• [2. SET RNG]: Select the starting point of the area to edit. Then select the end-
ing point of the area to edit. The selected area is framed in by the white rectan-
gle surrounded by gray.
7. Select [COLOR].
8. Press the applicable numeric key to select the new color. Select [8. NO CHANGE]
to keep the previous color.
9. Select [SHAPE].
10. Push the applicable numeric key or the
ENTER
knob to select the new shape or
figure. Select [NO CHANGE] to keep the previous shape.
11. Select [LINE TYPE].
12. Press the applicable numeric key to select the new line type. Select [5. NO
CHANGE] to keep the previous line type.
13. Select [TYPE].
14. Select the new fish type. Select [NO CHANGE] to keep the previous fish type.
15. Select [COMMENT].
16. If desired, enter (or change) the comment (see "How to enter alphanumeric
data" on page 1-10). Select [NO CHANGE] to keep the previous comment.
17. Select [RUN].
18. Press the
DISP
key to close the menu.
4.6
How to Undo or Redo Mark/line Operation
You can undo previous mark/line input, edit or deletion operation by pressing the
UNDO
key. Up to 20 previous operations can be undone.
When assigning the REDO function to a function key (see section 1.7.2), press the
function key to redo the last UNDO action for mark input, edit or deletion. Up to 20
UNDO actions can be redone.
TLL mark


