3
T a b l e t D o c k U s e r ’ s G u i d e
PRIOR TO DOCKING YOUR SYSTEM
The Tablet Dock is designed to accommodate a tablet
with either a standard battery pack or a larger high-
capacity battery pack. When a high-capacity battery pack
is installed in your tablet, you must adjust the Tablet
Dock platform to ensure that the connector on the back
of the tablet aligns properly with the interface connector
on the dock.
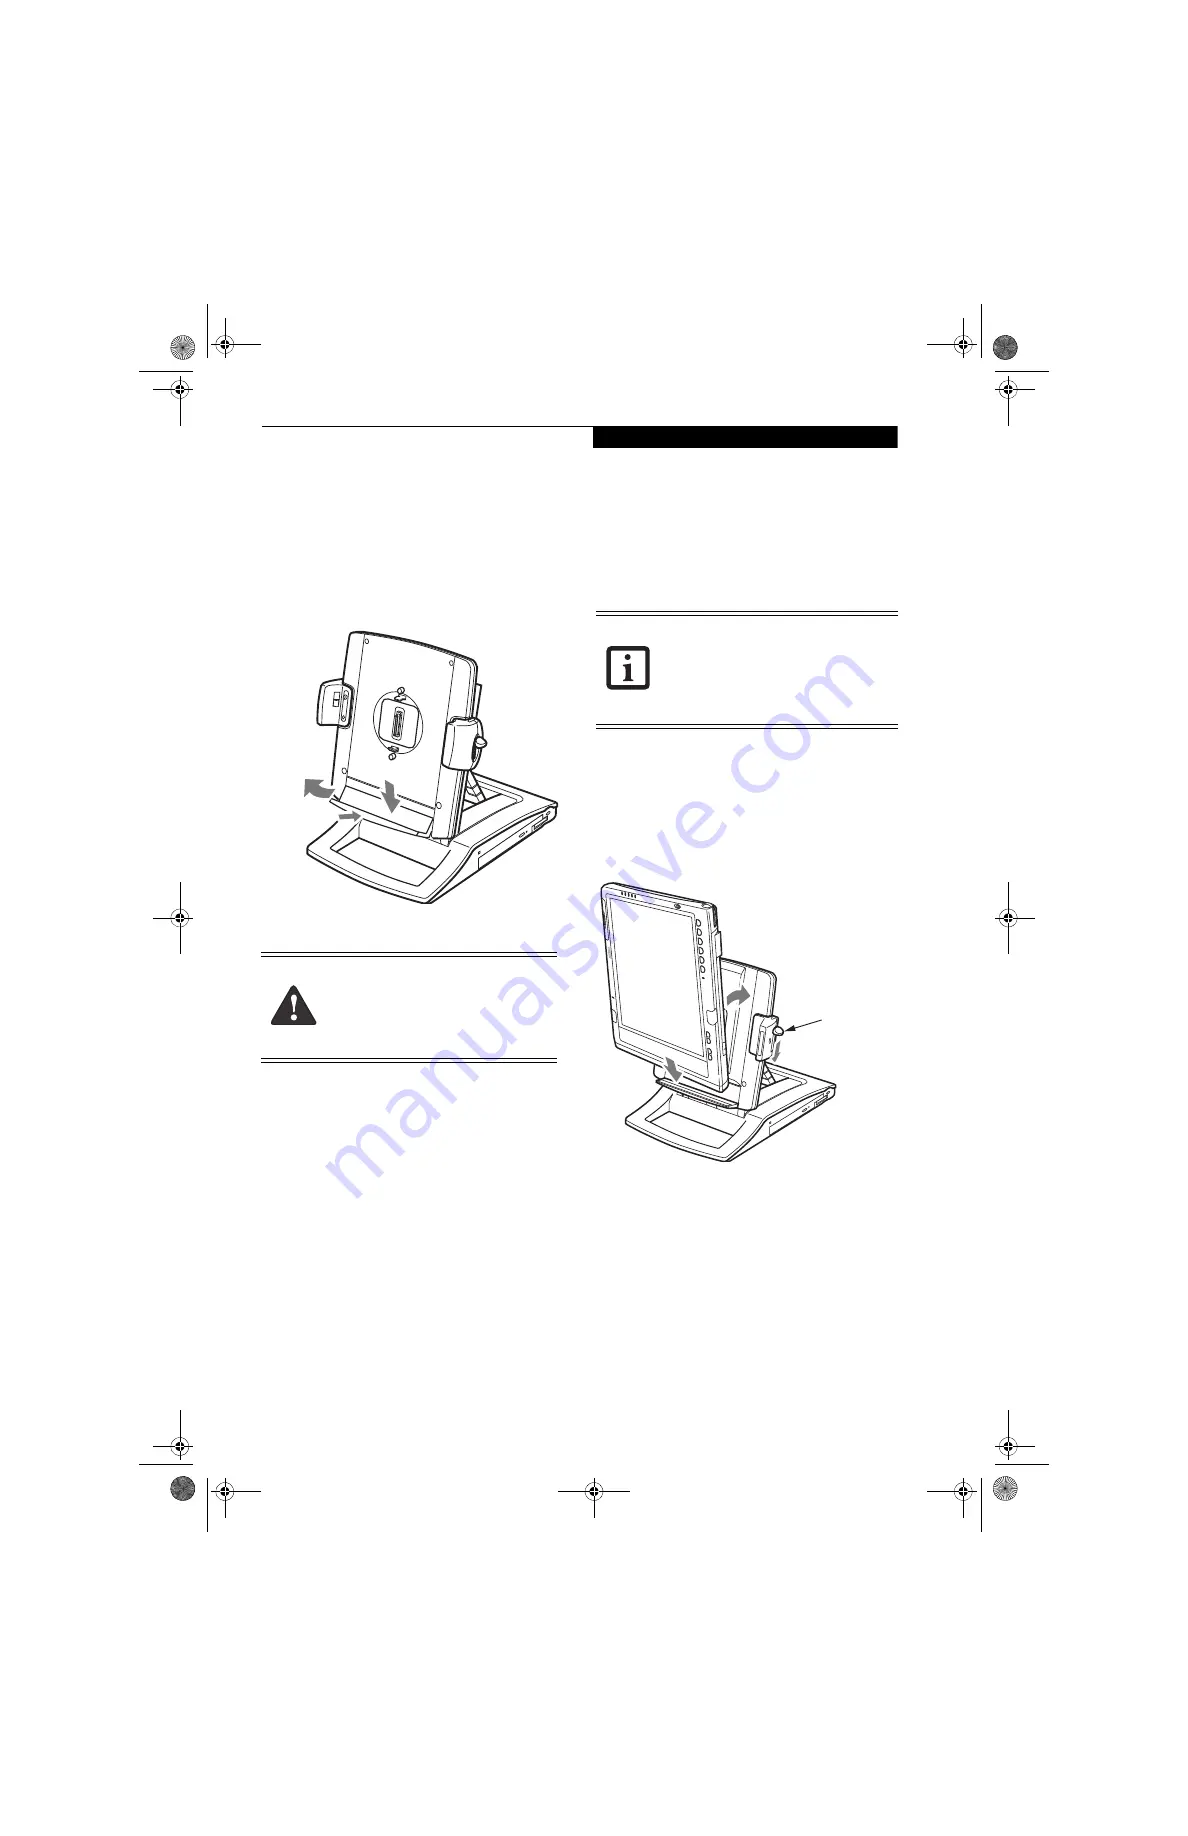
Figure 3. Dropping the Platform
If you have a high-capacity battery pack installed in your
system, perform the following procedure before
attempting to install the system.
Using the dock with a high-capacity battery
1. Holding the platform ledge, pull it away from the
Tablet Dock (reference Figure 3).
2. With the ledge pulled out, lower it as far as it will go.
3. Press the ledge back so that it is flush with the Tablet
Dock. The tablet with a high-capacity battery can
now be docked.
Using the dock with a standard battery pack
1. To change the dock back to accommodate a standard
battery (original configuration), pull the platform
ledge away from the Tablet Dock.
2. Lift the platform until it stops.
3. Press the platform ledge back so that it is flush with
the Tablet Dock.
DOCKING YOUR SYSTEM
Microsoft
®
Windows
®
uses “plug- and-play” technology
to automatically load the files necessary to operate your
Tablet Dock and any attached devices.
1. Plug either the system’s AC Adapter or the AC
Adapter that came with your Tablet Dock into a wall
outlet, then into the Tablet Dock’s DC Input jack.
2. Set the Tablet PC on the Tablet Dock, with the system
oriented in the same direction as the dock. (See
Figure 4 for location). The connector in the back of
the system should be aligned with the interface
connector on the Tablet Dock.
Figure 4. Docking the system
3. Ensure that the lock handle is in the “up” position
(See Figure 1 for location).
4. Press the system against the docking port until you
hear a click. The click indicates that the side latches
are in place. Note that the system is
not locked
into
place until the following step is performed.
5. Firmly push the lock handle down as far as it will go.
This engages the back latches and side latches, and
locks the system in place.
6. Your Tablet Dock is now ready for use. You may now
attach devices to it
.
Memory modules can be severely
damaged by electrostatic discharge (ESD).
To minimize risk to the module, before
docking or undocking your system, touch
a grounded metal object to discharge static
electricity in your body.
1
2
3
■
The following instructions assume the
Tablet Dock is positioned in portrait
mode, with the Lock Handle on the right
of the dock.
■
Your system may appear slightly
different from the illustrations.
Lock Handle
Tablet Dock B5FY-9111-01EN-00.book Page 3 Friday, October 31, 2008 10:21 AM


