414
Upgrade and Maintenance Manual
TX2560 M2 / RX2560 M2
Accessible drives
Ê
Ensure that the four pins on the frame (see arrows) engage with the side
holes on the dummy insert.
Ê
Insert the slimline ODD dummy module into the Multibay box and push back
until the locking tab engages (see figure
).
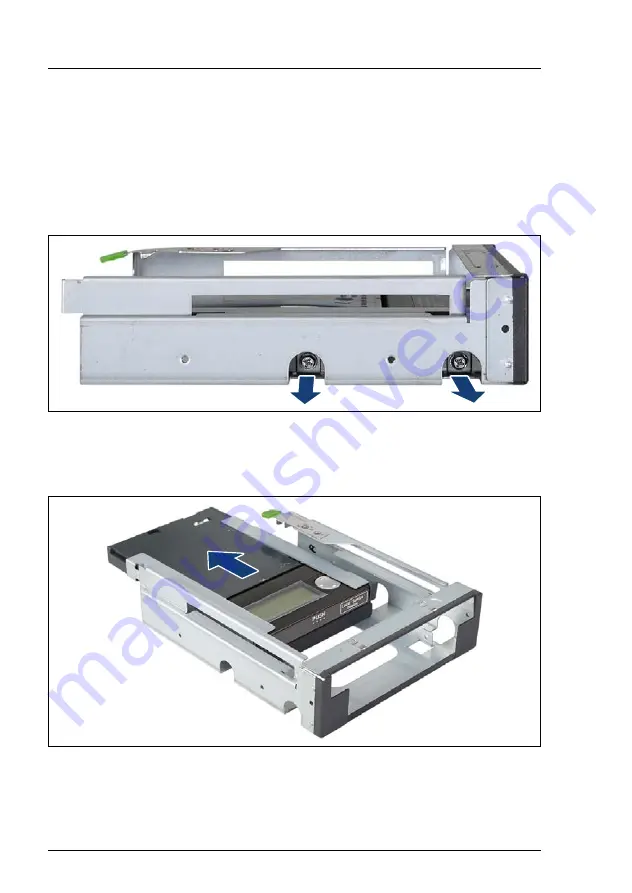
12.5.2.4 Removing the LSD module from the Multibay box
Figure 308: Removing the 3.5-inch installation frame from the Multibay box (A)
Ê
Remove two screws on either side of the Multibay box to disengage the 3.5-
inch installation bay.
Figure 309: Removing the 3.5-inch installation frame from the Multibay box (B)
Ê
Slide the 3.5-inch installation frame out of the Multibay box as shown.
Summary of Contents for PRIMERGY RX2560 M2
Page 6: ...Upgrade and Maintenance Manual TX2560 M2 RX2560 M2 ...
Page 26: ...Upgrade and Maintenance Manual TX2560 M2 RX2560 M2 Contents ...
Page 42: ...42 Upgrade and Maintenance Manual TX2560 M2 RX2560 M2 Before you start ...
Page 110: ...110 Upgrade and Maintenance Manual TX2560 M2 RX2560 M2 Basic hardware procedures ...
Page 152: ...152 Upgrade and Maintenance Manual TX2560 M2 RX2560 M2 Power supply unit PSU ...
Page 364: ...364 Upgrade and Maintenance Manual TX2560 M2 RX2560 M2 Main memory ...
Page 434: ...434 Upgrade and Maintenance Manual TX2560 M2 RX2560 M2 Accessible drives ...
Page 492: ...492 Upgrade and Maintenance Manual TX2560 M2 RX2560 M2 System board and components ...
Page 544: ...544 Upgrade and Maintenance Manual TX2560 M2 RX2560 M2 Cabling ...
Page 568: ...568 Upgrade and Maintenance Manual TX2560 M2 RX2560 M2 Appendix ...


