RX2540 M4
Upgrade and Maintenance Manual
477
Front panel
14.7.2 Removing the front VGA board
14.7.2.1 Preliminary steps
Ê
"Suspending BitLocker functionality" on page 91
Ê
"Locating the defective server" on page 53
Ê
"Shutting down the server" on page 55
Ê
"Disconnecting the power cord" on page 56
Ê
"Getting access to the component" on page 58
Ê
"Removing the fan holder" on page 233
14.7.2.2 Removing the front panel module
Ê
Remove the front panel module, see section
.
14.7.2.3 Removing the front VGA board
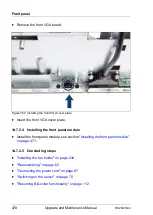
Figure 356: Removing the front VGA board
Ê
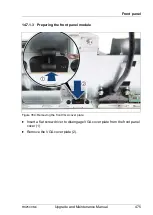
Remove the two screws of the front VGA board.
Upgrade and Repair Unit
(URU)
Hardware: 10 minutes
Tools:
Phillips PH1 screw driver
Summary of Contents for PRIMERGY RX2540 M4
Page 40: ...40 Upgrade and Maintenance Manual RX2540 M4 Before you start ...
Page 90: ...90 Upgrade and Maintenance Manual RX2540 M4 Basic hardware procedures ...
Page 136: ...136 Upgrade and Maintenance Manual RX2540 M4 Power supply unit PSU ...
Page 228: ...228 Upgrade and Maintenance Manual RX2540 M4 Hard disk drives HDD and solid state drives SSD ...
Page 344: ...344 Upgrade and Maintenance Manual RX2540 M4 Main memory ...
Page 362: ...362 Upgrade and Maintenance Manual RX2540 M4 Processor CPU ...
Page 390: ...390 Upgrade and Maintenance Manual RX2540 M4 Liquid cooling LC ...
Page 498: ...498 Upgrade and Maintenance Manual RX2540 M4 Additional interfaces ...
Page 572: ...572 Upgrade and Maintenance Manual RX2540 M4 Appendix A ...
Page 574: ...574 Upgrade and Maintenance Manual RX2540 M4 Appendix B ...
Page 582: ...8 RX2540 M4 Basic Serial RS 232 Cable plan System Board D3384 RS 232 onboard RS 232 rear C6 ...
Page 634: ...List of all used screws for PRIMERGY Servers Assembled in Germany and Japan January 2017 ...


