background image

5

G e t t i n g   t o   K n o w   Y o u r   L i f e B o o k


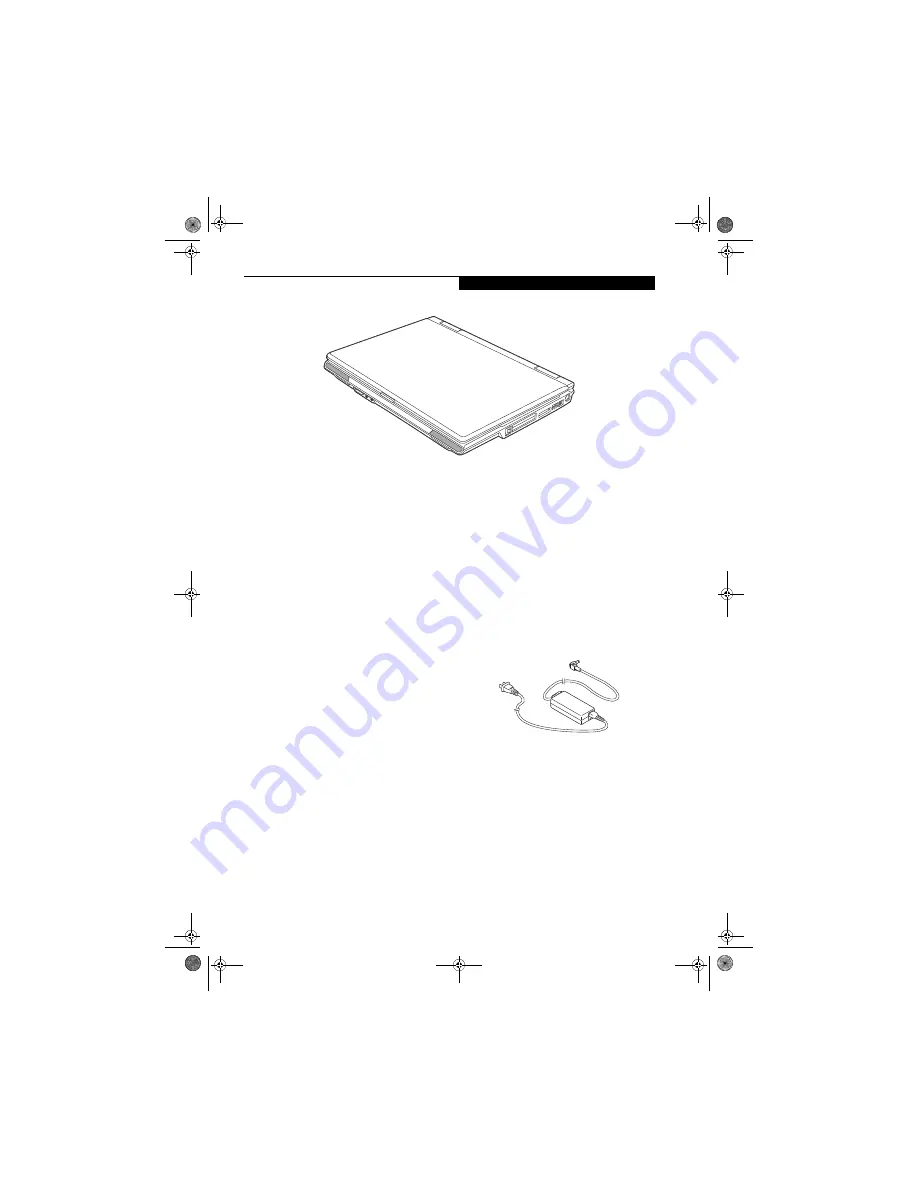
Figure 2-1.  Fujitsu LifeBook A3130 notebook

Overview

This section describes the components of your Fujitsu 
LifeBook A3130 notebook. We strongly recommend that 
you read it before using your notebook – even if you are 
already familiar with notebook computers.

UNPACKING

When you receive your LifeBook notebook, unpack it 
carefully and compare the parts you have received with 
the items listed below.

For a pre-configured model you should have:

LifeBook A3130 notebook

 (Figure 2-1)

AC adapter with AC power cord 

(Figure 2-2)

Lithium ion Battery, pre-installed

Driver and Application Restore (DAR) disc

Phone/Modem (RJ-11) telephone cable

Getting Started Guide

User’s Guide (this document)

International Limited Warranty Brochure

Microsoft®-associated product materials

Depending on your system configuration, the following 
optional item may be included with your system:

Additional battery

ExpressCard TV Tuner

Remote control package (for Windows Vista™ Home 
Premium models)

External USB floppy disk drive

Point and Write Touchpad stylus

Depending on your configuration, you may receive the 
following application CDs:

Cyberlink Application CDs

Once you have checked and confirmed that your Life-
Book system is complete, read through the following 
pages to learn about all of your notebook’s components.

Figure 2-2  AC Adapter

falcon3.book  Page 5  Thursday, May 24, 2007  8:44 AM

Summary of Contents for Lifebook A3130

Page 1: ...Fujitsu LifeBook A3130 Notebook User s Guide falcon3 book Page 1 Thursday May 24 2007 8 44 AM ...

Page 2: ...falcon3 book Page 2 Thursday May 24 2007 8 44 AM ...

Page 3: ...s The DVD player found in some models of the LifeBook notebook incorporates copyright protection technology that is protected by method claims of certain U S patents and other intellectual property rights owned by Macrovision Corporation and other rights users Use of this copyright protection technology must be authorized by Macrovision Corporation and is intended for home and other limited viewin...

Page 4: ... this is a natural occurrence for all batteries When this occurs you may want to replace the battery with a fresh one If you replace it it is important that you dispose of the old battery properly because batteries contain mate rials that could cause environmental damage if disposed of improperly Fujitsu is very concerned with environ mental protection and has enlisted the services of the Recharge...

Page 5: ...Clicking Double Clicking 15 Dragging Scrolling 16 Touchpad Control Adjustment 16 Optional Point and Write Touchpad 16 Volume Control Controlling the Volume 18 LifeBook Application Panel Configuring the Application Panel 19 3 GETTING STARTED Power Sources Connecting the Power Adapters 23 Display Panel Opening the Display Panel 24 Adjusting Display Panel Brightness 24 Closing the Display Panel 24 St...

Page 6: ...5 Jack 44 Universal Serial Bus Ports 44 IEEE 1394 Port 45 Headphone Line Out Jack 45 Microphone Line In Jack 45 S Video Out Port 45 External Video Port 45 5 TROUBLESHOOTING Identifying the Problem 49 Specific Problems 49 Troubleshooting Table 50 Power On Self Test Messages 57 Emergency Media Player Drive Tray Release 58 Modem Result Codes 58 Restoring Your Pre installed Software 59 Restoring the F...

Page 7: ...Network 90 Troubleshooting the WLAN Troubleshooting Table 91 Wireless LAN Glossary Glossary 92 WLAN Specifications Specifications 94 Using the Bluetooth Device What is Bluetooth 95 Where to Find Information About Bluetooth 95 APPENDIX B USING THE FINGERPRINT SENSOR Fingerprint Sensor Device Introducing the Fingerprint Sensor Device 99 Getting Started 99 Installing OmniPass 99 User Enrollment 100 U...

Page 8: ...L i f e B o o k A 3 0 0 0 S e r i e s N o t e b o o k falcon3 book Page 8 Thursday May 24 2007 8 44 AM ...

Page 9: ...1 Preface falcon3 book Page 1 Thursday May 24 2007 8 44 AM ...

Page 10: ...L i f e B o o k A 3 0 0 0 S e r i e s N o t e b o o k falcon3 book Page 2 Thursday May 24 2007 8 44 AM ...

Page 11: ...E mail 8fujitsu us fujitsu com Website http www computers us fujitsu com support Before you place the call you should have the following information ready so that the customer support representative can provide you with the fastest possible solution Product name Product configuration number Product serial number Purchase date Conditions under which the problem occurred Any error messages that have...

Page 12: ...2 L i f e B o o k A 3 0 0 0 S e r i e s N o t e b o o k falcon3 book Page 2 Thursday May 24 2007 8 44 AM ...

Page 13: ...3 2 Getting to Know Your LifeBook Notebook falcon3 book Page 3 Thursday May 24 2007 8 44 AM ...

Page 14: ...4 L i f e B o o k A 3 0 0 0 S e r i e s N o t e b o o k S e c t i o n T w o falcon3 book Page 4 Thursday May 24 2007 8 44 AM ...

Page 15: ...Driver and Application Restore DAR disc Phone Modem RJ 11 telephone cable Getting Started Guide User s Guide this document International Limited Warranty Brochure Microsoft associated product materials Depending on your system configuration the following optional item may be included with your system Additional battery ExpressCard TV Tuner Remote control package for Windows Vista Home Premium mode...

Page 16: ...adphones See Headphone Line Out Jack on page 45 for more information Wireless LAN Bluetooth On Off Switch The wireless LAN Bluetooth on off switch is used to turn on and off the WLAN and Bluetooth devices Switching the device off when not in use will help to extend battery life Note that either or both devices can be turned on and off using this switch See Activating the WLAN Device on page 89 for...

Page 17: ...se allows you to open the media player tray without powering on your LifeBook notebook See Emergency Media Tray Release on page 36 for more information Air Vents Optical Disk Drive Optical Disk Drive Eject Button Optical Disk Drive Emergency Release Stylus Stylus Slot Point and Write Pad Model Only To protect your notebook from damage and to optimize system performance be sure to keep all air all ...

Page 18: ...ack The DC power jack allows you to plug in the AC adapter to power your LifeBook notebook and charge the internal Lithium ion battery IEEE 1394 4 pin Jack The 4 pin 1394 jack is used to connect between your notebook and an IEEE 1394 peripheral such as a digital video camera See IEEE 1394 Port on page 45 for more information SD Memory Stick xD Picture Card Slot The Secure Digital Memory Stick xD P...

Page 19: ...em RJ 11 Telephone Jack The Modem RJ 11 telephone jack is for attaching a telephone line to the internal multinational 56K modem See Modem RJ 11 Telephone Jack on page 44 for more information Modem Jack S Video Out Port Gigabit LAN USB 2 0 Ports Air Vents External Anti theft Lock Slot RJ 45 Jack Video Port USB 2 0 Ports To protect your notebook from damage and to optimize performance be sure to ke...

Page 20: ...of time or for swapping a discharged battery with a charged Lithium ion battery See Lithium ion Battery on page 33 for more information Memory Upgrade Compartment Your notebook comes with high speed Double Data Rate Synchronous Dynamic RAM DDR SDRAM The memory upgrade compartment allows you to expand the system memory capacity of your notebook thus improving overall performance See Memory Upgrade ...

Page 21: ...her fully charged or the AC adapter is connected and there is no battery pack installed Orange solid The battery pack is charging Orange blinking Charging is suspended due to exces sively high or low battery temperature Off No AC adapter is connected BATTERY LEVEL INDICATOR The Battery Level indicator displays the charge level of the battery pack as follows Green solid Battery is between 51 and 10...

Page 22: ...CATOR The NumLk indicator states that the integral keyboard is set in ten key numeric keypad mode CAPSLOCK INDICATOR The CapsLock indicator states that your keyboard is set to type in all capital letters SCRLK INDICATOR The ScrLk indicator states that your scroll lock is active The Auto Insert Notification function will periodically check for a disc installed in the drive causing the HDD ODD Acces...

Page 23: ...your right mouse button and displays shortcut menus for the selected item Refer to your Windows documentation for addi tional information regarding the Windows keys CURSOR KEYS The cursor keys are the four arrow keys on the keyboard which allow you to move the cursor up down left and right in applications In programs such as Windows Explorer it moves the focus selects the next item up down left or...

Page 24: ... decrease the volume of your LifeBook notebook Fn F9 Pressing F9 repeatedly while holding Fn will increase the volume of your LifeBook notebook Fn F10 Pressing F10 while holding Fn allows you to change your selection of where to send your display video Each time you press the combination of keys you will step to the next choice The choices in order are built in display panel only both built in dis...

Page 25: ... select press the right button once and then immediately release it You also have the option to perform the clicking operation by tapping lightly on the Touchpad once Figure 2 11 Figure 2 11 Clicking methods DOUBLE CLICKING Double clicking means pushing and releasing the left button twice in rapid succession This procedure does not function with the right button To double click move the cursor to ...

Page 26: ...OL ADJUSTMENT The Windows Control Panel allows you to customize your Touchpad with selections made from within the Mouse Properties dialog box OPTIONAL POINT AND WRITE TOUCHPAD Certain configurations of this LifeBook notebook have an optional Point and Write Touchpad in the location of the standard touchpad pointing device The Point and Write Touchpad is compatible with the latest Microsoft Window...

Page 27: ...e stylus away from the pad or it might interfere with the operation Right click function is not supported by the stylus Use the right button for right click functions Use the stylus gently on the pad so as not to damage the stylus or pad Little pressure is required for the stylus to work effectively Be careful not to leave the stylus on the keyboard or palm rest when closing the display To change ...

Page 28: ...e holding Fn will increase the volume of your notebook Volume can be controlled by many volume controls that are set within individual applications Certain external audio devices you might connect to your system may have hardware volume controls Each source discussed above puts an upper limit on the volume level that must then be followed by the other sources We recommend that you experiment with ...

Page 29: ... this valuable feature By default pressing the My Home button will open the Fujitsu Computer Systems Corporation home page Pressing the Web Search button will open the Google search page Pressing the A or B buttons will open Notepad and Calculator respectively Note that the C button is initially unassigned Any of these button defaults can be changed using the following procedure To configure your ...

Page 30: ...20 L i f e B o o k A 3 0 0 0 S e r i e s N o t e b o o k S e c t i o n T w o falcon3 book Page 20 Thursday May 24 2007 8 44 AM ...

Page 31: ...21 3 Getting Started falcon3 book Page 21 Thursday May 24 2007 8 44 AM ...

Page 32: ...22 L i f e B o o k A 3 0 0 0 S e r i e s N o t e b o o k S e c t i o n T h r e e falcon3 book Page 22 Thursday May 24 2007 8 44 AM ...

Page 33: ...ptional Auto Airline Adapter 1 Plug the DC output cable into the DC power jack on your notebook 2 Plug the Auto Airline adapter into the cigarette lighter of an automobile with the ignition key in the On or Accessories position OR 3 Plug the Auto Airline adapter into the DC power jack on an airplane seat Switching from AC Adapter Power or the Auto Airline Adapter to Battery Power 1 Be sure that yo...

Page 34: ...n keys as noted below Using the Keyboard Adjusting the brightness using the keyboard changes the setting only temporarily Fn F6 Pressing repeatedly will lower the brightness of your display Fn F7 Pressing repeatedly will increase the brightness of the display CLOSING THE DISPLAY PANEL 1 Holding the edge of your display panel pull it forward until it is flush with the body of your Life Book noteboo...

Page 35: ... system s opening screen The boot sequence is executed when You turn on the power to your LifeBook notebook You restart your notebook from the Windows Shut Down dialog box The software initiates a system restart Example When you install a new application HARD DISK DRIVE PASSWORDS To provide additional data security you can assign pass words to your hard disk drive This feature is managed in the sy...

Page 36: ... account 3 The next screen asks for a Computer Name and allows you to choose a desktop background 4 You will next see a Help protect Windows automat ically screen in which the default choice is Use recommended settings The other two choices are Install important updates only and Ask me later Select from the three choices 5 On the next screen set your time and date settings 6 You will next see the ...

Page 37: ...y If you click Execute Click Me will begin installing If after clicking the button you receive a User Account Control window you will be asked for your permission to continue Click Yes to continue If you cancel the operation the Click Me icon will appear on your desktop for later installation FUJITSU DRIVER UPDATE UTILITY Your system has a convenient tool called the Fujitsu Driver Update FDU utili...

Page 38: ...n when your system is turned on Clicking on the power icon on the lock menu Selecting Sleep from the Windows Shut Down menu Timing out from lack of activity Allowing the battery to reach the Dead Battery Warning condition Your notebook s system memory typically stores the file on which you are working open application informa tion and any other data required to support operations in progress When ...

Page 39: ...r use the Windows shutdown procedure Using the correct procedure to shut down from Windows allows your notebook to complete its operations and turn off power in the proper sequence to avoid errors The proper sequence is 1 Click the Start button and then click the arrow at the bottom right 2 From the dropdown menu select Shut Down or Sleep or Hibernate If you are going to store your notebook for a ...

Page 40: ...30 L i f e B o o k A 3 0 0 0 S e r i e s N o t e b o o k S e c t i o n T h r e e falcon3 book Page 30 Thursday May 24 2007 8 44 AM ...

Page 41: ...31 4 User Installable Features falcon3 book Page 31 Thursday May 24 2007 8 44 AM ...

Page 42: ...32 L i f e B o o k A 3 0 0 0 S e r i e s N o t e b o o k S e c t i o n F o u r falcon3 book Page 32 Thursday May 24 2007 8 44 AM ...

Page 43: ...notifica tion message will appear If you do not respond to the low battery message the batteries will continue to discharge until they are too low to operate When this happens your notebook will go into Sleep mode There is no guarantee that your data will be saved once the notebook reaches this point Do not leave a faulty battery in your LifeBook notebook It may damage your AC adapter optional Aut...

Page 44: ...tional battery you can have a fully charged spare to swap with one that is not charged There are two ways to swap batteries cold swapping and hot swapping Cold swapping Batteries To cold swap batteries in your battery bay follow these easy steps Figure 4 1 1 Have a charged battery ready to install 2 Shut down your notebook and disconnect the AC adapter 3 Unlock the battery by pushing the two relea...

Page 45: ...p with the hole in the center of the disc Snap the disc onto the raised circle in the center of the tray 4 Gently push the holder tray back in until you hear a click Figure 4 3 Media Holder Tray Media Tray Eject Button Install your media player software before first using the optical drive Refer to the applicable readme file or tutorial associated with the software Do not operate your optical driv...

Page 46: ...ying button to open a drop down menu for options 2 Make the desired selections from the wide variety of options available Using the Media Player Control Panel The media player software allows you to watch the movie much like a VCR player You can pause rewind fast forward and stop the movie at any point 1 To Pause the movie click the on screen button 2 To Rewind the movie click the button to rewind...

Page 47: ...drive such as watching a DVD movie will greatly reduce your notebook s battery life Many movie run times are longer than your system can support on a single battery If you are watching a DVD movie on battery power you may need to swap in an additional charged battery or attach AC power during the movie to view it in its entirety An additional fully charged battery is highly recommended if you will...

Page 48: ...the memory stick it uses flash memory architecture xD Picture Cards work the same as Memory Sticks and SD Cards but they are much smaller than either one xD Picture Cards are primarily used to store and transfer images with devices such as cell phones Figure 4 6 Memory Stick Secure Digital and xD Picture Cards INSERTING MEMORY STICK SD XD CARDS Memory Sticks SD Cards and xD Picture Cards are inser...

Page 49: ...slot until it is seated in the connector REMOVING A MEMORY STICK SD XD CARD To remove a Memory Stick SD Card or xD Picture Card follow these easy steps Push the Memory Stick SD Card or xD Picture Card in until it unlatches It will then eject from the slot for removal See your card manual for specific instructions on the removal of your card Some cards may require your LifeBook notebook to be in Sl...

Page 50: ...book to be in Sleep Mode or Off during removal 1 Unlock the card from the slot by pressing the eject button associated with the slot in which the card is located When pressed the button will pop out 2 Firmly press the button again until it is flush with the notebook This will eject the card slightly out of the slot allowing you to remove the card PC Card Slot lower slot only PC Card PC Card Eject ...

Page 51: ...Card follow these steps 1 Unlock the card from the slot by pressing the eject button associated with the slot in which the card is located When pressed the button will pop out 2 Firmly press the button again until it is flush with the notebook This will eject the card slightly out of the slot allowing you to remove the card Inserting or removing an ExpressCard during your notebook s shutdown or bo...

Page 52: ... place Figure 4 10 Figure 4 10 Installing a Second Memory Module 7 Replace the cover and reinstall the screw REMOVING A MEMORY UPGRADE MODULE 1 Perform steps 1 through 4 of Installing a Memory Upgrade Module 2 Pull the clips sideways away from each side of the memory upgrade module at the same time 3 While holding the clips out remove the module from the slot by lifting it up and pulling towards t...

Page 53: ...ed module with a larger one be sure to check that your notebook has recognized the change Check the memory capacity by clicking Start Control Panel System and Maintenance System The amount of memory is displayed next to Memory RAM If the total memory displayed is incorrect check that your memory upgrade module is properly installed If the module is prop erly installed and the capacity is still not...

Page 54: ...low these easy steps 1 Align the connector with the port opening 2 Push the connector into the port until it is seated Figure 4 13 3 Plug the other end of the cable into a LAN outlet Figure 4 13 Connecting the LAN UNIVERSAL SERIAL BUS PORTS There are five USB 2 0 ports on this system four on the back and one on the side The Universal Serial Bus 2 0 ports USB allow you to connect USB devices such a...

Page 55: ...gure 2 4 on page 7 for location 1 Align the connector with the port opening 2 Push the connector into the port until it is seated S VIDEO OUT PORT The S Video port allows you to connect and use directly any S Video device such as a VCR or television The S Video standard provides for a higher quality picture than NTSC or PAL To connect an S Video device follow these steps Figure 4 16 1 Align the co...

Page 56: ...46 L i f e B o o k A 3 0 0 0 S e r i e s N o t e b o o k S e c t i o n F o u r falcon3 book Page 46 Thursday May 24 2007 8 44 AM ...

Page 57: ...47 5 Troubleshooting falcon3 book Page 47 Thursday May 24 2007 8 44 AM ...

Page 58: ...48 L i f e B o o k A 3 0 0 0 S e r i e s N o t e b o o k S e c t i o n F i v e falcon3 book Page 48 Thursday May 24 2007 8 44 AM ...

Page 59: ...ooting information 8 If you have tried the solutions suggested in the Trou bleshooting Table without success contact your support representative Toll free 1 800 8Fujitsu 1 800 838 5487 E mail 8fujitsu us fujitsu com Website http www us fujitsu com computers Before you place the call you should have the following information ready so that the customer support represen tative can provide you with th...

Page 60: ...con in the system tray Click on the Volume icon in the tool tray on the bottom right of the screen It looks like a speaker If the Mute box is checked click on it to uncheck it Optical Drive Problems LifeBook notebook fails to recognize optical discs Protective sheet is still in the optical drive tray Remove the protective sheet then replace the disc in the tray The disc is not pushed down onto cen...

Page 61: ...oard or Mouse Problems The built in keyboard does not seem to work The notebook has gone into Sleep mode Push the Power Suspend Resume button Your application has locked out your keyboard Try to use your integrated pointing device to restart your system You have installed an external keyboard or mouse and it does not seem to work Your external device is not properly installed Reinstall your device...

Page 62: ...lications PC Card ExpressCard Problems A card inserted in the card slot does not work or is locking up the system The card is not properly inserted Remove and re insert the card See PC Cards ExpressCards on page 40 for more information The card may have been inserted while an application was running so your notebook is not aware of its insertion Close the application and restart your notebook Your...

Page 63: ... timeouts which are too short for your operating needs Press any button on the keyboard or move the mouse to restore operation If that fails push the Power Suspend Resume button Check your power management settings or close your applications and go to the Power Savings menu of the setup utility to adjust the timeout values to better suit your needs You are operating on battery power only and have ...

Page 64: ...e Change what the power button does option You did not hold the button in long enough Hold the button longer This may need to be a few seconds if your application is preventing the CPU from checking for button pushes There may be a conflict with the application software Close all applications and try the button again The system powers up and displays power on informa tion but fails to load the ope...

Page 65: ...hat fails push the Power Suspend Resume button The display may be shut off by Sleep mode Auto Suspend or Video Timeout The notebook turned on with a series of beeps and your display is blank Power On Self Test POST has detected a failure that does not allow the display to operate Contact your support representative The display goes blank by itself after you have been using it The notebook has gone...

Page 66: ...nstall your device See External Video Port on page 45 for more information Your operating system soft ware is not setup with the correct software driver for that device Check your device and operating system documentation and activate the proper driver You have connected an external monitor and it does not come on Your external monitor is not compatible with your LifeBook notebook See your monitor...

Page 67: ...art the system there may be a serious fault which might cause you to lose data if you continue Contact your support representative Incorrect Drive A type run SETUP Type of floppy drive A not correctly identified in Setup This means that the floppy disk drive type identified in your setup utility does not agree with the type detected by the Power On Self Test Run the setup utility to correct the in...

Page 68: ... perhaps by an application program that changes data stored in BIOS memory Run Setup and reconfigure the system System RAM Failed at offset nnnn System memory failed at offset nnnn of in the 64k block at which the error was detected This means that there is a fault in your built in memory If you continue to operate you risk corrupting your data Contact your support representative for repairs nnnn ...

Page 69: ...e hard drive or an external floppy disk drive perform one of the following procedures Changing priority from BOOT Menu 1 Start your system and press the F12 key when the Fujitsu logo appears You will open the Boot Menu window 2 Using the arrow keys select the device from which you want to boot 3 Press Enter Note that this is a one time boot priority To change the boot priority for a longer period ...

Page 70: ...urity of the computer by automatically locking the computer with a password when it is carried Note that the HDD protection and computer locking features are mutually exclusive both cannot be selected at the same time 1 Double click the Shock Sensor Utility icon in the Notification Area at the bottom right of the screen The Shock Sensor Utility window appears 2 Click the Setting button The Shock S...

Page 71: ...ly or manually go to the Fujitsu site to check for new updates for your system The FDU icon should appear in the system tray at the bottom right of your screen roll the cursor over the icons to find the correct one If the FDU icon does not appear in the system tray it can be started by going to Start All Programs and clicking on Fujitsu Driver Update this will create the icon automatically To invo...

Page 72: ...62 L i f e B o o k A 3 0 0 0 S e r i e s N o t e b o o k S e c t i o n F i v e falcon3 book Page 62 Thursday May 24 2007 8 44 AM ...

Page 73: ...63 6 Care and Maintenance falcon3 book Page 63 Thursday May 24 2007 8 44 AM ...

Page 74: ...64 L i f e B o o k A 3 0 0 0 S e r i e s N o t e b o o k S e c t i o n S i x falcon3 book Page 64 Thursday May 24 2007 8 44 AM ...

Page 75: ...orting the weight of the notebook Do not drop your notebook Do not touch the screen with any sharp objects Cleaning your LifeBook notebook Always disconnect the power plug Pull the plug not the cord Clean your LifeBook notebook with a damp lint free cloth Do not use abrasives or solvents Use a soft cloth to remove dust from the screen Never use glass cleaners Storing your LifeBook notebook If stor...

Page 76: ...ries in hot locations for more than a day or two Intense heat can shorten battery life Do not leave a battery in storage for longer than 6 months without recharging it Increasing Battery Life Power your LifeBook notebook through the AC or optional auto airline adapter whenever possible If your notebook is running on battery power all day connect it to the AC adapter overnight to recharge the batte...

Page 77: ...tention to the following points The drive rotates the compact disc at a very high speed Do not carry it around or subject it to shock or vibration with the power on Avoid using or storing the drive where it will be exposed to extreme temperatures Avoid using or storing the drive where it is damp or dusty Avoid using or storing the drive near magnets or devices that generate strong magnetic fields ...

Page 78: ...68 L i f e B o o k A 3 0 0 0 S e r i e s N o t e b o o k S e c t i o n S i x falcon3 book Page 68 Thursday May 24 2007 8 44 AM ...

Page 79: ...69 7 System Specifications falcon3 book Page 69 Thursday May 24 2007 8 44 AM ...

Page 80: ...70 L i f e B o o k A 3 0 0 0 S e r i e s N o t e b o o k S e c t i o n S e v e n falcon3 book Page 70 Thursday May 24 2007 8 44 AM ...

Page 81: ...to 256 MB selectable in the BIOS from 32 MB to 256 MB of shared memory using Unified Memory Architec ture UMA AUDIO Realtek codec ALC262 Headphones Stereo headphone line out jack 3 5 mm 1 Vrms or less minimum impedance 32 Ohms Microphone Stereo microphone line in jack 3 5 mm 100 mVrms or less minimum impedance 1 5K Ohms Two built in stereo speakers 20 mm diameter MASS STORAGE DEVICE OPTIONS Hard D...

Page 82: ...C Adapter Autosensing 100 240V AC supplying 19V DC 4 22A 80W to the LifeBook notebook including an AC cable Power Management Conforms to ACPI Advanced Configuration and Power Interface DIMENSIONS AND WEIGHT Overall Dimensions Approximately 14 7 w x 10 43 d x 1 55 h 360 mm x 265 mm x 39 3 mm Weight Approximately 6 6 lbs 3 0 kg with battery installed ENVIRONMENTAL REQUIREMENTS Temperature Operating ...

Page 83: ...ftware Your LifeBook is pre installed with software utilities that let you operate and configure your LifeBook Application Panel OmniPass Fingerprint Recognition Software The fingerprint sensor uses Softex OmniPass which provides password management capabilities to Microsoft Windows operating systems OmniPass lets you use a master password for all Windows applica tions and on line passwords and pr...

Page 84: ...74 L i f e B o o k A 3 0 0 0 S e r i e s N o t e b o o k S e c t i o n S e v e n falcon3 book Page 74 Thursday May 24 2007 8 44 AM ...

Page 85: ...75 8 Glossary falcon3 book Page 75 Thursday May 24 2007 8 44 AM ...

Page 86: ...76 L i f e B o o k A 3 0 0 0 S e r i e s N o t e b o o k S e c t i o n E i g h t falcon3 book Page 76 Thursday May 24 2007 8 44 AM ...

Page 87: ...econd Used to describe data transfer rates Boot To start up a computer and load its operating system from disk ROM or other storage media into RAM Bus An electrical circuit which passes data between the CPU and the sub assemblies inside your LifeBook notebook Byte 8 bits of parallel binary information Cache Memory A block of memory built into the micro processor which is much faster to access than...

Page 88: ...to the computer If you do not know the IP address but if you know the computer name you can still communicate to that computer Driver A computer program which converts application and operating system commands to external devices into the exact form required by a specific brand and model of device in order to produce the desired results from that particular equipment DVMT Dynamic Video Memory Tech...

Page 89: ... IR An abbreviation for infrared IRQ Interrupt Request An acronym for the hardware signal to the CPU that an external event has occurred which needs to be processed KB Kilobyte LAN Local Area Network An interconnection of computers and peripherals within a single limited geographic location which can pass programs and data amongst themselves LCD Liquid Crystal Display A type of display which makes...

Page 90: ...r hardware whenever power is applied to your notebook Status and error messages may be displayed before the operating system is loaded If the self test detects failures that are so serious that operation can not continue the operating system will not be loaded PPPoE Point to Point Protocol over Ethernet A protocol for Ethernet using a Point to Point Protocol PPP which is used for connection on the...

Page 91: ...iza tion that tests and certifies the electrical safety of devices USB Universal Serial Bus Standard that allows you to simultaneously connect up to 127 USB devices such as game pads pointing devices printers and keyboards to your computer VGA Video Graphics Array A video display standard originally introduced by IBM with the PS 2 series of personal computers VRAM Video Random Access Memory A memo...

Page 92: ...e REN is used to deter mine the number of devices that may be connected to a telephone line Excessive RENs on a telephone may result in the devices not ringing in response to an incoming call In most but not all areas the sum of RENs should not exceed five 5 0 To be certain of the number of devices that may be connected to a line as determined by the total RENs contact the local tele phone company...

Page 93: ...éro d enregistrement Le sigle IC placé devant le numéro d enregistrement signifie que l enregistrement s est effectué conformément à une déclaration de conformité et indique que les spécifications techniques d Industrie Canada ont été respectées Il n implique pas qu Industrie Canada a approuvé le matériel Avant de connecter cet équipement à une ligne télépho nique l utilisateur doit vérifier s il ...

Page 94: ...84 L i f e B o o k A 3 0 0 0 S e r i e s N o t e b o o k S e c t i o n E i g h t falcon3 book Page 84 Thursday May 24 2007 8 44 AM ...

Page 95: ...85 Appendix A Integrated Wireless LAN User s Guide falcon3 book Page 85 Thursday May 24 2007 8 44 AM ...

Page 96: ...86 L i f e B o o k A 3 0 0 0 S e r i e s N o t e b o o k A p p e n d i x falcon3 book Page 86 Thursday May 24 2007 8 44 AM ...

Page 97: ...tement This equipment has been tested and found to comply with the limits for a Class B digital device pursuant to Part 15 of the FCC Rules These limits are designed to provide reasonable protection against harmful interference in a residential installa tion This equipment generates uses and can radiate radio frequency energy If not installed and used in accordance with the instructions it may cau...

Page 98: ...802 11g mode 108 Mbps maxi mum data rate with compatible access points and 11 Mbps in IEEE802 11b mode The WLAN device supports the following encryption methods WEP TKIP and AES encryption WIRELESS LAN MODES USING THIS DEVICE Ad Hoc Mode See Figure A 1 Ad Hoc Mode refers to a wireless network architecture where wireless network connectivity between multiple computers is established without a centr...

Page 99: ...eration of the WLAN device DEACTIVATING THE WLAN DEVICE Deactivation disabling of the WLAN device may be desired in certain circumstances to extend battery life or where certain environments require it i e hospitals clinics airplanes etc Deactivation using the Wireless On Off Switch The WLAN device can be disabled quickly and effi ciently by sliding the Wireless On Off Switch to the Off position t...

Page 100: ...he left panel 4 Click on the Add button 5 Depending upon what type of connection you would like to make make a selection For an infra structure network select Manually create a net work profile For ad hoc network select Create an ad hoc network 6 Enter the required information It may be necessary to consult with your network administrator for some of the information 7 In the event you require assi...

Page 101: ...rtening the distance to the access point or removing any obstacles for better sight The WLAN device has been deactivated or disabled Check if the wireless switch is turned ON Also verify Disable Radio is not checked in Network setting window The computer to be connected is turned off Check if the computer to be connected is turned ON RF interference from Access Points or other wireless networks Th...

Page 102: ...ed an Ethernet address or IEEE MAC address is the 48 bit address typically written as twelve hexadecimal digits 0 through 9 and A through F or as six hexadecimal numbers separated by periods or colons e g 0080002012ef 0 80 0 2 20 ef which uniquely identifies a computer that has an Ethernet interface MTU Maximum Transmission Unit The maximum size of data which can be transmitted at one time in netw...

Page 103: ...so all access points and all devices attempting to connect to a specific WLAN must use the same SSID A device will not be permitted to join the BSS unless it can provide the unique SSID Because the SSID is broadcast in plain text it does not supply any security to the network Subnet mask TCP IP network is controlled by being divided into multiple smaller networks subnets IP address consists of the...

Page 104: ...G 802 11a b g WLAN device conforms to IEEE 802 11a and 802 11b g Wi Fi based Transfer rate Automatic switching IEEE 802 11a g 54 Mbps maximum data rate 108 Mbps maximum data rate with compatible access points IEEE 802 11b 11 Mbps maximum data rate Active frequency 802 11b g 2400 2473 MHz 802 11a 5050 5850 MHz Number of channels 802 11a 8 independent channels 802 11b g 11 channels 3 non overlapping...

Page 105: ...ansmitter Canadian Notice To prevent radio interference to the licensed service this device is intended to be operated indoors and away from windows to provide maximum shielding Equipment or its transmit antenna that is installed outdoors is subject to licensing Warranty Users are not authorized to modify this product Any modifications invalidate the warranty This equipment may not be modified alt...

Page 106: ...96 L i f e B o o k A 3 0 0 0 S e r i e s N o t e b o o k A p p e n d i x falcon3 book Page 96 Thursday May 24 2007 8 44 AM ...

Page 107: ...97 Appendix B Using the Fingerprint Sensor falcon3 book Page 97 Thursday May 24 2007 8 44 AM ...

Page 108: ...98 L i f e B o o k A 3 0 0 0 S e r i e s N o t e b o o k falcon3 book Page 98 Thursday May 24 2007 8 44 AM ...

Page 109: ...see if the following are present The presence of the gold key shaped OmniPass icon in the notification area at the bottom right of the screen The presence of the Softex program group in the Programs group of the Start menu System Requirements The OmniPass application requires space on your hard drive it also requires specific Operating Systems OS s The minimum requirements are as follows Windows X...

Page 110: ...m his home computer and enrolls an OmniPass user with username John_01 and password freq14 He then goes to his webmail site to log onto his account He inputs his webmail credentials as usual username John_02 and password lifebook but instead of clicking Submit he directs OmniPass to Remember Password Now whenever he returns to that site OmniPass will prompt him to supply access credentials John en...

Page 111: ... To capture a fingerprint gently swipe or pull your fingertip over the sensor starting at the second knuckle towards yourself Figure B 2 Swiping too fast or too slow will result in a failed capture The Choose Finger screen has a Practice button click it to practice capturing your fingerprint When you are comfortable with how your fingerprint is captured proceed to enroll a finger 3 Once OmniPass h...

Page 112: ...ting and each time you navigate to this site OmniPass will log you into the site without prompting you to authenticate If you uncheck both boxes in Settings for this Password Site OmniPass will prompt you for your master pass word or fingerprint authentication device Once you have authenticated with OmniPass your credentials will be filled in to the site login prompt but you will have to click the...

Page 113: ...cess to Vault Management click Manage Identities under Vault Settings You can only manage the identities of the currently logged in OmniPass user To add a new identity click New Identity or double click Click here to add a new identity Name the new identity and click OK then click Apply You can now switch to the new identity and start remembering passwords To delete an identity highlight the ident...

Page 114: ...rt the OmniPass user data to the new system If you export an OmniPass only user you can import that user to any computer running OmniPass pro vided that a user with that name is not already enrolled in OmniPass If you attempt to import a user profile who has the same name as a user already enrolled in OmniPass the OmniPass import function will fail OMNIPASS CONTROL CENTER This section will serve t...

Page 115: ...assword Cannot add Windows users to OmniPass If you experience difficulties adding a Windows user to OmniPass you may need to adjust your local secu rity settings You can do this by going to Start Control Panel Administrative Tools and Local Security Settings Expand Local Policies expand Security Options and double click Network Access Sharing and Security Model for Local Accounts The correct sett...

Page 116: ...106 L i f e B o o k A 3 0 0 0 S e r i e s N o t e b o o k falcon3 book Page 106 Thursday May 24 2007 8 44 AM ...

Page 117: ...4 72 DIMM 42 Disk care 66 Display Panel 6 24 adjusting 24 brightness 24 closing 24 latch 6 opening 24 problems 55 Display Timeout 29 Double Clicking 15 Dragging 16 Drivers and Application Restore Disc 59 DVD drive access indicator 12 problems 50 tray release 58 E Emergency Optical Drive Release 7 Error Messages 57 ExpressCards 40 External Floppy Disk Drive problems 51 External Video Port 9 45 F FD...

Page 118: ...ng 38 removing 39 Memory Stick SD xD Card 38 39 Microphone Jack 7 45 Microsoft Works 73 Modem 9 52 Modem Jack 44 Modem Result Codes 58 Mouse problems 51 N Numeric Keypad 13 NumLk 12 O Optical Digital Audio Out Jack 6 Optical Drive 7 35 control panel 36 loading 35 removing 36 tray release 36 P PC Card care 67 inserting 41 problems 52 removing 40 41 slot 8 Point and Write Touchpad 16 Power AC adapte...

Page 119: ...oprocessor 71 Power 72 Video 71 Status Indicator Panel 6 11 Stereo Speakers 6 T Touchpad 15 buttons 15 controls 16 Touchpad Pointing Device 6 Troubleshooting 49 U Unpacking 5 USB 2 0 Ports 8 9 10 44 52 V Volume control 18 W Warranty 1 Windows keys 13 application key 13 start keys 13 Wireless LAN Before Using the Wireless LAN 88 Connection using Wireless Zero Tool 90 Infrastructure Mode 88 IP addre...

Page 120: ...110 L i f e B o o k A 3 0 0 0 S e r i e s N o t e b o o k I n d e x falcon3 book Page 110 Thursday May 24 2007 8 44 AM ...

Reviews: