8
6
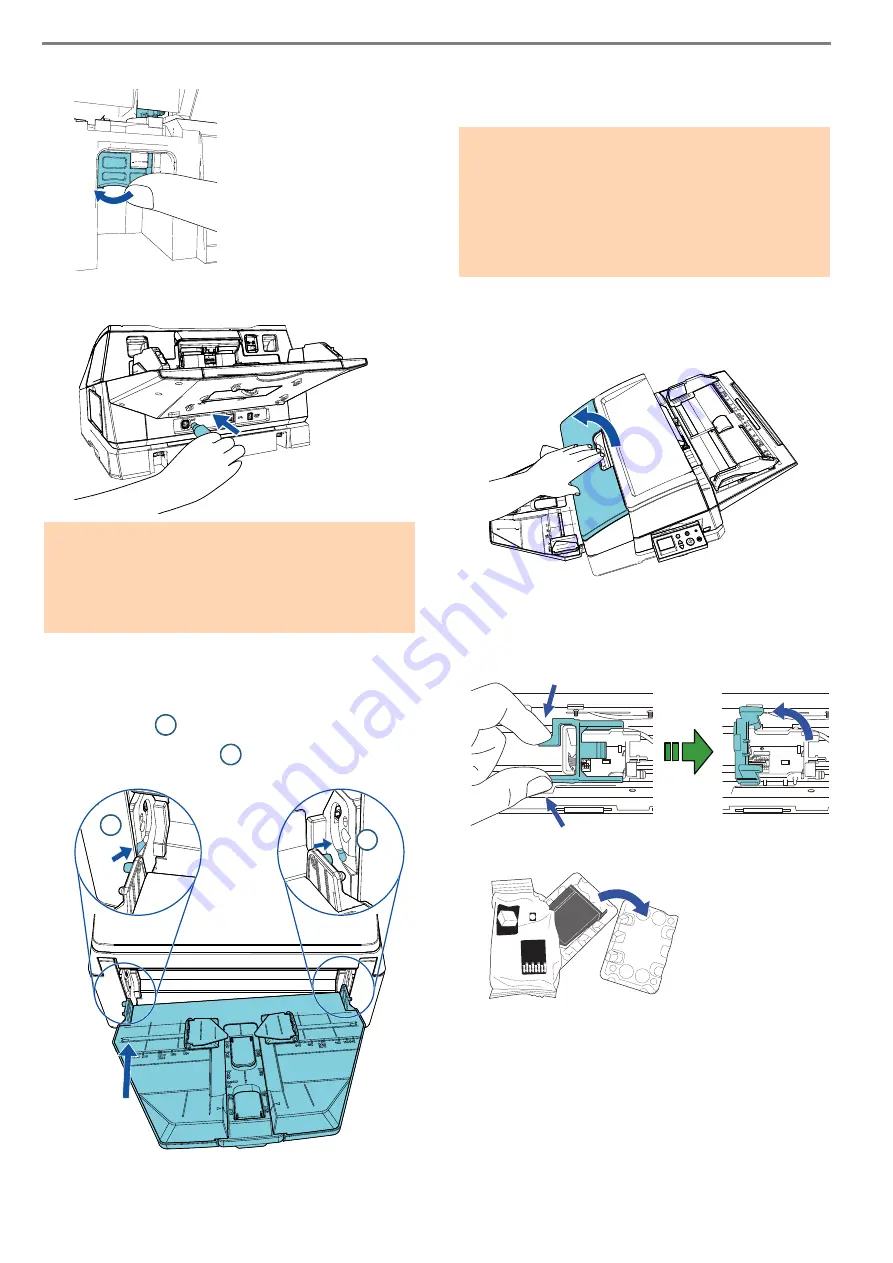
Turn the locks inside (two locks on the back side).
7
Connect the EXT cable to the connector on the
back of the scanner.
8
Install the stacker removed from the scanner (in
procedure 2) to the imprinter.
Insert the protrusion on the right side of the stacker
into the slot
and then push the left side of the
stacker along the slot
in the direction of the
arrow.
9
Connect the power cable to the scanner.
2.2 Loading the Print Cartridge
Load the print cartridge as follows:
1
Turn off the scanner.
2
Place your hand in the middle part of the print
cartridge and open it as shown below.
3
Remove the tape that holds the print cartridge
holder and the paper guides.
4
Lift the print cartridge holder by pinching the lever
with your fingers as shown below.
5
Take out the print cartridge from the bag.
ATTENTION
The imprinter will not work if the EXT cable is not
connected to the scanner. Scanning when the EXT
cable is not connected can cause documents to
jam inside the imprinter.
1
2
1
2
ATTENTION
When installing the print cartridge, install it
properly.
When you do not use the imprinter for a long time,
remove the print cartridge from the imprinter. Ink
will be consumed every time the scanner is
powered-on even if printing is not done.
LQNLHW
SULQWFRQUJKH
KSFT
KS


