


Removing and installing components during servicing
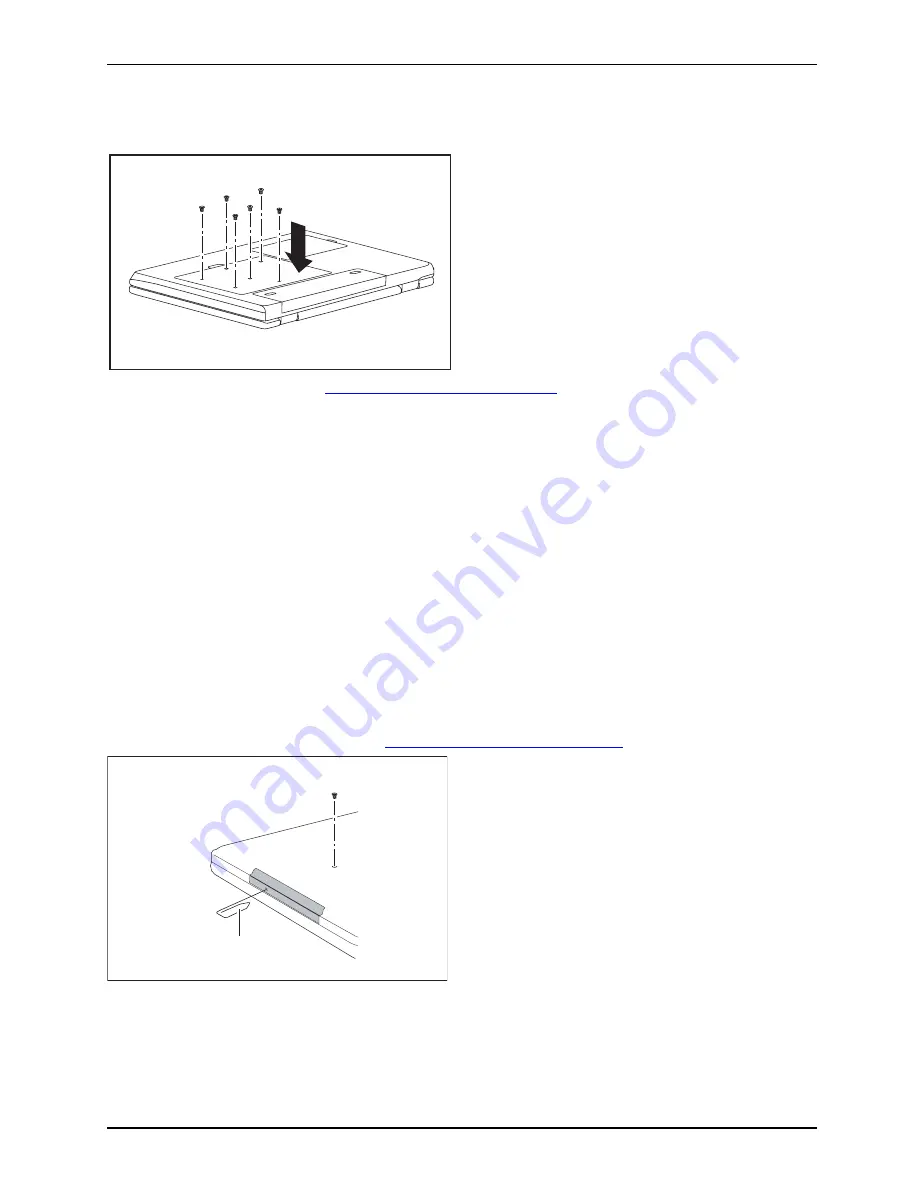
Attaching the cover
1
2
2
2
2
2
2
►
Place the cover in the correct
mounting position (1).
►
Secure the cover with the screws (2).
►
Reinstall the battery (see
"Installing the battery", Page 12
).
►
Turn the notebook the right way up and place it on a
fl
at surface.
►
Reconnect the cables that you disconnected previously.
Removing and installing the optical drive
If you are asked by the Hotline/Help Desk to remove and install the optical
drive yourself, proceed as follows:
Removing the optical drive
►
Switch off your notebook and disconnect the power plug from the mains socket.
►
Close the LCD screen.
►
Disconnect all cables connected to the notebook.
►
Turn your notebook over and place it on a
fi
rm,
fl
at and clean surface. If necessary, lay
an anti-slip cloth on this surface to prevent the notebook from being scratched.
►
Remove the battery (see Chapter
"Removing the battery", Page 12
).
Harddisk
2
1
►
Remove the screw (1).
►
Press a metal pin or wire (e.g. paperclip)
fi
rmly into the opening (2).
The drive tray will be ejected. You can now
pull out the drive tray completely.
►
Hold the drive tray
fi
rmly on both sides in the centre, and carefully pull
the optical drive out of the notebook.
►
Push in the drive tray until you feel it lock into place.
A26391-K245-Z220-1-7619, edition 1
21
Summary of Contents for ESPRIMO Mobile V6555
Page 1: ...ESPRIMO Mobile V6515 V6555 EasyGuide ...
Page 3: ......


