


System expansions
Installing an accessible 5
1
/
4
inch drive (e.g. DVD drive)
►
Remove the cover (see chapter
►
Remove the front panel (see chapter
"Removing the front panel", Page 34
).
►
Remove the drive cover if one is
fi
tted. To do this, press the corresponding drive cover
lightly out forwards and pull the drive cover forward out of the front panel.
Do not throw away the covers. If you remove the drive again, you must reinstall the
covers (cooling,
fi
re protection or EMC regulations to be complied with).
EMC,electromagnetic compatibility
►
Remove the drive cage (see chapter
"Removing the drive carrier", Page 37
).
►
Turn the drive cage over.
►
Take the new drive out of its packaging.
1
2
2
2
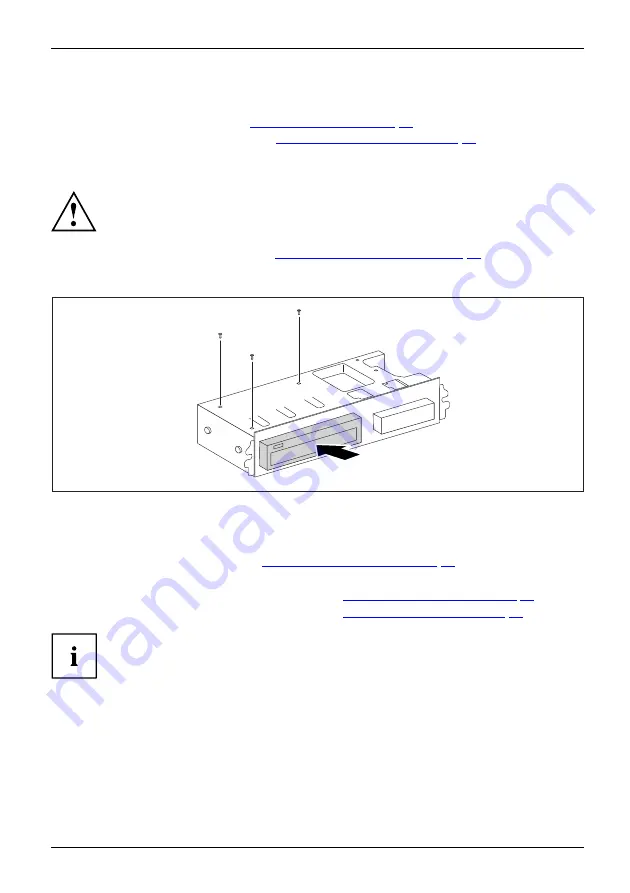
►
Slide the new drive into the drive cage (1) until the stop. Make sure that the screw
holes of the drive cage and of the drive are aligned.
►
Fasten the screws (2).
►
Install the drive cage (see chapter
"Installing the drive cage", Page 38
►
Plug the data and the power supply connectors into the drive. Make sure the polarity is correct.
►
Secure the front panel on the casing (see chapter
"Securing the front panel", Page 35
►
Install the cover on the casing again (see chapter
"Reattaching the cover", Page 36
).
It may be necessary to modify the entry for the drive in the BIOS Setup.
Fujitsu Technology Solutions
41
Summary of Contents for ESPRIMO E352 Series
Page 1: ...System Operating Manual ESPRIMO E352x E372x E4xx ...
Page 3: ......


