15
Inserting MO Disk
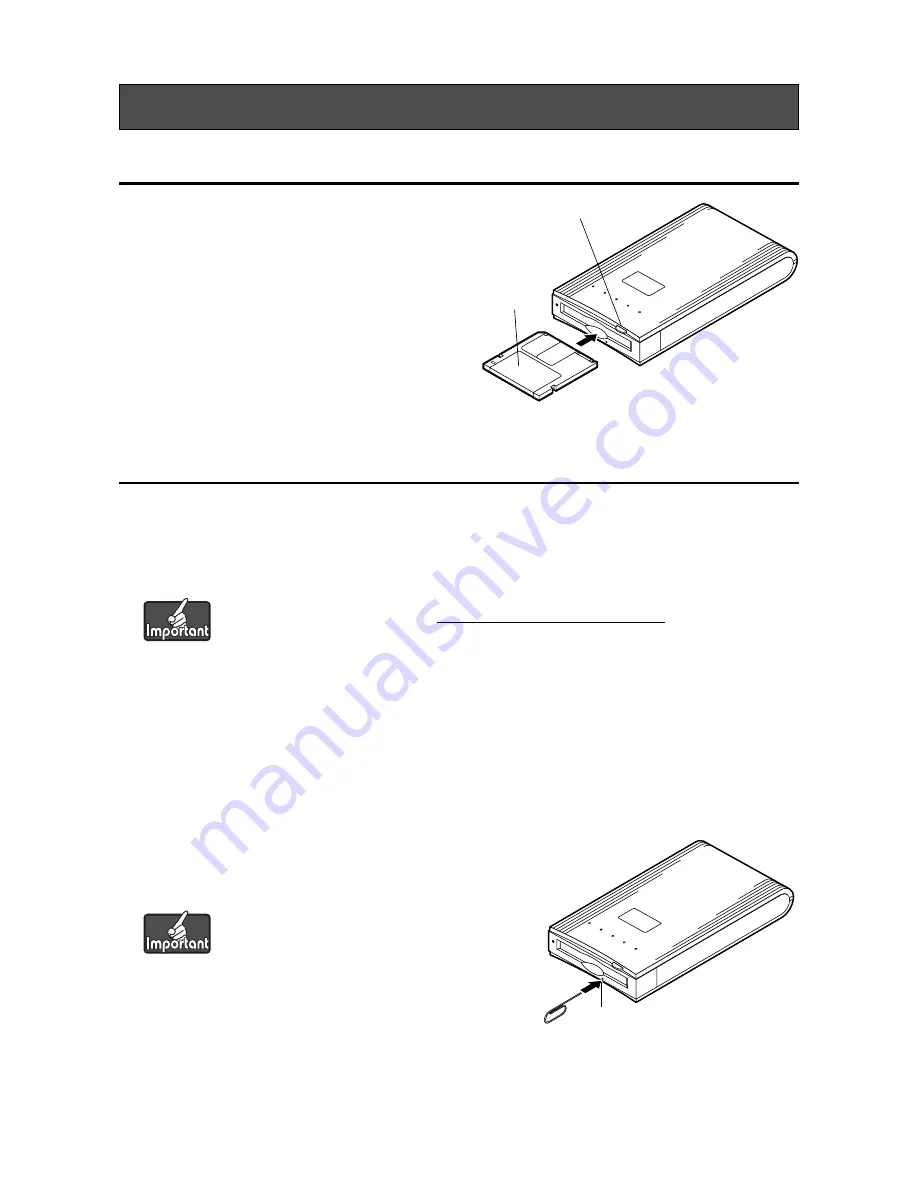
Gently insert the MO disk with the label side up, as
shown, until the disk clicks into the place. Never force the
disk into the drive or insert the MO disk upside down as
this may damage the drive.
The access light will come on while the MO disk is
loaded. Wait for the access light to go off before using
disk. The 2.3GB and 1.3GB MO disk takes a little longer
to become ready after disk insertion.
• Since a floppy disk is about the same size as your
MO disk, be careful to never insert a floppy disk into
the MO drive.
• Do not insert foreign objects into the drive.
Ejecting MO Disk
You can eject an MO disk from the MO drive using the following methods.
For Windows users
Right-click the removable disk icon and select Eject from the pop-up menu.
For Macintosh users
Same manner as ejecting floppy disk, Drag and Drop the removable disk icon into the Trash icon.
For all users (Emergency Eject)
If the MO disk cannot be ejected properly as described above, or
appears to be jammed in the drive, the disk can be ejected using
Emergency Eject.
1. Straighten one end of a large paper clip.
2. Insert the straightened end of the paper clip into
the manual eject hole and press with moderate
force to eject the disk.
Using the MO drive
For Windows XP and Windows 2000 users:
If the MO disk cannot be ejected, see How to use Eject and format privilege Tool.
Turn off the MO drive and wait for 30 seconds or more
before ejecting the MO disk.
Eject button/Access Light
MO Disk
Eject Hole


