Assembly Instructions
SMARTCASE S520
__________________________________________________________________________________________________________________________________________________________
Page 8 of 12
V1.1 - 07/2019
www.fujitsu.com
Step 5 Installing optional HDD Tray
[updated]
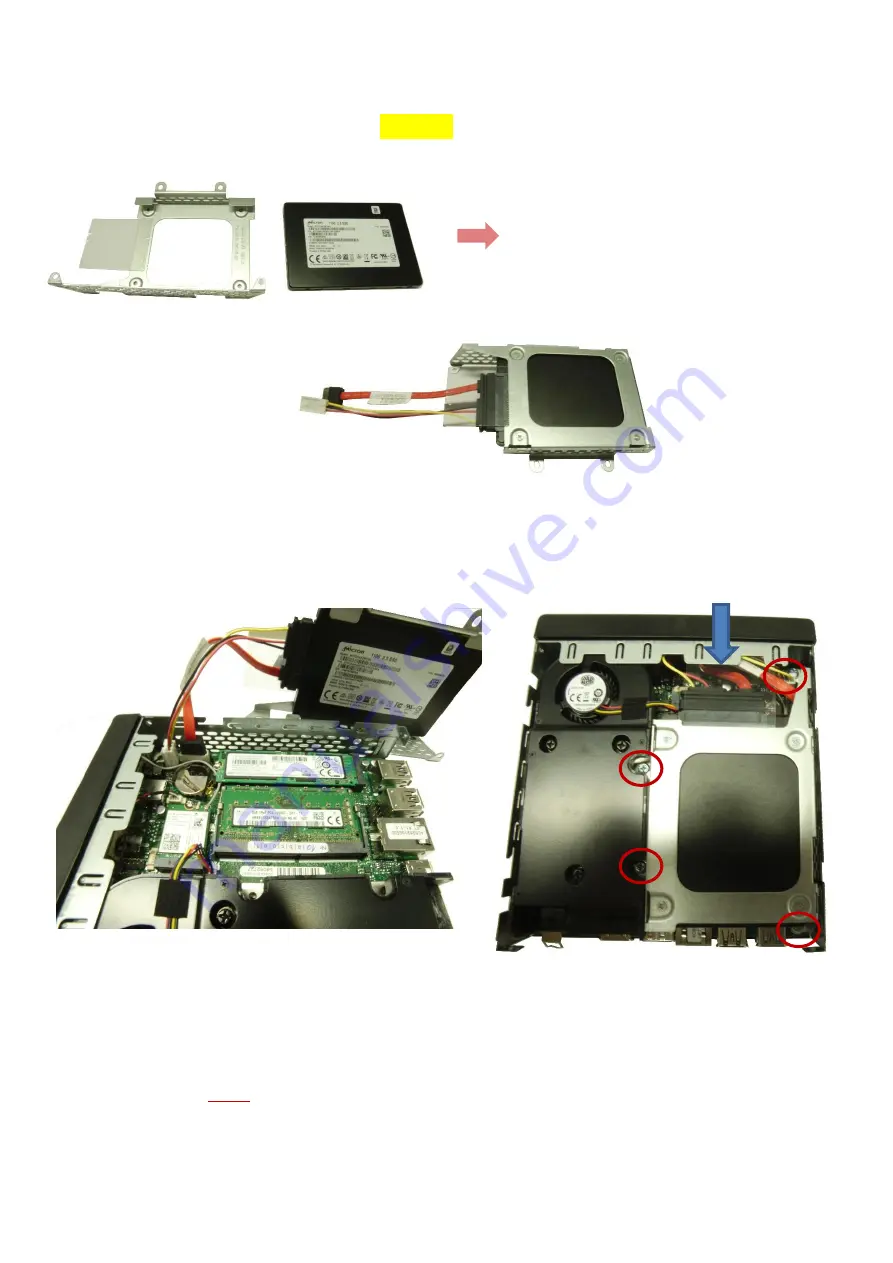
Plug the SATA and power cable to the onboard connectors. Then insert the HDD Tray carefully into the chassis and
assemble the four screws (M3x4.5; red marked).
NOTE: Consider the (optionally) installed WLAN antenna cables when installing the HDD Tray. The protection foil of
the HDD-Tray has to be below the chassis metal (blue arrow) to protect the cables when closing the chassis.
Install the SSD into the tray with four M3x3.5 srews
(0.25Nm)
and plug in the SATA/Power connectors.


