Working with floppy disks
Working with your notebook
A26391-LJ1-Z120-1-7619
31
Working with floppy disks
i
Follow the instructions supplied by the vendor of the floppy disks.
Never clean the floppy disk drives with cleaning disks. Even one attempt would destroy
the read/write head in the disk drive within 20 seconds.
3
2
1
5
6
4
7
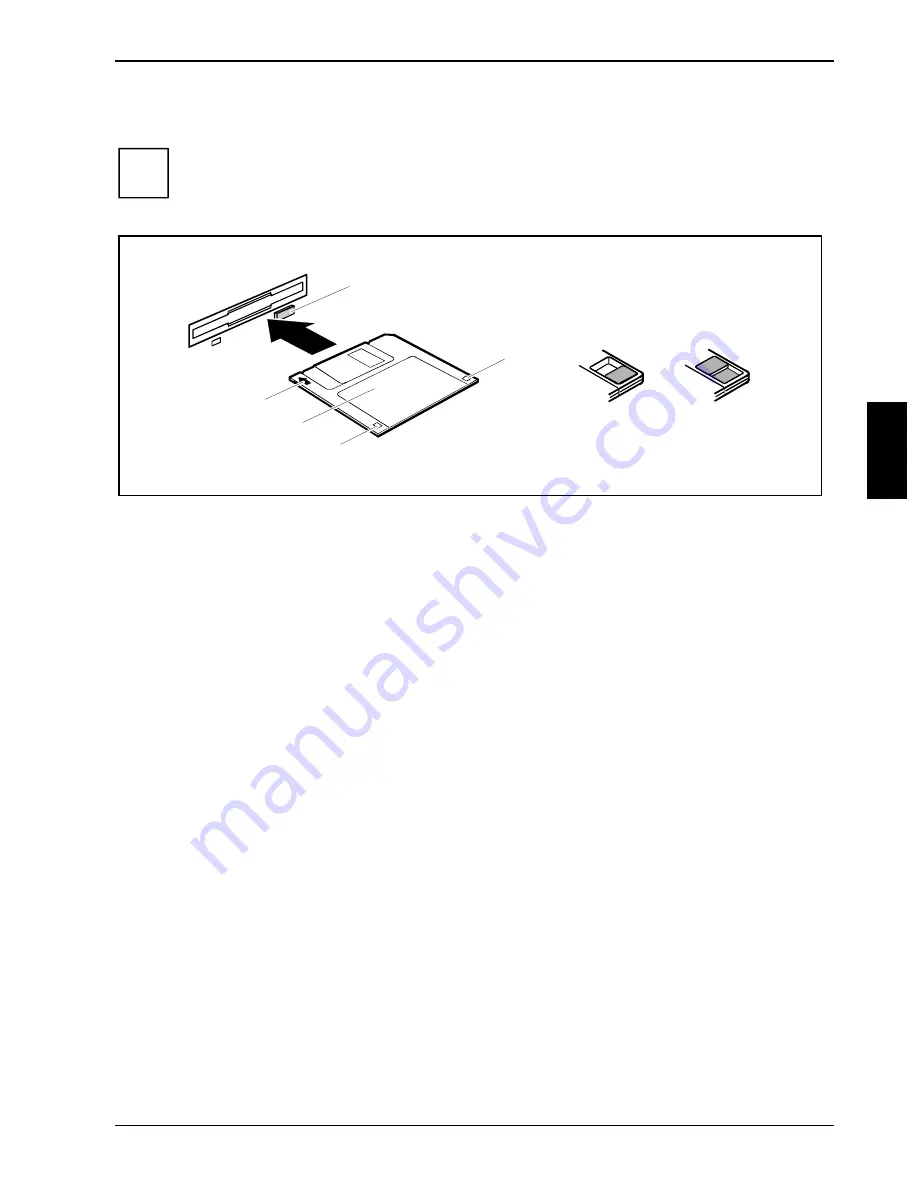
1 = Insertion direction
2 = Label area
3 = Write protection tab for a 1.44 Mbyte floppy disk
4 = Identification of a 1.44 MB floppy disk or write protect switch on a 120 MB floppy disk
5 = Eject button for inserted floppy disks
6 = Disk is write-protected
7 = Disk is not write-protected
To insert a diskette:
Ê
Push the floppy disk into the drive in the insertion direction (1) until it engages. The label
should be facing upward.
To remove a diskette:
Ê
Push the eject button (5).
Protect the floppy disk against being overwritten or erased
Ê
Slide the write-protect slider into position "write-protected" (6). The hole is now visible.
Deactivate write protection
Ê
Slide the write-protect slider into position (7). The hole is now covered.


