background image


Using your notebook


10600554388, edition 1 

19 

Key combinations 

The following description of key combinations refers to functions when using Microsoft Windows. 
Some of the following key combinations may not function in other operating systems and with some 
device drivers. 
Other key combinations are described in the relevant manuals supplied with your application 
programmes. 
Key combinations are performed as follows: 


Press and hold the first key in the combination. 


While holding the first key down, press the other key or keys in the combination. 


i


If the external keyboard does not feature a 

 Fn 

 key, you can simultaneously press 

the 

 Ctrl 

 + 

 Alt 

 keys instead. 


Fn

+

F1


Enabling Suspend mode 

This key combination switches the notebook into the Suspend mode. 

Fn

+

F3


Switching the loudspeakers on/off 

This key combination switches your notebook's loudspeaker off and on. 

F4

Fn

+


Switching between internal and external screen 

If an external monitor is connected, the monitor on which the output is to be 
displayed can be selected with this key combination. 
You can opt to use: 


just the notebook's LCD screen 


just the external monitor 


both the LCD screen and the external monitor. 

Fn

+

F5


Increasing the volume 

This key combination raises the volume of the integrated loudspeakers. 

F6

Fn

+


Reducing the volume 

This key combination reduces the volume of the integrated loudspeakers. 

Fn

+

F7


Increasing screen brightness 

This key combination increases screen brightness. 

F8

Fn

+


Decreasing screen brightness 

This key combination decreases screen brightness. 


Summary of Contents for AMILO A1640

Page 1: ...EasyGuide AMILO Series English answers2...

Page 2: ...artner your sales outlet Additional information is contained in the Help Desk list and the Warranty manual The Warranty manual can be found on the Drivers Utilities CD provided with your computer The...

Page 3: ......

Page 4: ...l ha sido impreso sobre papel reciclado Questo manuale stato stampato su carta da riciclaggio Denna handbok r tryckt p recyclingpapper Dit handboek werd op recycling papier gedrukt Herausgegeben von P...

Page 5: ...ion Index Notebook views Important notes Using your notebook for the first time Using your notebook Security functions Connecting external devices Settings in BIOS Setup Utility Troubleshooting and ti...

Page 6: ...odies AG Sony and Memory Stick are registered trademarks of Sony Electronics Inc All other trademarks referenced are trademarks or registered trademarks of their respective owners whose protected righ...

Page 7: ...otebook 11 Cleaning the notebook 12 Using your notebook for the first time 13 Unpacking and checking your notebook 13 Selecting a location 14 Connecting the power adapter 14 Using your notebook 15 Swi...

Page 8: ...p Utility 34 Protecting BIOS Setup Utility supervisor password 34 Password protection of operating system 36 Connecting external devices 37 Connecting an external monitor 37 Connecting USB devices 38...

Page 9: ...Contents 10600554388 edition 1 Technical data 47 AMILO Ax640 47 AMILO Mx405 49 AMILO Mx425 50 Power adapter 65 W 52 Power adapter 90 W 52 Index 53...

Page 10: ......

Page 11: ...out for connecting your notebook to your television An IEEE 1394 FireWire connection for high speed devices such as digital camcorders Three USB ports which provide easy expansion with webcams game pa...

Page 12: ...to loss of data invalidate your warranty destroy the notebook or endanger your life i Indicates important information which is required to use the system properly Text which follows this symbol descri...

Page 13: ...self with these components before you start to work with your notebook Opened Notebook 1 4 2 3 11 10 5 6 7 8 9 1 LCD screen 2 Easy Launch keys 3 processor fan controlling 4 Built in microphone 5 ON OF...

Page 14: ...On Off switch for Wireless LAN optional Back panel 14 Monitor port 15 Kensington Lock device Right side panel 16 PC card slot 17 PC card eject button 18 Headphones port 19 Audio connector 20 Microphon...

Page 15: ...dition 1 5 Left side panel 25 LAN port 26 Modem port 27 CD DVD drive 28 Insert Eject button 29 Opening for manual ejection Under side 30 Battery compartment 31 Battery release latch 32 Bass loudspeake...

Page 16: ......

Page 17: ...stop using them immediately Do not touch the contacts of the batteries Never interconnect the positive and negative terminals of a battery Batteries are harmful to the environment You should dispose...

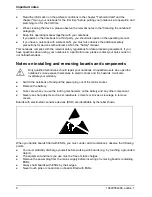
Page 18: ...Notes on installing and removing boards and components Only qualified technicians should repair your notebook Unqualified users who open the notebook s case expose themselves to electric shock and fir...

Page 19: ...ion Corporation and is intended for home and other limited viewing uses only unless otherwise authorised by Macrovision Corporation Reverse engineering or disassembly is prohibited Energy saving If yo...

Page 20: ...g for devices with wireless LAN This equipment complies with the requirements of Directive 1999 5 EC of the European Parliament and Commission from 9 March 1999 governing Radio and Telecommunications...

Page 21: ...ns adapter can be operated with the local mains voltage If this is not the case obtain the appropriate power adapter for your notebook Do not use any other voltage converter i If you travel in another...

Page 22: ...use cleaning products designed for computers Normal household cleaners and polishes can damage the markings on the keyboard and the device the paintwork or the notebook itself Ensure that no liquid e...

Page 23: ...n its built in battery You can increase the battery s life by enabling the system s energy saving functions When you use your notebook in your home or office we recommend you use the mains adapter ins...

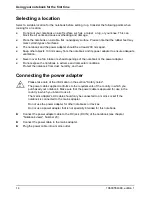
Page 24: ...the notebook or the power adapter Do not expose the notebook to extreme environmental conditions Protect the notebook from dust humidity and heat Connecting the power adapter Please take note of the...

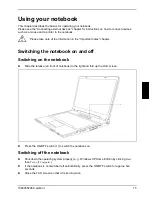
Page 25: ...rtant notes chapter Switching the notebook on and off Switching on the notebook Slide the release on front of notebook to the right and fold up the LCD screen Press the ON OFF switch 1 to switch the n...

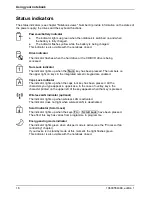
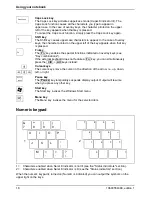
Page 26: ...ht on keys in the integrated numeric keypad are enabled A Caps Lock indicator The indicator lights up when the caps lock key has been pressed All the characters you type appear in uppercase In the cas...

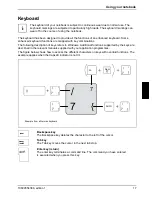
Page 27: ...scription of keys refers to Windows Additional functions supported by the keys are described in the relevant manuals supplied with your application programmes The figure below shows how to access the...

Page 28: ...ed on overlay keys see Key combinations If the external keyboard does not feature a Fn key you can simultaneously press the Ctrl Alt keys instead Cursor keys The cursor keys move the cursor in the dir...

Page 29: ...bling Suspend mode This key combination switches the notebook into the Suspend mode Fn F3 Switching the loudspeakers on off This key combination switches your notebook s loudspeaker off and on F4 Fn S...

Page 30: ...s are contained in the manual for your operating system Easy Launch keys Your notebook is equipped with two Easy Launch keys see chapter Notebook views Number 2 You can start the following application...

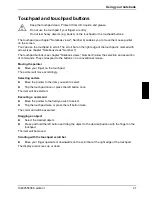
Page 31: ...ution of commands They correspond to the buttons on a conventional mouse Moving the pointer Move your finger on the touchpad The pointer will move accordingly Selecting an item Move the pointer to the...

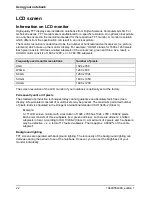
Page 32: ...280 x 800 SXGA 1280 x 1024 SXGA 1400 x 1050 UXGA 1600 x 1200 The screen resolution of the LCD monitor of your notebook is optimally set at the factory Permanently unlit or lit pixels The standard of p...

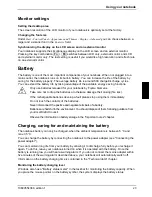
Page 33: ...batteries or otherwise damage their casing fire risk If the rechargeable batteries develop a fault please stop using them immediately Do not touch the contacts of the batteries Never interconnect the...

Page 34: ...ery compartment until it engages Close the battery compartment Using the power management features The notebook uses less power when the power management features are enabled You will then be able to...

Page 35: ...gn objects from getting into the PC card slot Insert the PC card end with the connector contacts into the card slot guide rails The labelled side of the PC card must face upwards Gently push the PC ca...

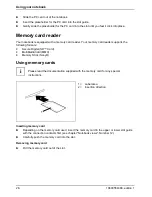
Page 36: ...r supports the following formats Secure Digital SD Card MultiMediaCard MMC Memory Stick Sony Using memory cards i Please read the documentation supplied with the memory card for any special instructio...

Page 37: ...RW is an optical data storage device that can be written with a maximum of 700 Mbyte of data a virtually unlimited number of times This means the data can be deleted and changed DVD DVD ROM and DVD vi...

Page 38: ...laser It is dangerous to loo directly at this beam Therefore do not remove any drive housing parts With the DVD RW drive you can read all CD DVD types named above You can also write CD R CD RW and DVD...

Page 39: ...e DVD RW Other types of DVD blanks are not supported by your CD DVD drive Inserting or removing a CD DVD Your notebook must be switched on Push the insert eject button see chapter Notebook views Numbe...

Page 40: ...to five times to play back corresponding DVD films Then the last regional code selected is retained and cannot be changed again i If a DVD film is to be watched in all regions it has the regional code...

Page 41: ...ne TBR 21 The modem can be operated in the following countries Multifrequency MFC dialling Belgium Denmark Germany Finland France Greece Great Britain Holland Ireland Iceland Italy Luxembourg Norway A...

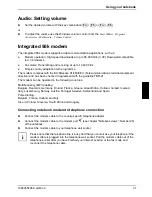
Page 42: ...reless LAN is integrated in your notebook Switching wireless LAN module on and off Slide the ON OFF switch for Wireless LAN 13 into the ON position to activate the wireless LAN module The wireless LAN...

Page 43: ...ll security functions The following sections explain the security features that are supplied with your notebook as standard Kensington Lock With the Kensington MicroSaver a sturdy steel cable you can...

Page 44: ...ng hints Make a note of the passwords and keep them in a safe place If you forget your supervisor password you will not be able to access your notebook Passwords are not covered by your warranty and a...

Page 45: ...the Enter key The notebook is rebooted and the new password is effective If you now want to open the BIOS Setup Utility you must enter your supervisor password Change supervisor password In order to c...

Page 46: ...go to the Security menu Select the Password Check option Select the Always option Select the Save Changes and Exit option under Exit Your notebook will now restart and you are asked to enter your pass...

Page 47: ...ons 4 Plug all power cables into the mains sockets Disconnecting devices from notebook 1 Turn off your notebook and all external devices 2 Unplug your notebook and all devices from the mains sockets 3...

Page 48: ...B ports see the Notebook views chapter Number 22 which also have a USB interface e g a printer a scanner or a modem i USB devices are hot pluggable This means you can connect and disconnect devices wh...

Page 49: ...al device to S Video Out You can connect an external device e g a TV to the S Video Out socket of your notebook see chapter Notebook views Number 24 to view films from DVDs photos or presentations etc...

Page 50: ......

Page 51: ...notebook Advanced For system settings such as interfaces keyboard and hard disks Security For security settings such as the password Boot For specifying the start order Power For setting the energy sa...

Page 52: ...e settings and exit the BIOS Setup Utility Select Save Changes and Exit and Yes to save the current settings and exit the BIOS Setup Utility The notebook is rebooted and the new settings come into eff...

Page 53: ...before you start Switch the notebook on Press the F12 key when the message F2 Setup F12 Boot Menu appears on the screen Insert the Windows XP Recovery CD into the CD DVD drive Select the CD ROM and p...

Page 54: ...itch the external monitor on Power saving has been activated screen is blank Press any key to continue Brightness is set too dark Adjust the brightness of the monitor Screen output is set to the noteb...

Page 55: ...correct monitor under Start Control Panel Appearance and Themes Display Settings Advanced Display The notebook cannot be started The battery is not installed correctly Switch the notebook off Check wh...

Page 56: ...ure freeze when playing some DVD films deactivate the accelerated hardware decryption it is activated in the default setting this can be recognised from the checkmark in the corresponding checkbox Ope...

Page 57: ...the model designation e g 7 AMILO A7640 or 1 AMILO A1640 These devices have an identical design and differ only in the type of LCD monitor used Processor Mobile AMD Athlon XP M from 3000 or Mobile AMD...

Page 58: ...CardBus PCMCIA PCMCIA 1 x type I or II Memory card reader Flash Card Port SD MS MMC Ports Monitor port 15 pin female connector Microphone jack connector mono Audio port connector stereo Video port 4 p...

Page 59: ...DIMM PC2100 or DDR333 SO DIMM PC2700 2 slots for 256 or 512 Mbyte modules Disk drives Hard disk drive CD DVD drive Electrical data Regulations complied with CE Maximum power draw notebook on with batt...

Page 60: ...eight depending on configuration approx 2 7 kg Battery Charging time when not in operation approx 3 hours Operating time approx 2 5 hours depending on application AMILO Mx425 The x in AMILO Mx425 is a...

Page 61: ...CIA 1 x type I or II Memory card reader Flash Card Port SD MS MS Pro MMC Ports Monitor port 15 pin female connector Microphone jack connector mono Audio port connector stereo Video port 4 pin mini DIN...

Page 62: ...40 V automatic Frequency 50 Hz to 60 Hz automatic Sub Rated voltage 20 V Max rated current 3 25 A You can readily order an additional power adapter and an additional power cable Power adapter 90 W Mai...

Page 63: ...n microphone 3 C Caps Lock Wireless LAN 16 Caps Lock indicator 16 CardBus see PC card CD blank 29 CD DVD AutoPlay function 30 emergency removal 29 inserting 29 overview 27 removing 29 working with 29...

Page 64: ...cator wireless LAN 16 Internet Easy Launch key 20 K Kensington Lock 4 33 applying 34 Kensington MicroSaver 33 34 Key Backspace 17 Caps Lock 18 cursor control keys 18 Enter 17 Fn key 18 Fn F4 19 Return...

Page 65: ...Lock indicator 16 Numeric keypad 17 18 O ON OFF switch 15 Open notebook view 3 Operating system activating system protection 36 cancel system protection 36 protecting with password 36 Operation prepar...

Page 66: ...41 System settings BIOS Setup Utility 41 T Technical data 47 Time daylight savings 43 not correct 43 Tips 43 Touchpad 3 21 cleaning 12 dragging items 21 executing commands 21 moving the pointer 21 sel...

Reviews: