7
Installation
4
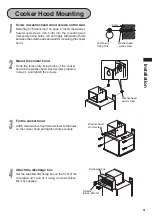
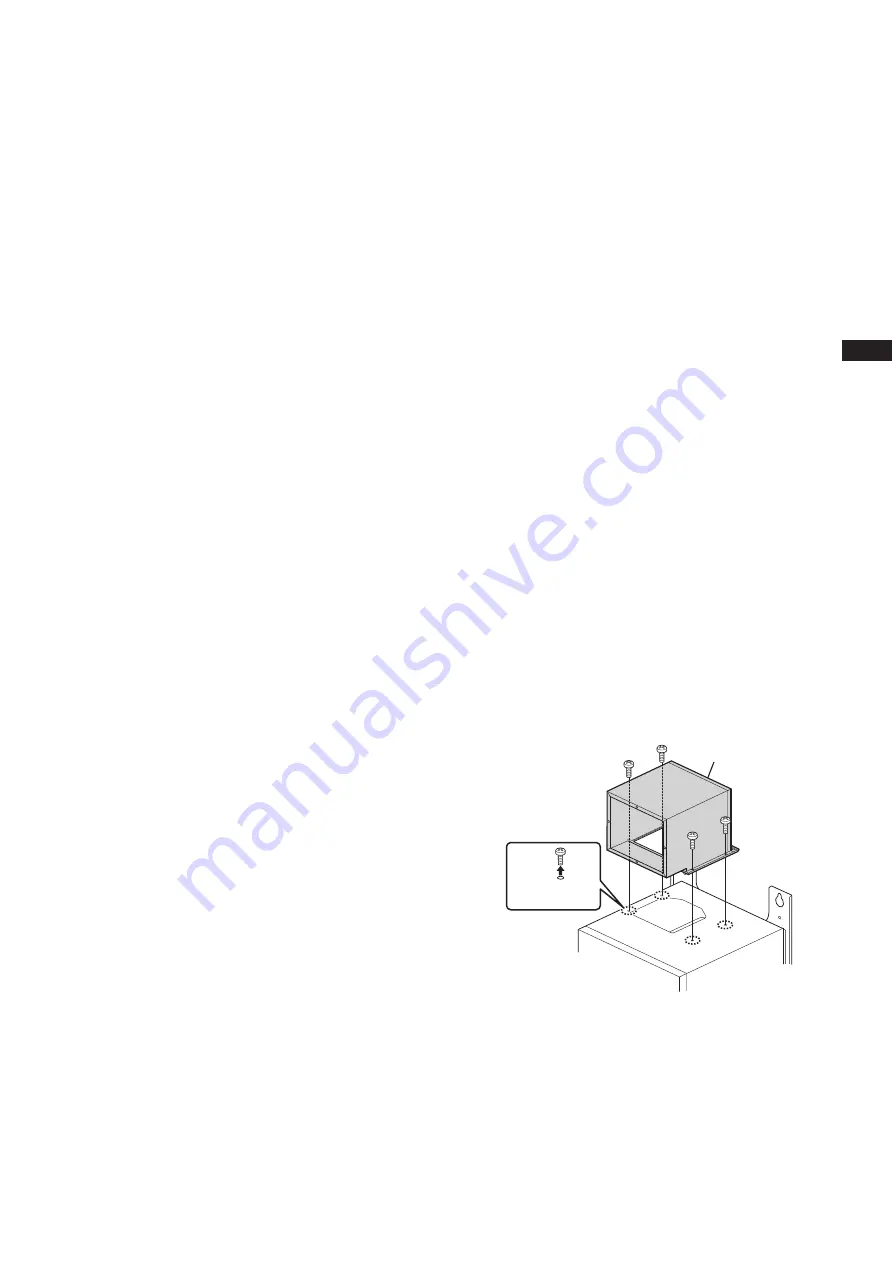
Attaching circulation unit
First, remove 4 screws from the top of the cooker
hood. Then put the supplied circulation unit on
the discharge port as shown, and fix it using
4 screws removed.
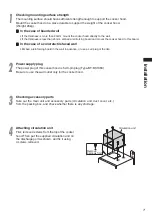
3
Checking accessory parts
Take out the main unit and accessory parts (circulation unit, duct cover, etc.)
from the packing box, and check whether there is any shortage.
1
Checking mounting surface strength
The mounting surface should have sufficient strength enough to support the cooker hood.
Mount the cooker hood on a place durable to support the weight of the cooker hood.
(Weight: 26kg)
In the case of boarded wall
If the thickness is more than 20mm, mount the cooker hood directly to the wall.
If the thickness is less than 20mm, embed a reinforcing board and mount the cooker hood to this board.
In the case of a concrete/tile faced wall
Embed a reinforcing board in the wall in advance, or use a curl plug or the like.
2
Power supply plug
The power plug of this cooker hood is 5A 3-pin plug (Type-BF: BS1363).
Be sure to use the wall outlet only for the cooker hood.
Circulation unit
Remove
4 screws first
Summary of Contents for NL-900R
Page 12: ......


