background image

123

Appendix

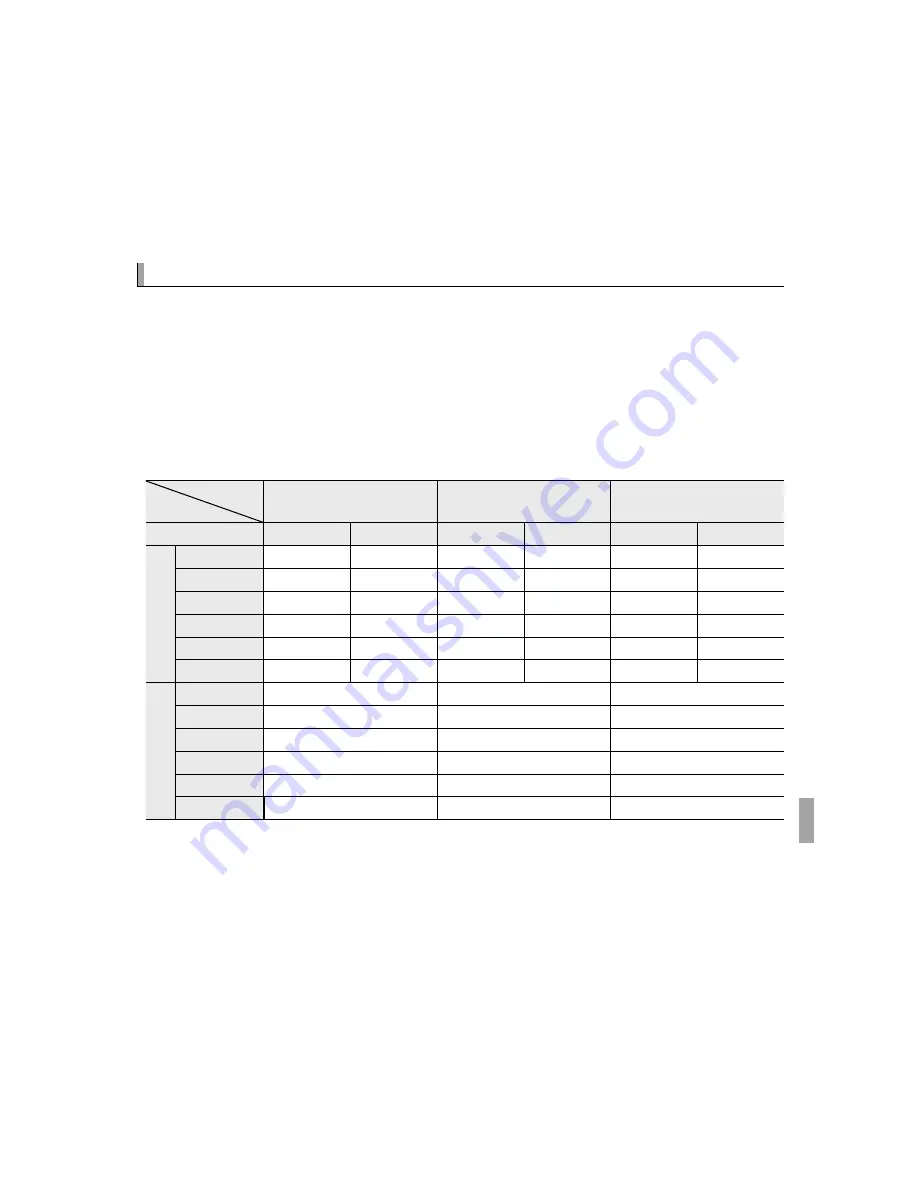
 Internal Memory/Memory Card Capacity

 Internal Memory/Memory Card Capacity

The following table shows the recording time or number of pictures available 
at diff erent image sizes.  All fi gures are approximate; fi le size varies with the 
scene recorded, producing wide variations in the number of fi les that can be 
stored.  The number of exposures or length remaining may not diminish at an 
even rate.  A limited number of test pictures can be taken when no memory 
card is inserted.


FinePix F550EXR

Medium

Medium

O

O

Internal memory 

Internal memory 

(approx. 39 MB)

(approx. 39 MB)

4 GB

4 GB

8 GB

8 GB

T

T

FINE

FINE

NORMAL

NORMAL

FINE

FINE

NORMAL

NORMAL

FINE

FINE

NORMAL

NORMAL

Phot

ographs

Phot

ographs

4:3

4:3

5

5

9

9

620

620

980

980

1250

1250

2000

2000

16:9

16:9

7

7

12

12

820

820

1300

1300

1670

1670

2650

2650

4:3

4:3

9

9

18

18

980

980

1930

1930

1980

1980

3910

3910

16:9

16:9

12

12

24

24

1300

1300

2580

2580

2650

2650

5240

5240

4:3

4:3

18

18

37

37

1960

1960

3800

3800

3970

3970

7700

7700

16:9

16:9

35

35

54

54

3680

3680

5530

5530

7470

7470

11200

11200

Mo
vie

Mo
vie

i

i

 1920

 1920

 1

 1

21 sec.

21 sec.

37 min.

37 min.

76 min.

76 min.

h

h

 1280

 1280

 1

 1

27 sec.

27 sec.

48 min.

48 min.

98 min.

98 min.

f

f

 2

 2

64 sec.

64 sec.

113 min.

113 min.

229 min.

229 min.

k

k

 640

 640

×

×

480

480

 3

 3

47 sec.

47 sec.

84 min.

84 min.

171 min.

171 min.

k

k

 320

 320

×

×

240

240

 3

 3

95 sec.

95 sec.

168 min.

168 min.

342 min.

342 min.

k

k

 320

 320

×

×

112

112

 3

 3

47 sec.

47 sec.

84 min.

84 min.

171 min.

171 min.

1 Use a 

G

 card or better. Individual movies can not exceed 29 minutes in length.

2 Individual movies can not exceed 115 minutes in length.
3 Use a 

G

 card or better. Individual movies can not exceed 30 seconds in length.

Summary of Contents for FinePix F500EXR

Page 1: ...hat you have read and un derstood its contents and the warnings in For Your Safety Pii before using the camera For information on related products visit our website at http www fujifilm com products d...

Page 2: ...cords as this can result in a risk of re or electric shock Ventilation Slots and openings in the cabinet are provided for ventilation to ensure reliable operation of the video product and to pro tect...

Page 3: ...the video product Lightning For added protection for this video product receiver during a lightning storm or when it is left unattended and unused for long periods of time unplug it from the wall out...

Page 4: ...camera in the bathroom or shower This can cause a re or electric shock Donot disassemble Never attempt to change or take apart the camera never open the case Failure to observe this precaution can cau...

Page 5: ...objects on the camera This can cause the heavy object to tip over or fall and cause injury Do not move the camera while the AC power adapter is still connect ed Do not pull on the connection cord to d...

Page 6: ...ouch imme diately after charging or use This is normal Battery Life At normal temperatures the battery can be recharged about 300 times A noticeable de crease in the length of time the battery will ho...

Page 7: ...battery charger Q CAUTION Do not use the discharge option with alkaline batteries The camera draws a small amount of current even when o Ni MH batteries that have been left in the camera for an extend...

Page 8: ...rinse your mouth thoroughly with water Drink large quantities of water and induce vomiting then seek medical assistance Although the display is manufactured using extremely high precision technology...

Page 9: ...s representations or war ranties of any kind express or implied arising by law or otherwise including but not limited to content quality accuracy completeness e ectiveness reliability tness for a part...

Page 10: ...r Majesty the Queen in Right of Canada Queen s Printer for Ontario Canada Post Corporation GeoBase Department of Natural Resources Canada ZIP 4 United States Postal Service 2010 the USPS Australia Cop...

Page 11: ...t available DETAIL INFORMATION DETAIL INFORMATION P P 61 61 Z Z ADVANCED ANTI BLUR ADVANCED ANTI BLUR P P 23 23 P P BEST FRAME CAPTURE BEST FRAME CAPTURE P P 45 45 O O AE BKT AE BKT P P 46 46 X X FILM...

Page 12: ...re list ed here Having a specific problem with the camera Find the answer here WarningMessagesandDisplays WarningMessagesandDisplays P P116 116 Find out what s behind that flashing icon or error messa...

Page 13: ...mera lights and sounds Frequently Used Buttons Frequently Used Buttons Taking Pictures During Playback Taking Pictures During Playback y To return instantly to shooting mode press the shutter button h...

Page 14: ...serting the Battery and a Memory Card 9 Compatible Memory Cards 12 Turning the Camera on and Off 14 Shooting Mode 14 Playback Mode 14 Basic Setup 16 Basic Photography and Playback Basic Photography an...

Page 15: ...ng Data 51 Adding Faces Automatically 51 More on Playback More on Playback Playback Options 53 Continuous Shooting 53 I Favorites Rating Pictures 53 Playback Zoom 54 Multi Frame Playback 55 ADeleting...

Page 16: ...UR F550EXR Only 85 b FACE DETECTION 85 C PHOTOMETRY 85 F AF MODE 86 n FACE RECOGNITION 86 F MOVIE AF MODE 87 W MOVIE MODE 87 J AE BKT EV STEPS F550EXR Only 87 Using the Menus Playback Mode 88 Using th...

Page 17: ...CKING DATA F550EXR Only 100 Rkm mile F550EXR Only 100 A IMAGE DISP 100 B FRAME NO 101 G OPERATIONVOL 101 H SHUTTERVOLUME 101 e SHUTTER SOUND 102 I PLAYBACKVOLUME 102 J LCD BRIGHTNESS 102 M AUTO POWER...

Page 18: ...Camera 108 Storage and Use 108 Water and Sand 108 Condensation 108 Cleaning 109 Traveling 109 Troubleshooting Troubleshooting Problems and Solutions 110 Warning Messages and Displays 116 Appendix App...

Page 19: ...ges in this manual on which related information may be found Menus and other text in the LCD monitor are shown in bold In the illustra tions in this manual displays may be simplified for explanatory p...

Page 20: ...ch item Selector button Move cursor up d exposure compensation button P35 b delete button Pxiii MENU OK button Move cursor right N flash button P37 Move cursor left F macro button P36 Command dial Mov...

Page 21: ...Speaker 64 95 23 USB multi connector 65 67 75 24 Connector for HDMI cable 66 25 Battery latch 9 11 26 Battery chamber 9 27 Memory card slot 10 Press and hold the DISP BACK button until o is displayed...

Page 22: ...ce 84 16 Battery level 5 17 Dual IS mode 102 18 GPS signal strength F550EXR only 40 19 Exposure compensation 35 20 Aperture 21 Shutter speed 22 Date and time 16 23 Blur warning 38 116 24 Focus frame 3...

Page 23: ...or upload to 91 12 Photobook assist 58 13 Voice memo indicator 95 14 DPOF print indicator 69 15 Protected image 92 16 Favorites 53 1 Playback mode indicator 21 53 2 Intelligent Face Detection indicato...

Page 24: ...ewing Indicators Press DISP BACK to cycle through shooting and playback indicators as follows Shooting Indicators displayed indicators hidden best framing HD framing histo gram F550EXR only Playback I...

Page 25: ...the charger into a power outlet The charging indicator will light The Charging Indicator The Charging Indicator The charging indicator shows battery charge status as follows Charging indicator Chargin...

Page 26: ...the Battery 3 Charge the battery Remove the battery when charging is complete See the specifications P128 for charging times note that charging times increase at low tem peratures Q Unplug the charger...

Page 27: ...en the battery chamber cover when the camera is on Failure to ob serve this precaution could result in dam age to image files or memory cards Q Do not use excessive force when handling the battery cha...

Page 28: ...n angle or use force If the memory card is not correctly inserted or no memory card is inserted a will appear in the LCD monitor and internal memory will be used for re cording and playback Click Q SD...

Page 29: ...red by an AC power adapter Press the shutter button to end the show Removing the Battery and Memory Card Removing the Battery and Memory Card Before removing the battery or memory card turn the camera...

Page 30: ...ld damage the card Format SD SDHC SDXC memory cards before first use and be sure to reformat all memory cards after using them in a computer or other device For more information on formatting memory c...

Page 31: ...me the copies not the originals Q Q Batteries Batteries Remove dirt from the battery terminals with a clean dry cloth Failure to observe this precaution could prevent the battery from charging Do not...

Page 32: ...de Switching to Playback Mode Press the a button to start playback Press the shutter button halfway to return to shooting mode PlaybackMode PlaybackMode To turn the camera on and begin playback press...

Page 33: ...on Q Fingerprints and other marks on the lens can affect pictures Keep the lens clean Q The ON OFF button does not completely end the supply of power to the camera R R Auto Power Off Auto Power Off Th...

Page 34: ...ress the selector left or right to highlight the year month day hour or minute and press up or down to change To change the order in which the year month and day are displayed highlight the date forma...

Page 35: ...EENERY SKY SKY GREENERY GREENERY Non portrait landscape Non portrait landscape a a c c d d e e u u v v w w x x y y z z Portrait Portrait Normallighting Normallighting ab ab cb cb fb fb ub ub vb vb wb...

Page 36: ...display Zoom indicator Zoom out Zoom in Holding the Camera Holding the Camera Hold the camera steady with both hands and brace your elbows against your sides Shaking or unsteady hands can blur your sh...

Page 37: ...ject is poorly lit the AF assist illuminatormaylight see C AFILLUMINATOR P 103 for information on disabling the illuminator Double beep If the camera is able to focus it will beep twice and the indica...

Page 38: ...t is poorly lit the flash may fire when the pic ture is taken For information on using the flash when lighting is poor see N Using the Flash Super Intelligent Flash P37 Click The Shutter Button The Sh...

Page 39: ...n taking important photo graphs take a test shot and check the results 1 Press the a button The most recent picture will be displayed 2 View additional pictures Press the selector right to view pictur...

Page 40: ...rease dynamic range or let the camera automatically adjust settings to suit the scene P23 SP SCENE POSITION Choose a scene suited to the subject or shooting conditions and let the camera do the rest P...

Page 41: ...a single image reducing noise mottling and blur R R n n is available when is available when ON ON is selected in the shooting menu is selected in the shooting menu P81 and the flash 81 and the flash...

Page 42: ...following options S RESOLUTION PRIORITY Choose for crisp clear shots T HIGH ISO LOW NOISE Reduce noise in pictures taken at high sensitivities U D RANGE PRIORITY Increase the amount of detail visible...

Page 43: ...panorama The camera zooms all the way out and zoom remains fixed at the wid est angle until shooting is complete 1 To select the angle through which you will pan the camera while shoot ing press the s...

Page 44: ...orded if shooting ends be fore the panorama is complete Q Shooting may be interrupted if the camera is panned too quickly or too slowly Pan ning the camera in a direction other than that shown cancels...

Page 45: ...left or right Use for portraits or photos of flowers similar to those pro duced by SLR cameras R Softening can not be applied to background objects that are too close to the main subject If a message...

Page 46: ...tic subjects at high zoom ratios R A single combined photograph may not be created with some scenes or if the subject or camera moves during shooting Do not move the cam era until shooting is complete...

Page 47: ...hen photographing cats M M LANDSCAPE LANDSCAPE Choose for daylight shots of buildings and landscapes N N SPORT SPORT Choose when photographing moving subjects O O NIGHT NIGHT Choose this mode for poor...

Page 48: ...imer menu offers a n AUTO RELEASE option that releases the shutter auto maticallywhenapetisdetected P39 Duringplayback imagesearch P57 canbe used to search for pictures taken in either mode R Although...

Page 49: ...icture will be under or over exposed at cur rent settings is shown by the exposure indicator 1000 F3 5 SETTING SHUTTER SPEED A AAPERTUREPRIORITYAE APERTUREPRIORITYAE You choose the aperture using the...

Page 50: ...l be displayed in red Adjust shut ter speed until the correct exposure is achieved If the subject is outside the metering range of the camera the aperture display will show F Press the shutter button...

Page 51: ...1 Focus Position the subject in the focus frame and press the shutter button halfway to lock focus and exposure Focus and exposure will remain locked while the shutter button is pressed halfway AF AE...

Page 52: ...car bodies Fast moving subjects Subjects photographed through a window or other re flective object Darksubjectsandsubjectsthatabsorbratherthanreflect light such as hair or fur Insubstantial subjects...

Page 53: ...or use the command dial to choose an exposure compen sation value and then press MENU OK Choose positive values to increase exposure Choose negative values to reduce exposure R A d icon and exposure...

Page 54: ...subjects near the center of the frame Use the zoom control to compose pictures P18 To exit macro mode press the selector left F and select OFF MACRO OFF R Use of a tripod is recommended to prevent bl...

Page 55: ...dimly lit indoor scenes Use the flash when lighting is poor for example when shoot ing at night or indoors under low light Press the selector right N and choose from the follow ing flash modes AUTO F...

Page 56: ...ot Do not move the camera until shooting is complete R The flash may cause vignetting Using the Flash Using the Flash The flash is automatically raised and lowered when the camera is turned on and off...

Page 57: ...a Use for portraits of babies S 10 SEC The shutter is released ten seconds after the shutter button is pressed Use for self portraits The self timer lamp on the front of the camera lights when the tim...

Page 58: ...updates GPS data only when on The camera may need some time to acquire GPS data when turned on This option is selected automatically at battery levels of B and below R GPS works best outdoors under cl...

Page 59: ...last able to update GPS data Q SelectOFFforR LOCATIONSEARCH P99 andR TRACKINGDATA P100 in the setup menu when in a hospital and before takeoff and landing if traveling by air Q Place names are current...

Page 60: ...tunnel or metal briefcase between tall buildings or in the vicinity of cell phones or other devices that broadcast in the 1 5GHz band Obey all local regulations regarding the use of GPS devices Note t...

Page 61: ...menu and select ON for b FACE DETECTION Faces can be detected with the camera in vertical or horizontal orientation if a face is detected it will be indicated by a green border If there is more than o...

Page 62: ...of pictures that can be taken in a single burst varies with the scene and camera settings The number of pictures that can be recorded depends on the memory available ITOP n The camera takes photograp...

Page 63: ...e the frame rate and number of shots 1 Press the selector right when the camera is in shooting mode 2 Highlight the current frame rate and press the selector right then press selector up or down to ch...

Page 64: ...of frames selected for the before portion is recorded the remaining frames will be taken after the shutter button is pressed all the way down Q If the shutter button is pressed halfway for an extende...

Page 65: ...A STANDARDforthe first d Velvia VIVID for the second and e ASTIA SOFT for the third Y DYNAMIC RANGE BKT F550EXR Only Each time the shutter button is pressed the camera takes three shots at differ ent...

Page 66: ...the setup menu j RAW RAW R CONTINUOUS CONTINUOUS RAW JPEG RAW JPEG RAW RAW OFF JPEG OFF JPEG I TOP TOP n n Up to 6 Up to 6 Up to 6 Up to 6 Up to 32 Up to 32 P BEST FRAME CAPTURE BEST FRAME CAPTURE Up...

Page 67: ...ring playback Happy Birthday AddingNewFaces AddingNewFaces Follow the steps below to add faces to the face recognition database 1 Select REGISTER Select REGISTER for n FACE RECOGNITION in the shooting...

Page 68: ...14 characters and press MENU OK BIRTHDAY Enter the subject s date of birth and press MENU OK CATEGORY Choose the option that describes your relationship to the sub ject and press MENU OK R If you atte...

Page 69: ...ibed above R To delete face recognition data for the selected subject select ERASE AddingFacesAutomatically AddingFacesAutomatically To automatically add frequently photographed subjects to the face r...

Page 70: ...lesubjects from the face recognition database the camera displays the name of the subject that will be used to set focus and exposure the subject shown by the green frame If no name is entered the cam...

Page 71: ...ired frame R Pictures taken using other cameras are indicated by a m gift image icon during playback ContinuousShooting ContinuousShooting In the case of pictures taken in continuous shooting mode onl...

Page 72: ...e is zoomed in the selector can be used to view areas of the image not currently visible in the display Navigation window shows portion of image currently displayed in LCD monitor Zoom indicator Press...

Page 73: ...evious and following images in the background Select j to increase the number of images displayed to two nine or one hundred i to view fewer images 100 0001 100 0001 When two or more images are displa...

Page 74: ...are shown by S When the operation is complete press DISP BACK to display a confirmation dialog then highlight OK and press MENU OK to delete the selected pictures ALL FRAMES ALL FRAMES A confirmation...

Page 75: ...d in the search conditions under BY FACE Search for faces from the face recognition database BY I FAVORITES Search by rating BY SCENE Search by scene BYTYPE OF DATA Find all still pictures or all movi...

Page 76: ...ected for photobooks 2 Scroll through the images and press the selector up to select or deselect To display the current image on the cover press the selector down Press MENU OK to exit when the book i...

Page 77: ...ough the pictures EditingandDeletingPhotobooks EditingandDeletingPhotobooks Display the photobook and press MENU OK The following options will be dis played select the desired option and follow the on...

Page 78: ...rama is displayed full frame the camera will play back the picture from left to right or from bottom to top To pause playback press the selector down press the selector down again to resume To exit to...

Page 79: ...t Film simulation y Flash mode u White balance i Exposure compensation o Frame number 0 Picture overexposed areas blink on and off 1 Histogram Histograms Histograms Histograms show the distribution o...

Page 80: ...ording press the F button again Recording ends automatically when the movie reaches maximum length or memory is full R Zoom can be adjusted while recording is in progress R If the subject is poorly li...

Page 81: ...ting or while the indicator lamp is lit Failure to observe this precaution could prevent the movie from being played back Q Vertical or horizontal streaks may appear in movies containing very bright s...

Page 82: ...End playback delete delete Press the selector up to end playback Adjust speed Adjust speed Press the selector left or right to adjust playback speed dur ing playback Adjust volume Adjust volume Press...

Page 83: ...Connect the camera to a TV to show pictures to a group 1 Turn the camera off 2 Connect the supplied A V cable as shown below Insert into USB multi connector Connect yellow plug to video in jack Connec...

Page 84: ...en an HDMI cable is connected pictures and sound are played back on the TV When an HDMI cable is connected pictures and sound are played back on the TV Q When connecting cables be sure the connectors...

Page 85: ...he printer not all the functions described below may be supported 1 Connect the supplied USB cable as shown and turn the printer on 2 Press the a button for about a second to turn the camera on 3 Pres...

Page 86: ...an be printed from internal memory or a memory card that has been formatted in the camera R If no pictures are selected the camera will print one copy of the current picture R Page size print quality...

Page 87: ...n a memory card The information in the order includes the pictures to be printed and the number of copies of each picture 1 Select playback mode and press MENU OK to display the playback menu 2 Highli...

Page 88: ...the print order and press MENU OK when settings are complete 7 A confirmation dialog will be displayed Press MENU OK to save the print order R Remove the memory card to create or modify a print order...

Page 89: ...2 Duo or better 2 2 RAM RAM 1GB or more 1GB or more 512MB or more 512MB or more 1 1GB or more GB or more 2 2 Free disk space Free disk space 15GB or more 15GB or more 2GB or more 2GB or more Video Vi...

Page 90: ...e Installer Does Not Start Automatically If the Installer Does Not Start Automatically If the installer does not start automatically select Computer or My Computer from the Start menu then double clic...

Page 91: ...MB available when FinePixViewer is running Video Video 800 600 pixels or more with thousands of colors or better Other Other Built in USB port recommended Operation is not guaranteed with other USB po...

Page 92: ...select Preferences from the Image Capture application menu The Image Capture preferences dialog will be displayed choose Other in the When a camera is connected open menu then select FPVBridge in the...

Page 93: ...attery before connecting the cam era 2 Turn the camera off and connect the supplied USB cable as shown making sure the connectors are fully inserted Connect the camera directly to the computer do not...

Page 94: ...lamp is out before turning the camera off or discon necting the USB cable if the number of images copied is very large the indicator lamp may remain lit after the message has cleared from the compute...

Page 95: ...e when it is no longer required or before begin ning reinstallation After quitting the software and disconnecting the camera drag the FinePixViewer folder from Applications into the Trash and select E...

Page 96: ...gs The op tions available vary with the shooting mode selected Usingthe UsingtheF F ModeMenu ModeMenu To display F mode menu shooting options press the F button in shooting mode Highlight items and pr...

Page 97: ...rk Dark Less noticeable Less noticeable Noise mottling Noise mottling More noticeable More noticeable Option Option Description Description AUTO AUTO Sensitivity is adjusted automatically in response...

Page 98: ...mory allowing more pictures to be recorded O O4 3 4 3 Size Aspect ratio SizeVersus Aspect Ratio SizeVersus Aspect Ratio Size Size Option Option Prints at sizes up to Prints at sizes up to O O 34 25cm...

Page 99: ...y ADVANCED ANTI BLUR F550EXR Only defaults to defaults to OFF OFF Select ON to enable advanced anti blur in R mode P23 P P FILM SIMULATION FILM SIMULATION defaults to defaults to c c Simulate the effe...

Page 100: ...v MODE defaults to defaults to r r Choose an advanced shooting mode P25 A A SCENE POSITION SCENE POSITION defaults to defaults to L L Choose a scene for SP mode P29 N N ISO ISO defaults to defaults to...

Page 101: ...se to shooting conditions Option Option Description Description AUTO AUTO A A100 100 Increase contrast when shooting indoors or under overcast skies B B200 200 C C400 400 D D800 800 Reduce loss of det...

Page 102: ...tions White balance measure ment options will be displayed frame a white object so that it fills the LCD monitor and press the shutter button all the way down to measure white balance If COMPLETED is...

Page 103: ...s and sets focus and exposure for human por trait subjects P43 C C PHOTOMETRY PHOTOMETRY defaults to defaults to o o Choose how the camera meters exposure when Intelligent Face Detection is off Option...

Page 104: ...ts focus to reflect changes in the distance to the subject in the focus frame x TRACKING Position the subject in the center focus area and press the selector left Focus will track the subject as it mo...

Page 105: ...battery mode the camera focuses continuously increasing the drain on the battery and that the sound of the camera focusing may be audible and that the sound of the camera focusing may be audible W W...

Page 106: ...IGATION F550EXR Only PHOTO NAVIGATION F550EXR Only To show the direction and distance from your present position to the location where a picture was taken 1Select an option other than OFF for RLOCATIO...

Page 107: ...y time during the show to view on screen help The show can be ended at any time by pressing MENU OK Option Option Description Description NORMAL Press selector left or right to go back or skip ahead o...

Page 108: ...Press DISP BACK to exit when settings are complete PlaybackMenuOptions PlaybackMenuOptions m m PHOTOBOOK ASSIST PHOTOBOOK ASSIST Create books from your favorite photos P58 R RPHOTO NAVIGATION F550EXR...

Page 109: ...selected pictures are indicated by During playback selected pictures are indicated by j jYouTube YouTube or or j jFACEBOOK FACEBOOK icons icons RESET ALL Deselecting All Pictures Choose RESET ALL to...

Page 110: ...pictures created with other devices have already been processed using red eye removal or pictures created with other devices R R The amount of time needed to process the image varies with the number...

Page 111: ...all copies have an aspect ratio of 4 3 If the size of the final Larger crops produce larger copies all copies have an aspect ratio of 4 3 If the size of the final copy will be copy will be a a OK OK...

Page 112: ...mera may not be able to rotate pictures created with other devices The camera may not be able to rotate pictures created with other devices E E COPY COPY Copy pictures from internal memory to a memory...

Page 113: ...oice Memos PlayingVoice Memos Pictures with voice memos are indicated by a q icon during playback To play the voice memo back select PLAY for F VOICE MEMO in the playback menu R R The camera may not p...

Page 114: ...to display the image so that it fills the screen with its top and bottom cropped out 4 3 to display the entire image with black bands at either side 4 3 4 3 16 9 16 9 16 9 16 9 4 3 4 3 R R Photographs...

Page 115: ...the selector left to highlight the tab for the current menu 1 3 Press the selector down to highlight X EXIT SET SET UP SET Tab 1 4 Press the selector right to place the cursor in the setup menu 2 Adj...

Page 116: ...minutes 3Press MENU OK To switch between local time and your home time zone highlight g LOCAL or h HOME and press MENU OK Option Option Description Description h h HOME HOME Switch to the time current...

Page 117: ...be deleted from the memory card or internal All data including protected pictures will be deleted from the memory card or internal memory Be sure important files have been copied to a computer or oth...

Page 118: ...not be logged if the battery is Signal strength will be displayed in yellow and GPS data will not be logged if the battery is low low B B or less no memory card is inserted or the memory card has less...

Page 119: ...names RENEW RENEW Numbering is reset to 0001 after formatting or when a new memory card is inserted R R If the frame number reaches 999 9999 the shutter release will be disabled If the frame number r...

Page 120: ...manually Note that in some situations the camera turns off automatically even when OFF is selected L L DUAL IS MODE DUAL IS MODE defaults to defaults to l l Choose whether image stabilization is perfo...

Page 121: ...ro mode try increasing the distance to the subject era is unable to focus in macro mode try increasing the distance to the subject Q Q Avoid shining the AF assist illuminator directly into your subjec...

Page 122: ...ACKGROUND COLOR BACKGROUND COLOR Choose a color scheme c c GUIDANCE DISPLAY GUIDANCE DISPLAY defaults to defaults to ON ON Choose whether to display tool tips Q Q VIDEO SYSTEM VIDEO SYSTEM Choose a vi...

Page 123: ...t this option to save power o o CLEAR DISPLAY CLEAR DISPLAY Choose this option for a brighter higher quality display The LCD monitor will dim to save power if no operations are performed for 30 s R R...

Page 124: ...anufacturers USB cable supplied SD card slot or card reader A V cable supplied Computer TV HDTV Computer Related Computer Related Printing Printing Printer PictBridge compatible printer USB cable Audi...

Page 125: ...chargeable Li ion batteries Li ion batteries NP 50 Additional large capacity NP 50 rechargeable bat teries can be purchased as required Battery Battery chargers chargers BC 45W Replacement battery cha...

Page 126: ...s such as near a broadcasting anten na power line radar emitter motor transformer or magnet in contact with volatile chemicals such as pesticides next to rubber or vinyl products Water and Sand Exposu...

Page 127: ...th a piece of FUJIFILM lens cleaning paper to which a small amount of lens cleaning fluid has been applied Care should be taken to avoid scratching the lens or LCD monitor The camera body can be clean...

Page 128: ...e taking a picture it in the camera immediately before taking a picture There is dirt on the battery terminals There is dirt on the battery terminals Clean the terminals with a soft dry cloth Clean th...

Page 129: ...l fails to charge contact your FUJIFILM dealer The battery is too hot or too cold The battery is too hot or too cold Wait for the battery temperature to stabilize Wait for the battery temperature to s...

Page 130: ...d for is selected for R R CONTINU CONTINU OUS OUS Turn the self timer off Turn the self timer off P P39 39 GPS GPS The camera is slow to acquire GPS data Some time may be needed to acquire GPS data im...

Page 131: ...ra is in silent mode Turn silent mode off Turn silent mode off P P98 98 The flash does not fully The flash does not fully light the subject light the subject The subject is not in range of the flash T...

Page 132: ...Solution Pictures are grainy Pictures are grainy The pictures were taken with a different make or model of camera The pictures were taken with a different make or model of camera No sound in movie No...

Page 133: ...erly connected Connect the camera correctly Connect the camera correctly P P67 67 The printer is off The printer is off Turn the printer on Turn the printer on Only one copy is printed Only one copy i...

Page 134: ...Turn the camera off and then on again Camera malfunction or moving parts of lens obstructed Turn the camera off and then on again taking care not to touch the lens If the message persists contact a F...

Page 135: ...IS FULL FULL INSERT A NEW CARD INSERT A NEW CARD WRITE ERROR WRITE ERROR Memory card error or connection error Memory card error or connection error Reinsert the card or turn the camera off and then R...

Page 136: ...ewer images Choose fewer images PROTECTED FRAME PROTECTED FRAME An attempt was made to delete rotate or add a voice memo to a protected picture Remove An attempt was made to delete rotate or add a voi...

Page 137: ...cted device Confirm that the device is turned on and that the USB cable is connected PRINTER ERROR PRINTER ERROR Printer out of paper or ink or other printer error Check printer see printer manual for...

Page 138: ...Choose the following settings for improved battery performance b FACE DETECTION P85 OFF F AF MODE P86 r CENTER S POWER MANAGEMENT P105 n POWER SAVE RLOCATION SEARCH P99 OFF RTRACKING DATA P100 OFF The...

Page 139: ...en ZOOM CONTINUOUS is selected for A IM AGE DISP P100 Remove red eye by selecting ON for B RED EYE REMOVAL P92 Playback Playback Zoom in on faces during slide shows P89 or by pressing the selector dow...

Page 140: ...s select p SPOT for C PHO TOMETRY P85 andpositionyoursubjectinthecenterofthe frame To photograph subjects that are in motion select u CON TINUOUS or x TRACKING for F AF MODE P86 To photograph night sc...

Page 141: ...0 620 980 980 1250 1250 2000 2000 O O16 9 16 9 7 7 12 12 820 820 1300 1300 1670 1670 2650 2650 P P4 3 4 3 9 9 18 18 980 980 1930 1930 1980 1980 3910 3910 P P16 9 16 9 12 12 24 24 1300 1300 2580 2580 2...

Page 142: ...11sec 38min 38min 76min 76min h h1280 12801 1 14sec 14sec 49min 49min 99min 99min f f2 2 32sec 32sec 115min 115min 232min 232min k k640 640 480 4803 3 25sec 25sec 86min 86min 172min 172min k k320 320...

Page 143: ...F550EXR MOTION PANORAMA 360 MOTION PANORAMA 360 1 624 11 520 1 624 11 520 tall tall 11 520 1 080 11 520 1 080 wide wide MOTION PANORAMA 180 MOTION PANORAMA 180 1 624 5 760 1 624 5 760 tall tall 5 760...

Page 144: ...nuous F550EXR F550EXR I I Up to 32 frames at 3 5 8 or 11 fps Up to 32 frames at 3 5 8 or 11 fps P P 8 or 16 frames at 3 5 8 or 11 fps 8 or 16 frames at 3 5 8 or 11 fps F500EXR F500EXR I I L L Up to 12...

Page 145: ...database was Date map database was created created October 2010 October 2010 Input output terminals A VOUT A VOUT audio videooutput audio videooutput NTSC or PAL output with monaural sound NTSC or PAL...

Page 146: ...n NP 50 rechargeable battery Nominal voltage Nominal voltage DC 3 6V DC 3 6V Nominal capacity Nominal capacity 1000mAh 1000mAh Operating temperature Operating temperature 0 C 40 C 32 F 104 F 0 C 40 C...

Page 147: ...manufactured using advanced high precision technol ogy small bright points and anomalous colors may appear particularly in the vicinity of text This is normal for this type of LCD monitor and does not...

Page 148: ...H p p Q Q R R s s f f U U V V W W N N B BOFF OFF Q Q 1 1 N N 1 1 O O B BON ON K K 1 1 L L 1 1 M M P P 1 1 1 1 1 1 1 1 1 1 1 1 1 1 1 1 h h S S R R o o n n F F F F 1 1 1 1 OFF OFF d d 8 8 N N AUTO AUTO...

Page 149: ...1 1 1 1 1 1 1 1 1 1 1 1 1 1 1 1 1 1 A A 1 1 1 1 1 1 B B C C D D M M P P c c 8 8 d d e e b b 8 8 f f 8 8 D D 8 8 R R O O5 5 X X5 5 Y Y5 5 P P5 5 L L6 6 I I OFF OFF 1 1 Z Z5 5 b b OFF OFF 1 1 1 1 1 1 1...

Page 150: ...40 320 240 k k320 112 320 112 J J5 5 M M 7 7 7 7 7 7 7 7 7 7 L L l l 8 8 m m 8 8 OFF OFF 1 1 1 1 8 8 D D ON ON OFF OFF 1 1 1 1 1 1 1 1 1 1 B B C C ON ON 8 8 OFF OFF 1 1 1 1 1 1 1 1 1 1 1 1 1 1 8 8 j j...

Page 151: ...7 3 AKASAKA 9 CHOME MINATO KU TOKYO 107 0052 JAPAN http www fujifilm com products digital_cameras index html FUJIFILM FUJIFILM Corporation...

Page 152: ...nvolved in using your camera for the first time Complete operating instructions may be found in the Owner s Manual provided in pdf for mat on the supplied CD For information on related products visit...

Page 153: ...g or driving a vehicle This can result in you falling down or being involved in atraffic accident Do not touch any metal parts ofthe camera during a thunderstorm This can cause an electric shock due t...

Page 154: ...he event that the LCD monitor is dam aged care should be taken to avoid contact with liquid crystal Take the urgent action indicated should any of the following situa tions arise Ifliquid crystal come...

Page 155: ...chemicals such as Do not use this apparatus near water pesticides Clean only with adry cloth next to rubber or vinyl products Do not block any ventilation openings In Water and Sand stall in accordanc...

Page 156: ...sources For more detailed information about recycling this product please con tact your local city office your household waste disposal service or the shop where you purchased the product In Countries...

Page 157: ...ing the Battery and aMemory Card 2 Turning the Camera On 2 Taking Pictures 3 Viewing Pictures 4 Deleting Pictures 4 Exposure Compensation 15 Macro Mode Close ups 16 Using the Flash Super Intelligent F...

Page 158: ...e camera s internal memory or on optional SD SDHC and SDXC memory cards referred to in this manual as memory cards ICharging the Battery The battery is not charged at shipment Charge the battery befor...

Page 159: ...insert at an angle or use force 4 Close the battery chamber cover ITurning the Camera On 2 Press the ON OFF button to turn the camera on The lens will extend and the flash will pop up The camera can...

Page 160: ...g focus and searching for faces increasing the drain on the battery ITaking Pictures This section describes how to take pictures in EXK AUTO mode 1 Turn the camera on and 3 Press the shutter button ha...

Page 161: ...press the selector up To exit playback and return to shooting mode press the shutter but ton Problem The camera does not turn on Solution The battery is exhausted Charge the battery or insert afully...

Page 162: ...ress the button again Recording ends automatically when the movie reaches maximum length or memory is full Zoom can be adjusted while recording is in progress If the subject is poorly lit the AF assis...

Page 163: ...zontal streaks may appear in movies containing very bright subjects This is normal and does not indicate a malfunction CD The temperature of the camera may rise if it is used to record movies for an e...

Page 164: ...right to rewind or advance one frame at a time End playback d I Press the selector up to end playback e ete Ad d Press the selector left or right to adjust playback speed dur JUSt spee ing playback Pr...

Page 165: ...r right fiash button mand dial Move cursor down 0 self timer button Mode dial Select a shooting mode F button Display frequently used shooting and playback options w 9 11 button Record movies w 5 E bu...

Page 166: ...ption Description m l ISO Control the camera s sensitivity to light 0 IMAGE SIZE Choose the size and aspect ratio at which pictures are recorded a CONTINUOUS Capture motion in aseries of pictures LOCA...

Page 167: ...SP selector Using the Selector During Shooting All Modes Option 9 IMAGE QUALITY DYNAMIC RANGE 1m WHITE BALANCE D FACE DETECTION 1m PHOTOMETRY Ill AF MODE 10 Description Control Choose how much image...

Page 168: ...t used FSSOEXR Only when 110 AE BKT is selected for a CONTINUOUS Using the F Button and the Selector During Playback Option Description Control m PHOTOBOOK ASSIST Create books from yourfavorite photos...

Page 169: ...ve red eye from pictures taken with Intelligent Face De tection Protect pictures from accidental deletion Create acropped copy ofthe current picture Create asmall copy ofthe current picture Rotate pic...

Page 170: ...ATION VOL nq Description Set the camera clock Set the clock to local time Select ON to display GPS data Select ON to record GPS data to alog file on the memory card Choose the units used for the displ...

Page 171: ...press the selector 1 DIGITAL ZOOM Enable or disable digital zoom down to highlight s r I AF ILLUMINATOR Enable or disable the AF assist illuminator and press the selector 1m RAW FSSOEXR Only 1 right t...

Page 172: ...ial to choose an exposure compen sation value and then press MENU OK Choose positive values to increase exposure Choose negative values to reduce exposure A icon and exposure indicator are displayed a...

Page 173: ...of the frame Use the zoom control to compose pictures Erill 3 To exit macro mode press the selector left and select r l OFF Use of a tripod is recommended to prevent blur caused by camera shake The s...

Page 174: ...ven in dimly lit indoor scenes Use the flash when lighting is poor for example when shoot ing at night or indoors under low light Press the selector right and choose from the follow ing flash modes Op...

Page 175: ...ntil shooting is complete The flash may cause vignetting 18 Using the Flash The flash is automatically raised and lowered when the camera is turned on and off If the flash is lowered manually when the...

Page 176: ...for portraits of bab1es i 2 SEC cJre on The shutter is released ten seconds after the shutter button is pressed Use for self portraits The self timer lamp on the front of the camera lights when the ti...

Page 177: ...out and zoom remains fixed at the wid est angle until shooting is complete 1To select the angle through which you will pan the camera while shoot ing press the selector down Press the selector left or...

Page 178: ...ng ends be fore the panorama is complete CD Shooting may be interrupted ifthe camera is panned too quickly or too slowly Pan ning the camera in a direction other than that shown cancels shooting CD Th...

Page 179: ...r portraits or photos of flowers similar to those pro 1 duced by SLR cameras Softening can not be applied to background objects that are too close to the main subject If a message stating that the cam...

Page 180: ...ects at high zoom ratios A single combined photograph may not be created with some scenes or if the subject or camera moves during shooting Do not move the cam I era until shooting is complete S PRO F...

Page 181: ...dogs CAT Choose when photographing cats LANDSCAPE Choose for daylight shots of buildings and landscapes SPORT Choose when photographing moving subjects 7 NIGHT Choose this mode for poorly lit twilight...

Page 182: ...offers a f AUTO RELEASE option that releases the shutter auto matically when a pet is detected Elill 19 During playback image search can be used to search for pictures taken in either mode Although c...

Page 183: ...FUJI FILM FUJIFILM Corporation 7 3 AKASAKA 9 CHOME MINATO KU TOKYO 107 0052 JAPAN Printed in China http www fujifilm com products digital_cameras index html...

Page 184: ...FUJI FILM FinePix CD FINEPIX F550EXR Copyright 2011 FUJIFILM Corporation All rights reserved SILKYPir...

Page 185: ...visiting our website at www fujifilmusa com If you are experiencing technical problems or need product information please contact our Digital Help Desk at 800 800 FUJI 3854 Option 1 Monday Friday 9 00...

Page 186: ...technical support and warranty 1 Our warranty policy Is found on our website at www fujifllm ca Garantie I soutien technique Cette camera est couverte par Ia garanlie de manufacture de FUJIFILM CANAD...

Page 187: ...nties of any kind express or implied arising by law or oth erwise including but not limited to content quality accuracy com pleteness effectiveness reliability fitness for a particular purpose usefuln...

Page 188: ...s reserved Her Majesty the Queen in Right of Canada Queen s Printer for Ontario Canada Post Corporation GeoBase Department of Natural Resources Canada ZIP 4 United States Postal Service 2010 the USPS...

Page 189: ...com S R TEL 593 72835526 dtecnico fujifilm com ec s TEL 55 52 5263 5500 soporte fujifilm com mx R TEL 55 52 5366 5150 camaras fujifilm com mx S R TEL 595 21 281948 larson rieder net py S R TEL 51 14...

Page 190: ...hoto boushahrigroup com S R TEL 961 1252474 fototek antakiholding com s TEL00974 44 66 175 prabu techno blue com s TEL 96626978756 service fujifilm com sa s TEL 963 11 221 8049 ftc amirgroup com R TEL...

Page 191: ...uct registration include Product Protection o With the information you provide we can confirm the date of purchase of your product This is a benefit to you in the event your original proof of purchase...

Page 192: ...age incurred in transit or otherwise in connection with the return of the Product nor will FUJIFILM be responsible for the return of any items that are included with the Product SOME STATES DO NOT ALL...

Reviews: