1
21
20
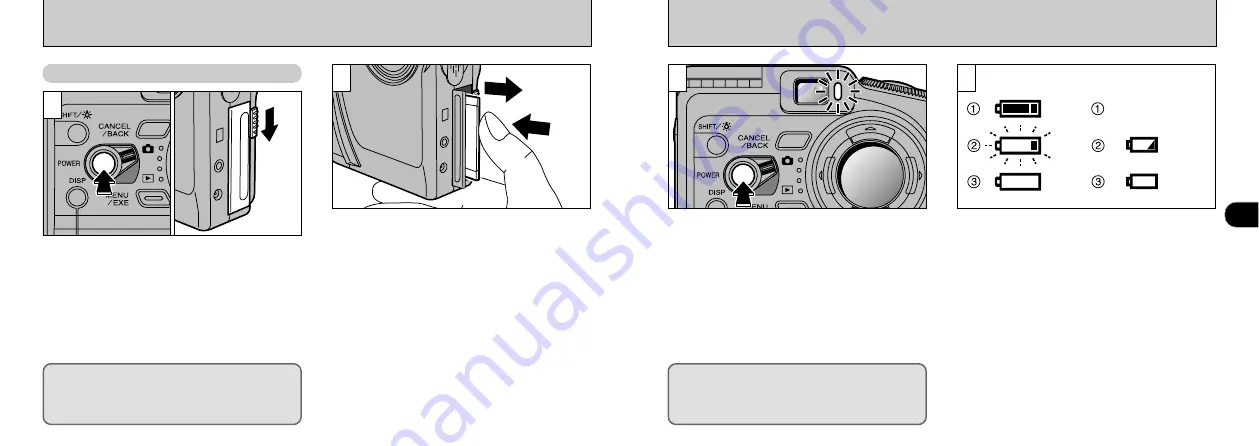
LOADING AND REMOVEING THE SmartMedia
™
➀
Check that the indicator in the viewfinder is
green and then switch the camera off.
➁
Release the SmartMedia cover lock as shown
in the figure.
Never open the SmartMedia slot cover while
the camera is switched on.This could destroy
the image data or damage the SmartMedia
itself.
Push the SmartMedia into the slot slightly and
allow it to pop back out. It can then be pulled out
easily.
●
!
To protect the SmartMedia, always store it in the
special anti-static case.
●
!
See P.80, 100 for information on printing images.
●
!
See P.100-102 for information on downloading
images to a personal computer.
Removing the SmartMedia
TM
1
2
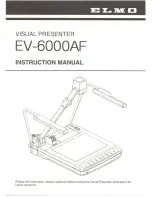
Press the Power button to switch the camera on
or off. When the camera is switched on, the
viewfinder lamp glows green.
Check the battery level warning when you switch
the camera on.
➀
The battery is fully charged.
(This icon is only displayed on the LCD panel
for 3 seconds after you switch the camera on.)
➁
The battery charge is too low. Fully charged
batteries should be installed as the power will
run out shortly.
➂
There is no charge at all in the batteries. The
icon disappears immediately and camera
operation stops. Install fully charged batteries.
●
!
If you switch the camera on when the Mode switch is
set to “
0
”, the lens cover opens and the lens
moves out. For this reason, take care to avoid
touching the lens when you switch the camera on.
●
!
Switch the camera on before attempting to use the
camera in any way.
●
!
If the date or time shown on the LCD monitor is
blinking, set the date and time. (
LCD Panel
LCD Monitor
1
On
Flashing
On
Blank
On
On
2
SWITCHING ON AND OFF
●
➀
●
➁
When the Auto Power Off function is
enabled (
P.92), the camera automatically
switches itself off if it is left on and unused
for a few minutes.


