

ENGLISH
INSTALLING THE SOFTWARE
The software installation procedure varies depending on the computer you
are using and its operating system. Check your computer and operating
system and then install the software using the appropriate procedure.
The DCR-71 Setup disc (CD-ROM) contains the following software:
1. Driver software for Windows 98 SE / ME / 2000 / 2000 Pro
2. Driver software for Mac OS 8.6 to 9.2.2
Install the software as described in this manual or as directed by the
instructions on your computer screen.
Installing the software on Windows 98 SE / ME /2000 / 2000 Pro
*When installing the software on Windows 2000, you must log in using an administrator
account for installation to be successful.
(1) Switch your PC on and launch Windows.
(Note: Do not connect the DCR-71 to the computer yet.)
(2) Load the DCR-71 Setup disc into the CD-ROM drive.
(3) (Note) Displayed on the screen.
Check that the DCR-71 is not connected to your
computer and then click (OK).
*If the warning message is not displayed, click the
CD-ROM icon in the My Computer window.
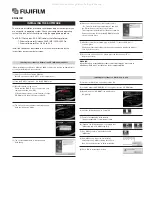
(4) The screen shown at right automatically appears.
Click the “Windows” button.
(5) The “InstallShield Wizard” window appears.
Click (Next).
(6) When the screen shown at right appears, select
“Yes, I want to restart my computer now” and click
the (Finish) button to restart your computer.
This completes the installation of the driver software.
Remove the Setup disc from the CD-ROM drive and
store it in a safe place.
(7) After the system has restarted, plug in the DCR-71 into the USB port of
your computer.
Windows will automatically detect the new hardware and display the memory
card icons in the screen.
(8) If you could not see the icons, please press the function key “F5” to
refresh the screen.
WARNING
If your PC fails to restart with the reader connected it may be necessary to
disable any “USB drive” boot devices in the computers BIOS.
Installing the software on Mac OS 8.6 to 9.2.2
(1) Switch your Macintosh on and launch Mac OS.
(2) Load the bundled CD-ROM (DCR-71 Setup disc) into the CD-ROM drive.
(3) Double-click the “CD-ROM” icon displayed on
the desktop.
(4) Save the “MACsetup.hqx” to your MAC.
(5) Execute the expanding software with
(’stuffit expander 6.0’) or something similar.
(6) “Expand” file “MACsetup.hqx” to generate files
“MACsetup.img.sit” & MACsetup.img”.
(7) Run “MACsetup.img” to generate the file
“MACsetup”.
(8) Run “MACsetup” to get the file “installer”
and execute it by double clicking the file icon,
then follow the instruction to finish installation.
(9) Click “OK” to restart the machine.
All manuals and user guides at all-guides.com


