


See "2.3 Changing Paper Settings" in "Part 1 Hardware" of
the User Guide (Copier).
Setting the Paper Type
Save
Cancel
1. Tray 1
Current Value :
0
New Value :
1
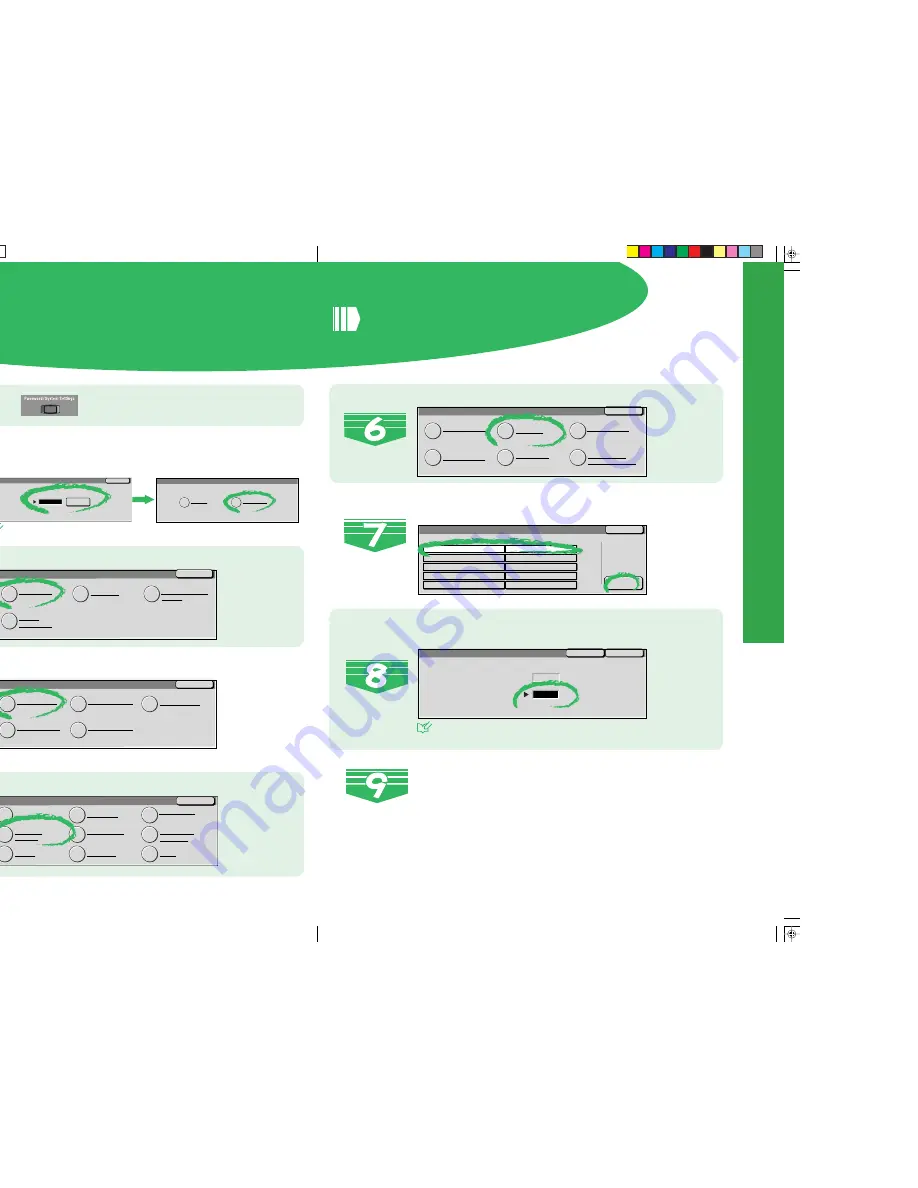
Press on the Control Panel.
Select
System Settings
.
Close
System Settings
SystemSettings
Auditron
Administration
Setup Menu
System Administrator
Password
Select
Common Settings
.
Close
System Settings
Common Settings
Copy Mode Settings
Network Settings
Print Mode Settings
Scan Mode Settings
Select
Paper Tray Attributes
.
Close
Common Settings
Machine Clock/Timers
Audio Tones
Screen Defaults
Paper Tray
Attributes
Printing Priority
Image Quality
Adjustment
Reports
Diagnostics
Others
Select the paper tray whose paper type setting is
to be changed at Items, and select
Change Set-
tings
.
Change
Settings
Close
Paper Type
Items
Current Settings
1. Tray 1
2. Tray 2
3. Tray 3
4. Tray 4
5. Tray 5 (Bypass)
0
0
0
0
0
Close
Paper/Tray Attributes
Custom Paper Name
Paper Type
Paper Tray Priority
Paper Type Priority
Image Quality
Tray 5 (Bypass)
Paper Size Defaults
Select
Paper Type
.
8
9
Cancel
System Administrator - Password Entry
Password
Confirm
✽✽✽✽✽
System Adminstrator Menu
User Mode
System Settings
If the Password Entry screen is displayed, enter the pass-
word and select Confirm. And then, select
System Settings
.
Note
If the Password Entry screen is not displayed, proceed to
Step 3.
Enter the setting value of the paper type to be
changed using Numeric Keypad, and select
Save
.
Select Close repeatedly until the System Settings screen is
displayed, and then select
Exit
.
This exits the System Administration Mode.
See
See “5.4.4 Setting Paper Tray Attributes” in “Part 1 Hardware”
of the User Guide (Copier) for details on value of paper type.
Setting the P
aper
Type


