40
40
Replacing Consumables
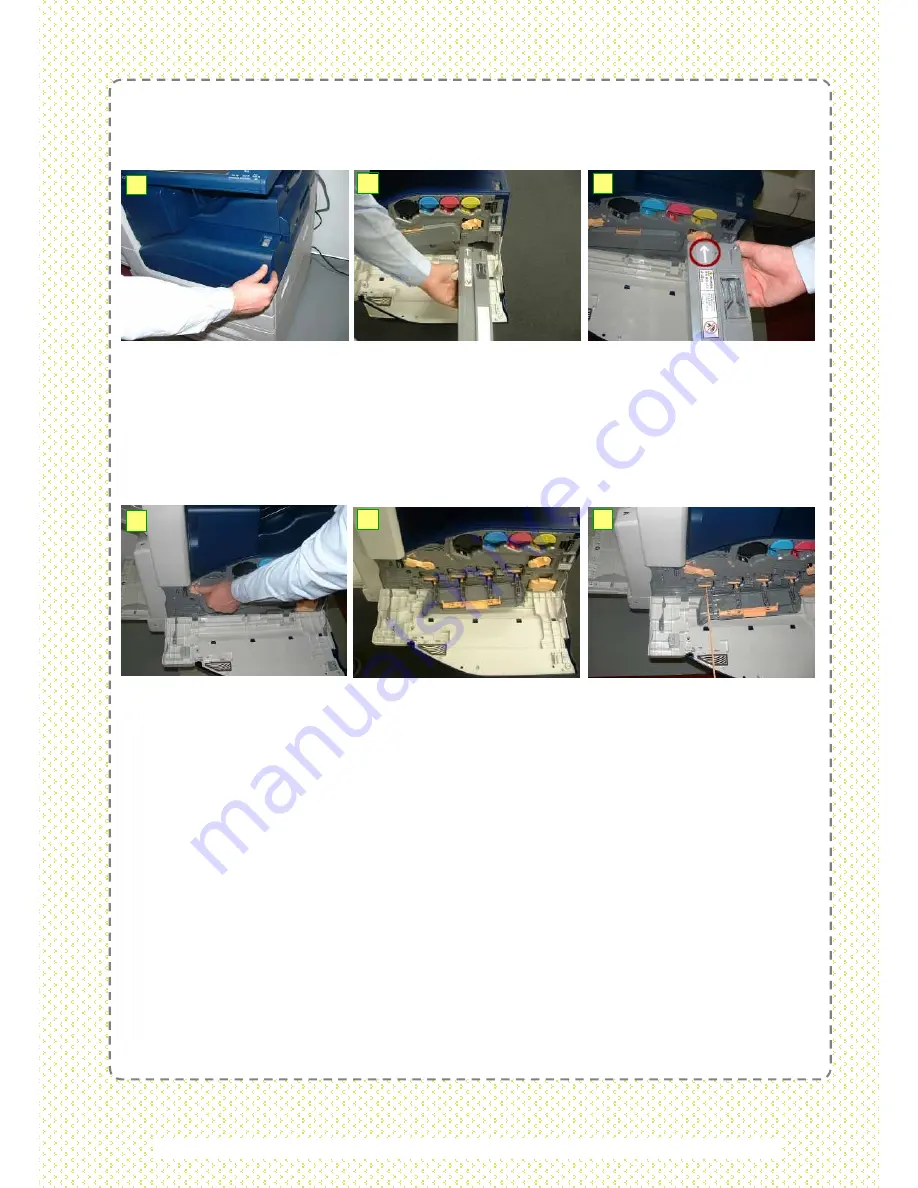
Replacing Waste Toner Cartridge / Container
1:
Open the Front Cover. Place a few sheets of paper on the floor before removing the
cartridge.
2:
Grasp the front of the cartridge and gently pull the cartridge straight out. Remove the new
Waste Toner Cartridge from its packaging.
3:
Install cartridge with the label facing upwards, and push the cartridge into the machine
until it clicks into place.
NOTE:
Replace the Waste Toner (Dry Ink) Cartridge while the machine is powered On. Ensure machine is
idle before opening the Front Cover.
1
2
3
4
5
6
4:
Grasp the
Orange
handle
‘
R9
’
and rotate it to the left to unlock.
5:
Pull down the handle to open the Drum Cartridge Cover and access the four cartridges.
6:
Slowly slide the Cleaning Bar beneath the drum marked R1 out towards the front of the
machine until it stops.
NOTE:
Slide the bar out until the
'000'
symbol can be seen. Do not remove the bar from its
housing.
7:
Slowly slide the Cleaning Bar all the way back into the machine until it locks into place.
8:
Repeat steps 6 and 7 for the remaining drums marked R2, R3 and R4
9:
Lift up the Drum Cartridge Cover back into its closed position.
10:
Rotate the
Orange
handle
‘
R9
’
to the right to the to lock the cover in place. Close the
Front Cover.
CAUTION:
Do not use warm water or cleaning solvents to remove Toner (Dry Ink) from your skin or clothing. This will set
the Toner and make it difficult to remove.
If any Toner gets on your skin or clothing, use a brush to remove the Toner, blow it off, or wash it off with cold water and
mild soap. Do not attempt to use a standard shop vacuum or home vacuum to clean Toner spills in or near the machine.
Shop and home vacuums are not equipped with correct filtration and will contaminate your environment.
For used cartridges disposal, please call us @ 1-300-88-1163 for collection.


