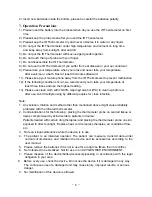
- 4 -
measurement in the meantime ,the measured temperature data appears on the displayed
screen (Figure 5.5B)
。
●
Before your measuring ,please keep your forehead dry and cleanly.
●
When the temperature unit “ ” or “
” blink then you can process for next measurement.
●
If you don’t use again, the power will be automatically switch off within 60 seconds.(for
FT-F31,FT-F32); switch off within 10 seconds.(for FT-F41,FT-F42)
Figure 5.1B Figure 5.2B Figure 5.3B Figure 5.4B Figure
5.5B
2
)
Ambient Temperature Measuring mode:(Figure 5.1C)
●
Press the “power” button to turn on the IR Thermometer and then all display segments
appear briefly as like on(Figure 5.2C),the displayed screen appear last measured
temperature data, please see on (Figure 5.3C),after few seconds automatically change to
the Ambient Temperature Measuring Mode
“
”
symbol appear on the display and the
temperature unit
“ ”
or
“
”
blink then it’s ready to measure, please see on (Figure
5.4C).
●
Take IR thermometer to aim at the target about 5 to 10 CM distance then press the “SCAN”
button key about one second then you will hear long “Bi--” sound that it’s finished the
measurement in the meantime the measured temperature data appear on the displayed
screen (Figure 5.5C)
。
●
When the temperature unit
“ ”
or
“
”
blink on the displayed screen again then you
can process for next measurement.
●
If you don’t use again, the power will automatically switch off within 60 seconds.(for
FT-F31,FT-F32); switch off within 10 seconds.(for FT-F41,FT-F42)
Figure 5.1C Figure 5.2C Figure 5.3C Figure 5.4C Figure
5.5C
3
)“ ”
and
“
”
adjust (Suitable for FT-F31, FT-F31-BT)
●
On power off condition, press the “SCAN” button key about 5 seconds until the displayed
screen appears
“
- - -
”
to blink 3 times then displays
“
”
or
“ ”
temperature unit .
In this condition, press the “SCAN” button key again to adjust
“
”
”
or
“ ”
and then
it is set up ready for use
。


