FTE MAX S202 User Manual Download Page 29

PAG.29

rev 1.3

SYSTEM SETUP

1. Display Mode is used to switch the display mode. You can 
select from Auto / PAL / PAL-M / NTSC 3.58. Press [
] to select the desired mode.
2. Aspect Mode is used to switch the screen aspect ratio mode. 
You can select from Auto / 4:3 PS / 4:3 LB / 16:9. Press [

] to select the needed mode.

3. Video Output is use for switching the screen aspect ratio 
mode. Now we provide below options: RGB / CVBS. You can 
press [

] key to select each mode circularly.

4. VCR Loopthrought: If there is a VCR connected to the recei-
ver and, the receiver is connected to the TV, user can choose 
what prefer to watch on TV when both equipments are connec-
ted at the same time. If the selection is “VCR master”, the VCR 
will be showed even the receiver is on. If the selection is “STB 
master”, the receiver will be showed on the TV.
This receiver includes low power consumption (LPC) mode 
when it is in stand-by (see point 5.6.). If you choose STB mas-
ter, low power consumption option will be active and it could be 
modifi ed at its menu. By the other way, if you choose VCR mas-
ter, then the Low Power Consumption option will not be active 
and the receiver will not be in LPC mode.
5. Standard Mod.: To choose the modulator output standard. 
Using [

] you can chose between: PAL-BG / PAL-I / 

PAL-DK / NTSC.
6. RF Channel: This option allows you to determine the initial 
channel that the built-in modulator is supposed to occupy. This 
is important in the case that you wish to connect the receiver to 
an existing network.
The output range is from channel 21 to 69. Press [

] to 

change the value.
7. Press [Exit] to close the “TV System” menu.

5.3. TIME & TIMER SETTING

When you enter “Time” “Local Time Setting” or  “Sleep Timer” a 
menu with three items will be opened (OSD 59). Use [

to select between the three options and confi rm with [OK].
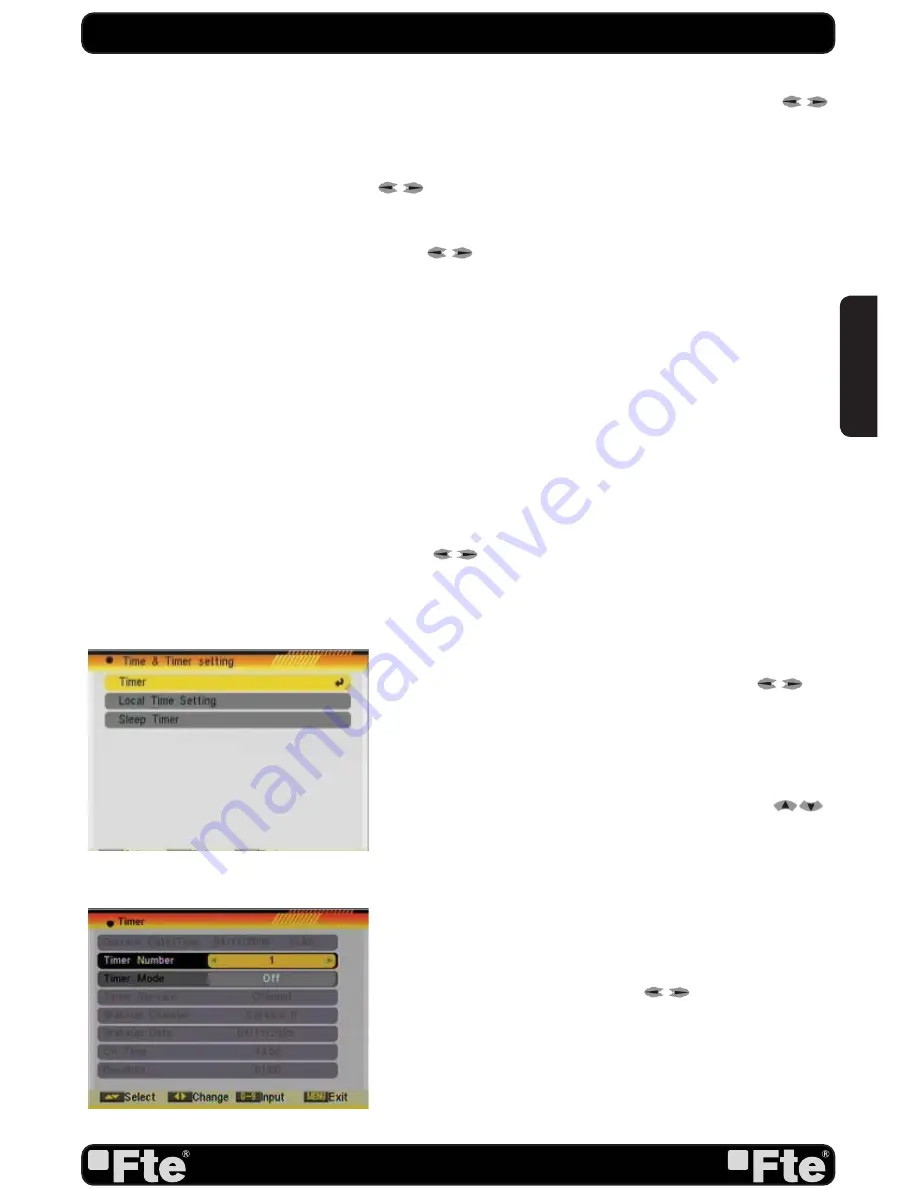
5.3.1. TIMER

Select “Timer” item and press [OK] to enter the “Timer list” 
menu (OSD 60).
The current time will be displayed in the fi rst column. If the 
current time is incorrect, please modify it with the [Number] 
buttons at the “Time” menu.
1. Timer Number: You can press [

] to set the Timer 

number. There are totally 8 timers.
2. Timer Mode: Select how often the timer is running: Once, 
Daily, Weekly, Monthly and Yearly. Or switch the timer off.
3. Timer Service: Select between Channel (timer setting for 
channel change and Wakeup/Sleep) and Message (reminding 
message).

OSD 59

OSD 60

ENGLISH

Summary of Contents for MAX S202

Page 1: ...MAX S202...

Page 2: ...on the connections Do not install the receiver close to strong heat sources and ensure a good aeration if you plan to install the receiver in a small cabinet Before you start operating the receiver ma...

Page 3: ...or VCR However the pictu re quality will be a little poorer The modulator has an antenna input and the output range is from chan nel 21 to 69 This will allow you to mix the existing antenna signals w...

Page 4: ...preferred audio language for those channels using If a channel offers the same audio language as the First Audio you set the system will play this audio language as default If the channel does not of...

Page 5: ...s of DiSEqC1 1 switches Positioner Press to select between None DiSEqC1 2 USALS Polarity Press to switch between Auto H V Once the LNB is configured press Exit to save the chan ges and go to the previ...

Page 6: ...sh the scanning and saving the found channels Main Menu Selecting this option the main menu will appear on the TV STEP 3 TIME CONFIGURATION It is recommended to setup the clock before starting to enjo...

Page 7: ...to enjoy the receiver especially if you are using this output for getting the picture on the TV and mixing it with an existing antenna signals The receiver includes an UHF modulator allowing connectin...

Page 8: ...st and settings This option makes a backup of the channel list and it will allow restoring the channel list even thought after a factory default Single Search Once the antenna is configured this optio...

Page 9: ...s on or off the LNB power or enable disable Low Power Consumption mode RCU position Switch To chose the RCU position of the remote control Information Shows all the technical information for the selec...

Page 10: ...es 15 2 6 CH CH 15 2 7 TV RADIO 15 2 8 Vol Vol 16 2 9 Exit 16 2 10 Menu 16 2 11 Recall 16 2 12 Channel List 16 2 13 EPG 17 2 14 List 17 2 15 Favourites 17 2 16 Audio Track Mode 17 2 17 Information 18...

Page 11: ...em Setup 5 1 Language 28 5 2 TV System 28 5 3 Time Timer Setting 29 5 3 1 Timer 29 5 3 2 Local Time setting 30 5 3 3 Sleep Timer 31 5 4 OSD Setting 31 5 5 Parental Lock 31 5 6 Power setting 32 5 7 RCU...

Page 12: ...rking on the connections Do not install the receiver close to strong heat sources and ensure a good aeration if you plan to install the receiver in a small cabinet Before you start operating the recei...

Page 13: ...of the receiver and provide the same functionality as the remote control ones 1 IF IN Satellite input 2 IF OUT Satellite output for cascading to other devices Note The operation of another receiver at...

Page 14: ...control unit Q My STB is running in TV mode but the TV screen shows nothing except one ball and No Signal A That means the channel you selected has no signal This can be caused by several reasons 1 Th...

Page 15: ...he Mute button again to restore the sound 2 4 CHANNEL NUMBER In TV mode you can enter the channel number directly with your remote control unit and confirm the number with the OK button to change to t...

Page 16: ...Once the desired channel is selected press OK to change and display the marked channel Expanded Channel List OSD 5 You can use keys to navigate this list In this view you can get more information abou...

Page 17: ...me and date of this event 4 To close the EPG menu press Exit 2 14 LIST In TV mode press List button to access directly to the TV Channel List menu or to the Radio Channel List menu 2 15 FAVOURITES 1 I...

Page 18: ...nce in the related Favourite Group list 2 19 ZOOM 1 Press Zoom button in TV mode to zoom the image Image can be augmented x16 times OSD 13 2 Press Exit to exit this function 2 20 SUBTITLES In TV mode...

Page 19: ...ndow 2 You can enter directly the number of the desired channel with the remote control The selection will select that channel but it will not be previewed until you confirm with OK button 3 Press Pup...

Page 20: ...3 1 4 EDIT 1 After pressing the Yellow button a window for entering the password will open The default password is 0000 2 You can Delete Skip Lock and Edit the channel OSD 21 3 Press Exit to leave the...

Page 21: ...reate Press Green button to open the Create window OSD 27 Press OK button on the Satellite item to display the satelli te list You can select the satellite for which you want to crea te a new channel...

Page 22: ...hoice Press OK again to confirm 3 3 2 CHANNEL PLAY TYPE Press OK to enter Channel Play Type menu OSD 32 1 Here you can select the playing channels as Free Scrambled or All 2 If you select Free then al...

Page 23: ...ter the password The default password is 0000 2 After entering the password correct a safety question will show up where you have to confirm first OSD 36 3 Select Yes to delete all channels or No to c...

Page 24: ...options can be modified LNB Type Press to switch among Standard User and Universal mode If you select Standard or User the frequency of the LNB can be changed Pressing OK the frequencies will appear...

Page 25: ...window like the one beside will open OSD 43 1 On Satellite item press OK to open the satellite list OSD 44 Then press to move the highlight and press OK to mark unmark and EXIT to finish the selectio...

Page 26: ...mber buttons of the RCU The available range are 3000 13450 MHz and 1000 45000KS s Press Green button to delete the current TP A safety ques tion will be displayed for confirmation to delete the curren...

Page 27: ...satellite select Save option and confirm with OK If you prefer to exit without saving the changes select Exit and press OK 4 After pressing Yellow button you will be asked Are you sure to delete OSD 5...

Page 28: ...the same audio language as the First Audio you set the system will play this audio language as default If the channel does not offer this audio language then the system will compare the offered langua...

Page 29: ...er Consumption option will not be active and the receiver will not be in LPC mode 5 Standard Mod To choose the modulator output standard Using you can chose between PAL BG PAL I PAL DK NTSC 6 RF Chann...

Page 30: ...ate and time are reached no matter if the system is in standby mode or in playing mode it will automatically show a reminding message The message will be displayed on the screen until you press Exit t...

Page 31: ...e channels Press to set the time between 1 to 10 seconds 3 Position To define the position of the information s bar top bottom 4 OSD Transparency With this parameter you can set the transparency of th...

Page 32: ...be that you don t need to provide the power to the LNB But since this is depending on the kind of installed distribution system we recommend you to contact your install er or to refer to the user manu...

Page 33: ...s as you can see at OSD 74 1 Language press to select the language that will appear on the menus see point 5 1 2 First Audio Some channels offer more than one audio language This function allows you t...

Page 34: ...length of the snake If the snake runs against a wall or against itself then it dies Press OK to Pause Play the game Press Exit to quit the game and return to the Game menu 6 3 3 OTHELLO 1 Mark Setup a...

Page 35: ...and on again Now the new software is used 7 Press Exit to save the setting without upgrade For more information about software upgrade please visit http www ftemaximal com 6 5 2 UPGRADE BY SATELLITE T...

Page 36: ...to Download OSD 81 4 In the PC application set the Baud Rate to 115200 and start the download procedure Caution The new download channels will delete the original channels list Please be careful befo...

Page 37: ...Outer code Inner code Energy dispersion QPSK SCPC MCPC RS 204 188 8 ALL DVB rates DVB S recommendation INPUT SIGNAL Frequency Input level Channel bandwidth Input socked 950MHz 2150MHz 65dBm 25dBm 36MH...

Page 38: ...PAG 38 rev 1 3 WE FTE MAXIMAL DECLARE THAT THE PRODUCTS MAX S202 IS IN CONFORMITY WITH FOLLOWING DIRECTIVES LVD 73 23 EEC EMC 89 336 EEC AS LAST AMENDED BY 93 68 EEC CONFORMITY DECLARATION ENGLISH...

Reviews: