background image


Frymaster, a member of the Commercial Food Equipment Service Association, recommends using 
CFESA Certified Technicians.


24-Hour Service Hotline 1-800-551-8633


MAR 2013

www.frymaster.com

  E-mail: 

[email protected]


*8196985* 


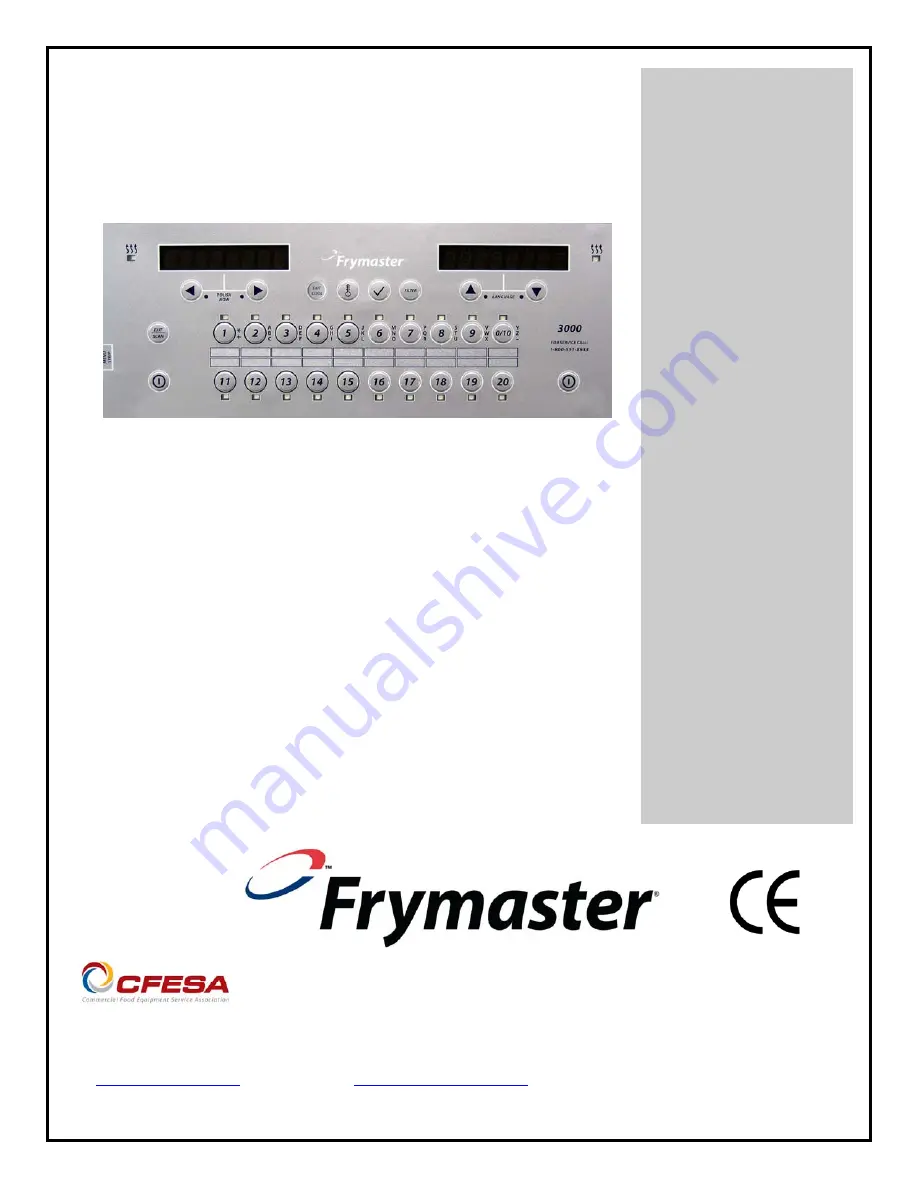
3000 Version 3 

CONTROLLER


Operation Manual


Summary of Contents for 3000

Page 1: ...ercial Food Equipment Service Association recommends using CFESA Certified Technicians 24 Hour Service Hotline 1 800 551 8633 MAR 2013 www frymaster com E mail service frymaster com 8196985 3000 Version 3 CONTROLLER Operation Manual ...

Page 2: ...void the manufacturer s warranty NOTICE This equipment must be installed in accordance with the appropriate national and local codes of the country and or region in which the appliance is installed NOTICE TO OWNERS OF UNITS EQUIPPED WITH COMPUTERS U S This device complies with Part 15 of the FCC rules Operation is subject to the following two conditions 1 This device may not cause harmful interfer...

Page 3: ...ultiple Setpoint Cooking Overview 1 10 1 9 Product Setup Multiple Setpoint 1 11 1 10 Filter Menu 1 12 1 10 1 Filter 1 13 1 10 2 Clean and Filter 1 14 1 10 3 Dispose 1 14 1 10 4 Dispose Bulk 1 15 1 10 5 Fill Vat from Bulk Bulk option only 1 15 1 10 6 Boil Out 1 16 1 11 Polishing 1 16 1 12 SCAN Mode 1 17 1 13 Sensitivity Setting Chart 1 18 CHAPTER 2 Operator Troubleshooting 2 1 Introduction 2 1 2 2 ...

Page 4: ...d Controller Button Navigation Product Press to start a cook cycle Active when adjacent LED is lit LED flashes during a cook cycle Press and hold to cancel a cook cycle Press at end of cook cycle to cancel an alarm Press and hold a product with different setpoint to change setpoint temperature Exit Scan Press once all product buttons are lit Select Product displayed Press product button to view pr...

Page 5: ...ray type in this manual If you are using the 3000 Version 3 with the Cooks and Filters features disabled you will not see the items shown in gray type in the programming steps If you have Cooks and Filters enabled the items shown in gray in this manual will appear in the programming steps you encounter on the controller Follow these steps to enable or disable the Filters and Cooks options The defa...

Page 6: ...1 4 Press and hold ü check button Last Dispose Stats Enter 1650 Vat Setup System 1 4 Language 2nd Language Locale CE or Non CE Energy Gas or Elec Type Vat System Volume Sound Level Tempr Format F or C Exit Melt Tempr Cool Mode Tempr Cool Mode Default Fresh Oil Waste Drain Switch Recovery Alarm Basket Lift Hold Time Time Date 1 4 Filter 1 4 Cooks til Filter EOD Filter Timer EOD Filter Time Flushing...

Page 7: ...e toggled easily from the front panel ex Spanish as a second language Default is Spanish Locale Non ce Press to scroll to choices CE European Conformity standards CE Belgium or Non CE non European standards and press This option is only available on the far left computer on multiple batteries Energy Gas Press to scroll to choices Gas or Electric and press This option is only available on the far l...

Page 8: ...t saving time begins each year at 2 00 A M on the second Sunday in March with clocks moving ahead one hour Daylight saving time ends each year at 2 00 A M on the first Sunday in November with clocks moving back one hour For the two U S states and international locations that do not use DST set to disabled OFF OFF Press until the controller displays INFO MODE changing to MAIN and then PRODUCT SETUP...

Page 9: ...cur each day 23 59 is disabled Enter time in 24 hour format Press 1 polish duration 15 Use numbered keys to change This is the duration in minutes for a polish Default to 15 minutes Press 1 polish start TEMPR 300F 149 C Use numbered buttons to change temperature This is the minimum temperature required for a polish to begin Default is 300F 149C Press Exit Exit Press the Exit Scan button once to re...

Page 10: ... life in days 2 disposes prior Avg Oil Life Number Days Press This is the average oil life of past 3 disposes Avg cooks Number Press This is the average cooks over past 3 disposes Reset Last dispose stats Yes no Press to scroll or to reset Last Dispose stats Reset Last dispose stats Enter code Enter 1656 complete Blank Exit Exit Press button once and press to scroll to desired choice Once desired ...

Page 11: ...Blank With the desired stats displayed press Product Product Name Press Started Number Minutes Press This is the time the last cook started Actual time Number Minutes Press This is the actual cook time including stretch time Program time Number Minutes Press This is the programmed cook time Max TEMP Number Press This is the maximum temperature of the oil during the last cook Min TEMP Number Press ...

Page 12: ... to 0 00 skip to FILTER PROMPT 1 ALARM NAME SHAKE Press to scroll through the alarm names ex Shake Stir Press 1 ALARM MODE Shake Alarm Mode AUTO Press Default is auto If manual is desired press to scroll to Manual shake alarm mode Press Alarm Shake Mode when set to auto cancels the alarm automatically after a few seconds Manual requires user action 1 ALARM TONE Shake Alarm tone Short Press to scro...

Page 13: ...f the first temperature change Step 3 sets the duration of the second cooking segment 4 minutes and the setpoint of the second temperature change Step 4 sets the duration of the third cooking segment 3 minutes and the setpoint of the third temperature change The four remaining minutes in the cook time elapse at the final temperature No entry is required to use the final minutes Enter 13 00 the cum...

Page 14: ...sensitivity 0 or previously entered value Enter the flex value 0 9 for the product and press 3 Time O 00 or previously programmed time Enter time remaining after second temperature change and press 3 TEMPR 0 00 or previously programmed temperature Enter temperature of the second segment and press 3 sensitivity 0 or previously entered value Enter the flex value 0 9 for the product and press 4 Time ...

Page 15: ...assemble To unassign a product from a button set the cook time to 0 00 and press EXIT SCAN 1 10 Filter Menu Not available with Filters option disabled The filter functions detailed below are only available if the Filters option is enabled in the C3000 Version 3 If Filters is disabled the Filter button has no function Pressing it with the fryer OFF or ON will have no effect See Page 1 2 for an expl...

Page 16: ...lank Press the button Filter Now Yes No Press YES to continue A no answer bypasses filtration and cooking continues FILTER PAN READY CONFIRM Ensure the filter pan is in place and clean Press or OPEN DRAIN VALVE Blank Open drain valve Draining 40 sec countdown timer None required If the drain valve becomes clogged use the Fryer s Friend poker like tool to clear the blockage DANGER NEVER attempt to ...

Page 17: ...er s joiner strip The strip is present to seal the joint between the fry vessels Banging fry baskets on the strip to dislodge shortening will distort the strip adversely affecting its fit It is designed for a tight fit and should only be removed for cleaning ...

Page 18: ...ining into an appropriate METAL container for disposal When draining oil into a disposal unit do not fill above the maximum fill line located on the container For safe convenient draining and disposal of used oil or shortening Frymaster recommends using the Frymaster Shortening Disposal Unit SDU The SDU is available through your local distributor Left Display Right Display Action Follow steps to E...

Page 19: ...press or CLOSE DRAIN VALVE Blank Close the drain valve OPEN DISPOSE VALVE CONFIRM Open dispose valve and press or DISPOSING 4 00 countdown timer None required CLOSE DISPOSE VALVE CONFIRM Close the dispose valve and press or REMOVE FILTER PAN Blank Open the door and pull filter pan out of the cabinet IS PAN EMPTY YES NO Ensure the pan is empty and press YES otherwise press NO and follow the prompts...

Page 20: ...r Turns on and heats to 195ºF 91 ºC The boil out timer starts BOIL OUT 30 00 The countdown timer begins Boil Out Done CONFIRM Press or to confirm and cancel the alarm IS SOLUTION REMOVED CONFIRM Once solution is removed press or OFF OFF DANGER Remove all drops of water from the frypot before filling with oil Failure to do so will cause spattering of hot liquid when the oil is heated to cooking tem...

Page 21: ...t dispose Press 1 TIME Time Time that product is programmed to cook Press 1 TEMPR Temperature Temperature that product is programmed to cook Press 1 Sensitivity Number The level of sensitivity the product is programmed to cook at Press 1 ALARM TIME Shake Time The time during a cook till a product shake alarm occurs Press 1 ALARM NAME Shake stir numbered alarm This is the name of the alarm Press 1 ...

Page 22: ...rge scallops 3 25 3 small scallops 1 10 3 shrimp 35 to a lb 2 15 3 shrimp 40 to 75 to a lb 1 45 3 shrimp 75 to 100 to a lb 1 10 3 cod 2 oz 3 25 7 flounder fillet 7 oz 4 35 3 flounder whole 10 12 oz 6 25 3 cod fillet 3 oz 4 35 7 perch 5 oz 4 30 3 haddock 7 oz 6 25 7 clams 2 00 3 oysters 1 10 4 strip clams fresh 0 35 4 strip clams frozen 0 45 4 Vegetables okra 4 30 4 eggplant 4 00 4 zucchini 3 00 4 ...

Page 23: ...nd that failure of a small component may often be indicative of potential failure or incorrect functioning of a more important component or system If you are in doubt as to the proper action to take do not hesitate to call the Frymaster Technical Service Department or your local Frymaster Authorized Servicer for assistance Before calling a servicer or the Frymaster HOTLINE 1 800 551 8633 Verify th...

Page 24: ...rature is more than 410ºF 210ºC or in CE countries 395ºF 202ºC Shut the fryer down immediately and call your FAS for assistance Controller displays Hi temp Frypot temperature is more than 40 ºF 22ºC above setpoint Press the power button to turn off fryer and let cool before returning power to fryer If issue continues call your FAS for assistance Controller displays RECOVERY FAULT YES and alarm sou...

Page 25: ... F 148 C for Polish and 250 F 121 C for Clean Filter or Dispose ensure the controller is ON Controller displays WAIT FOR Filter A Another function is still in process B MIB has not cleared checking system A Wait until the previous function ends to start another filtration cycle B Wait one minute and try again Controller displays INSERT pan A Normal during Change Filter Paper routine A Insert pan a...

Page 26: ... contact with ATO board E17 ATO Probe Error ATO probe resistance is out of range E20 Invalid Code Location SD card was removed during software upgrade E21 FILTER PAPER PROCEDURE ERROR Change Filter Paper 24 hour timer has expired E22 OIL IN PAN ERROR Oil may be present in the filter pan E25 RECOVERY FAULT Recovery time exceeded maximum time limit E27 LOW TEMP ALARM Oil is approximately 35 F 19 4 C...

Page 27: ......

Page 28: ...ter L L C 8700 Line Avenue Shreveport Louisiana 71106 TEL 1 318 865 1711 FAX Parts 1 318 688 2200 Tech Support Fax 1 318 219 7135 PRINTED IN THE UNITED STATES SERVICE HOTLINE 1 800 551 8633 819 6985 MAR 2013 ...

Reviews: