background image

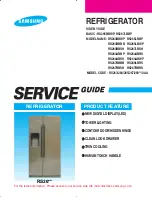
Summary of Contents for PHS37EHSB2

Page 1: ...tructions 6 Features at a Glance 7 Temperature Controls 8 JJ Looking inside 12 13 Automatic Ice and Water Dispenser J4 20 Replacing Air Filter 2J Food Storage Energy Saving Tips 22 Norma_ Operating Sounds 23 Care Cleaning 24 25 Warranty 26 Before You Call Solutions to commo Problem 27 30 READ AND SAVE THESE INSTRUCTIONS pN 241812901 Feb 2oo7 ...

Page 2: ...maintaining any appliance P ease record your mode and serial numbers below for future reference This information is found on the seria plate mocated inside the refrigerator compartment Model Number Serial Number Purchase Date PLEASE COMPLETE W TH YOUR REFRIGERATOR Got Questions Need Parts or Service Before Ca ting Your Local Repair Service o B Electrolux United States lq Canada 4 4 4 4 1 Reso ve m...

Page 3: ...ve doors o J Leave shelves in place so children may not easily climb inside Have refrigerant removed by a qualified service technician ELECTRICAL INFORMATION The refrigerator must be plugged into its own dedicated 115 Volt 60 Bz 15 Amp AC only electricaB outBet The power cord of the appliance is equipped with a three prong grounding plug for your protection against electrical shock hazards It must...

Page 4: ...of tabs are free Continue this __I process untii alI tabs are free and the toe griiie can be removed See graphic at top of page in right column LEVELING All four corners of your refrigerator must rest firml on a solid floor Your refrigerator is equipped with adjustable front rollers to help level your unit To ensure proper door seal and assist door closing the refrigerator should be tilted 1 4 6 r...

Page 5: ...supply and flush supply line until water is clear Turn OFF water supply at shutoff valve 3 Unscrew plastic cap from water valve inlet and discard cap 4 Slide brass compression nut then ferrule sleeve onto water supply line as shown 5 Push water supply line into water valve inlet as far as it will go inch Slide ferrule sleeve into valve inlet and finger tighten compression nut onto valve Tighten an...

Page 6: ...op hinge Lift the door off of the bottom hinge and set it aside 4 Remove the three bottom hinge screws and hinge if necessary To remove the freezer door 1 Detach the multi wire cable connector located above the top hinge Grasp both sides of the connector firmly and pull apart 2 Remove top hinge cover screw on freezer door and remove cover some models 3 Trace lightly around the door s top hinge wit...

Page 7: ...e E ectronic Controls Freezer and Refrigerator SpiHSefeTM Controms __ Dairy Compartment Door Bin Spi IProof TM Braiding Shemf Door Bin Wine Rack TaU Bottle Retainer Door Bin Special Item Rack Meat Keeper and Cover Can Rack CNsperPan and Cover Fixed Door Bin Door Bin Ice Container Pizza Shemf Wire She f Brash items Door Bin Wire Shelf Door Bin Sma Basket Large Basket Door Bin Large Basket Door Bin ...

Page 8: ...tures a fan circulates air in the refrigerator and freezer compartments For good circulation do not block cold air vents with food items _toryfettlnf factoty etti_g Freezer c _o_ FreshFood Refrigerator Freezer Controls Features may vary according to model TEMPERATURE ADJUSTMENT GUIDE ff Fresh Food Compartment Es Too Warm Turn Fresh Food Control Slightly Towards Colder ff Fresh Food Compartment Es ...

Page 9: ...e the current settings or temperatures of your freezer and fresh food compartments The models with a 2 digit temperature display are for reference only and do not display the current accurate compartment temperature Should you desire to see what the current accurate temperature is place a separate thermometer inside the freezer or fresh food compartment in the desired location To adjust the temper...

Page 10: ...ng it may indicate that the control system has detected a performance problem Call your service representative who can interpret the flashing message To maintain temperatures a fan circulates air in the refrigerator and freezer compartments For good circulation do not block cold air vents with food items NumedcD_p_y Fresh Freezer Food Temperature Disp_y 2 DigiO Freezer Fresh Food F o C F o C Tempe...

Page 11: ...s air filter needs to be replaced from time to time You can monitor the need for replacement by referring to the status light while the air filter is ON To turn on the air filter press the Air Filter button To turn off the air filter press the Air Filter button To RESET the air filter press the Air Filter button and hold for 3 seconds RESPONDING TO ALARMS Audible Tones Indicator Lights Your refrig...

Page 12: ...e back of the refrigerator To adjust cantilever shelves Lift front edge up Pull shelf out Replace the shelf by inserting the hooks at rear of the shelf into the wall bracket Lower the shelf into the desired slots and lock into position SpiflSafe 7M glass shelves some models catch and hold accidental spills In some models the Spit Safe TM shelves slide out for easy access to food and for fast clean...

Page 13: ...ed before storing Crisper Drawer HUMIDITY CONTROL SOME MODELS The Humidity Control present on some models with crisper drawers alIows you to adjust the humidity within the crisper This can extend the life of fresh vegetables that keep best in high humidity Crisper Humidity Control DELl DRAWER SOME VlODELS Some models are equipped with a Deli Drawer for storage of luncheon meats spreads cheeses and...

Page 14: ...ight bulb with an appliance bulb of the same wattage The FILTER STATUS indicator light above the Touch Pad _v ill light up each time the dispenser is used The following filter light indications are Green The filter is still operating within its specified Iife cycle Amber The filter has reached approximately 80 of its useful life This is the recommended time to purchase a replacement filter Red The...

Page 15: ...ht On Touch Pad to turn on dispenser light A red indicator will appear above the Touch Pad Light Off Press the Light Off Touch Pad to turn off dispenser light A red indicator will appear above the Touch Pad WATER To operate the water dispenser press a glass against the WATER dispensing paddle _ To stop dispensing water pull the glass away from the dispensing paddle O Dispensed water is not cold Fo...

Page 16: ...days to fill the ice container Because of new plumbing connections the first production of ice cubes may be discolored or have an odd flavor Discard ice made during the first 24 hours TURMNG YOUR SIDE MOUNTED raCE MAKER ON OFF To begin ice production lower the wire signal arm to the DOWN or ON position The ice maker turns off automatically when the ice container becomes fu l To stop the ice maker ...

Page 17: ...ssing the ice maker s On Off power switch to the On d position Ice cubes stored too long may develop an odd flavon Empty the ice container and ensure that the ice maker is on see previous page The ice maker will then produce more ice _ Occasionally shake the ice container to keep ice separated If a large quantity of ice is needed at one time it is best to remove cubes directly from the ice contain...

Page 18: ... if cartridge remains in housing pull down genti_ while twisting filter back and forth 4 Rinse out cup under running water 5 The large o ring that seals the filter system fits in the o ring groove inside the cup Should the o ring fall out during filter cartridge replacement simply place it back in the groove prior to screwing the cup back in place if the o ring becomes damaged you will need to ord...

Page 19: ...ndards 42 and 53 See performance data sheet for specifications This system should not be used on water that is microbiologicaliy unsafe or with water of unknown quality unless the water has been adequately disinfected before or after traveling through the filtration system Rated Capacity 400 gallons Rated service flow 5 GPM Maximum Rated Pressure 100 PSI Maximum Operating Temp 100 F 3 Pull the old...

Page 20: ...isinfection before this device Rated Capacity 250 gallons Rated service flow 5 GPM Maximum Rated Pressure 100 PSI Maximum Operating Temp 100 F To change filter It is not necessary to turn the water supply off to change the filter 1_ Turn OFF side mounted ice maker by raising wire signa arm to the UP position Turn OFF rear mounted ice maker by pressing ON OFF power switch to the O position 2 Push t...

Page 21: ...e side of the air filter housing This releases the hinged bottom half to drop open 2 Remove the old filter and discard it 3 Unpackage the new filter and place it inside the hinged bottom half of the housing 4 Push the hinged bottom half upward until the tab snaps into closed position 5 Press and hold the Filter Reset button on the electronic control panel for 3 seconds When the Filter OK light com...

Page 22: ... too much warm food to the freezer at one time This overloads the freezer slows the rate of freezing and can raise the temperature of frozen foods Leave a space between the packages so cold air can circulate freely allowing food to freeze as quickly as possible _ Avoid storing hard4o freeze foods such as ice cream and orange iuice on the freezer door shelves These foods are best stored in the free...

Page 23: ...sound After defrosting a popping sound may occur D Automatic Ice Maker If your refrigerator is equipped with an automatic ice maker you will hear ice cubes falling into the ice bin E Cold Control Automatic Defrost Control These parts can produce a snapping or clicking sound when turning the refrigerator on and off F Condenser Fan You may hear air being forced through the condenser by the condenser...

Page 24: ... alcohol to clean Handles handles Use a soft cloth to clean smooth handles Do Not use a dry cloth to clean smooth doors CAUTION Never use CHLORIDE to clean stainless steel Stainless Steel Models Only Soap and water Soap and water Soap and water Glass cleaner Mild liquid sprays Soap and water Mild liquid sprays Vacuum attachment Soap and water Non Abrasive Glass Cleaner Soap and water Ammonia Stain...

Page 25: ...tor compartment Turn automatic ice maker off and empty ice bucket even if you will only be gone for a few days Remove all food and ice if you will be gone one month or more Turn off automatic ice maker and turn water supply valve to closed position Turning refrigerator controls to OFF by pressing and holding the On Off button for 3 seconds electronic or turn control knobs to 0 manual on the mechan...

Page 26: ...er than authorized service companies or external causes such as abuse misuse inadequate power supply accidents fires or acts of God DISCLAIMER OF IMPLIED WARRANTIES LIMITATION OF REMEDIES CUSTOMER S SOLE AND EXCLUSIVE REMEDY UNDER THIS LIMITED WARRANTY SHALL BE PRODUCT REPAIR OR REPLACEMENT AS PROVIDED HEREIN CLAIMS BASED ON IMPLIED WARRANTIES INCLUDING WARRANTIES OF MERCHANTABILITY OR FITNESS FOR...

Page 27: ...king door See PROBLEM section OPENING CLOSING OF DOORS DRAWERS Set Fresh Food control to warmer setting until refrigerator temperature is satisfactory Allow 24 hours for temperature to stabilize Clean or change gasket Leaks in door seal will cause refrigerator to run longer in order to maintain desired temperatures Clean condenser See Care Cleaning Chart in Care and Cleaning section Compressor goe...

Page 28: ...cts on bottom Vegetables contain and give It is not unusual to have moisture on the bottom side of side of drawer cover off moisture the cover Move humidity control some models to lower setting Water collects in bottom of Washed vegetables and fruit Dry items before putting them in the drawer Water drawer drain while in the drawer collecting in bottom of drawer is normal WATER MOISTURE FROST OUTSI...

Page 29: ...Allow 24 hours for temperature to stabilize Add more food to freezer Cover foods tightly Discard stale ice Ice maker will produce fresh supply Add filter to water supply line Consult a water purifying company Discard stale ice ICE DISPENSER Dispenser will not dispense ice Ice dispenser is jammed Ice storage container is empty Freezer temperature is set too warrn Household water line valve is not o...

Page 30: ...is dirty Interior needs to be cleaned See Care Cleaning Chart in Care and Cleaning section Food with strong odors is in Cover food tightly refrigerator OPENING CLOSING OF DOORS DRA WERS Door s will not close Close both doors gently Door was closed too hard causing other door to open slightly Refrigerator is not level It rocks on the floor when moved slightly Refrigerator is touching a wall or cabi...

Reviews: