background image

5

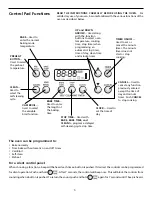
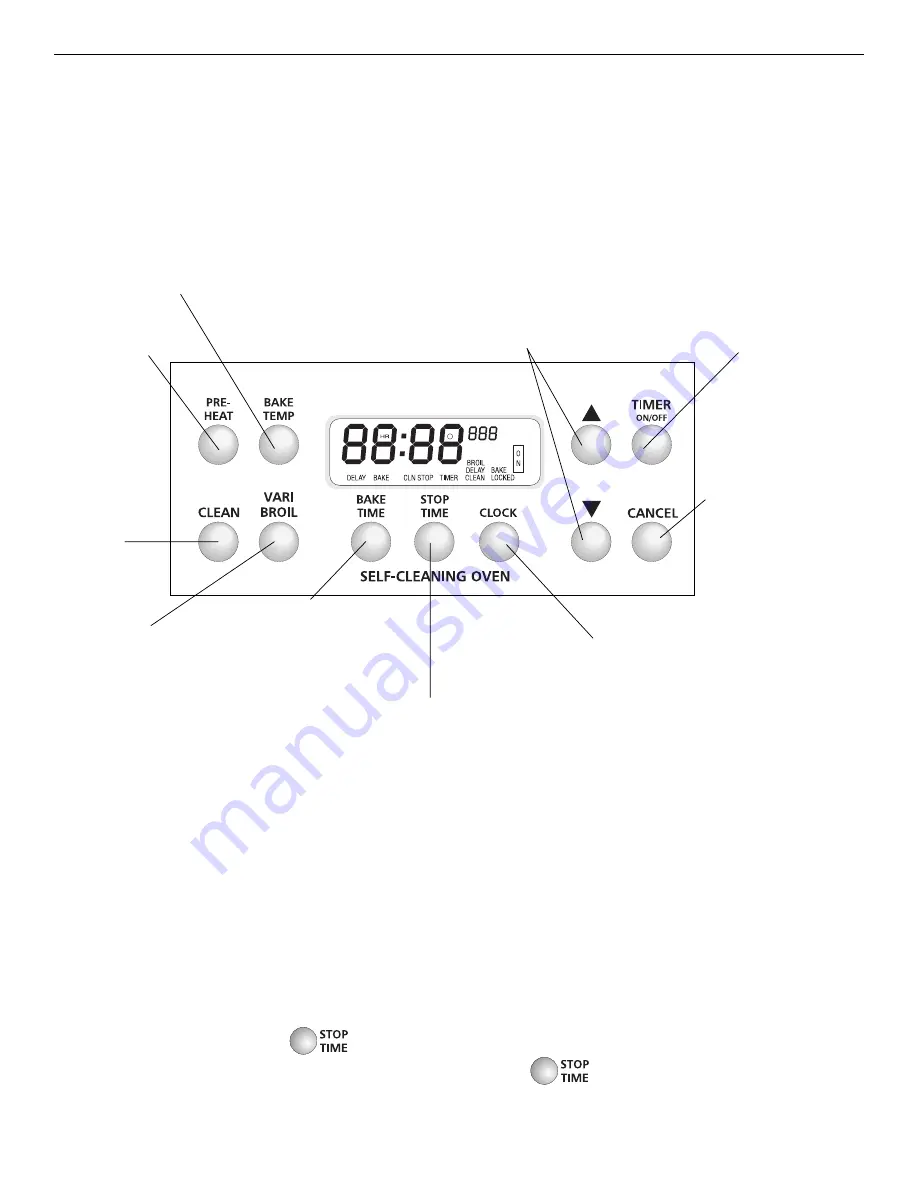
Control Pad Functions

STOP TIME

— Used with

BAKE, BAKE TIME, and

CLEAN

 to program a delayed

self-cleaning cycle stop time.

READ THE INSTRUCTIONS CAREFULLY BEFORE USING THE OVEN.  

For

satisfactory use of your oven, become familiar with the various functions of the

oven as described below.

UP and DOWN

ARROW

— Used along

with the function

buttons to select oven

temperature, cooking

time, stop time (when

programming an

automatic stop time),

time of day, clean time

and minute timer.

TIMER ON/OFF

—

Used to set or

cancel the minute

timer. The minute

timer does not

start or stop

cooking.

VARI BROIL

—

Used to select

the variable

broil function.

PREHEAT

BUTTON

—

Used to select

the preheat

temperature.

BAKE

—Used to

enter the normal

baking mode

temperature.

The oven can be programmed to:

• Bake normally

• Time bake with automatic on and off times

• Vari Broil

• Self-clean

• Preheat

For a silent control panel:

When choosing a function, a beep will be heard each time a button is pushed. If desired, the controls can be programmed

for silent operation. Push and hold 

. After 7  seconds, the control will beep once. This will block the controls from

sounding when a button is pushed. To return the sound, push and hold 

 again for 7 seconds until 1 beep is heard.

BAKE TIME

—

Used to enter

the length of

the baking

time.

CLEAN

—

Used to

select the

self-cleaning

cycle.

CANCEL

— Used to

cancel any function

previously entered

except the time of

day and minute

timer. Push 

CANCEL

to stop cooking.

CLOCK

— Used to

set the time of

day.
Summary of Contents for FGF379WECT

Page 1: ...e Clock and Minute Timer 6 Installing Burner Grates 7 Flame Size 7 Proper Burner Adjustments 7 Setting Surface Controls 8 Setting Warmer Drawer Controls if equipped 9 Before Setting Oven Controls 10 Setting Oven Controls 11 14 Oven Cleaning 15 16 General Cleaning 17 20 Changing Cooktop and or Oven Lights 20 Adjusting Oven Temperature 21 Avoid Service Checklist 22 23 Warranty Back Page ...

Page 2: ...la version française de ce Guide de l utilisateur faites en la demande par écrit à l adresse indiquée ci dessous Exigez qu on vous livre le N de pièce 316000299F French Owner s Guides OR SpanishOwner sGuides pleasespecify Frigidaire Company P O Box 9061 Dublin Ohio 43017 0961 This Owner s Guide contains general operating instructions for your range and feature information for several models Your r...

Page 3: ... in use They should never be allowed to sit or stand on any part of the appliance DO NOT TOUCH SURFACE BURNERS AREAS NEAR THESE BURNERS OVEN BURNERS OR INTERIOR SURFACES OF THE OVEN Both surface and oven burners may be hot even though flames are not visible Areas near surface burners may become hot enough to cause burns During and after use do not touch or let clothing or other flammable materials...

Page 4: ...nsils from the rack before moving Do not use the broiler pan without its insert The broiler pan and its insert allow dripping fat to drain and be kept away from the high heat of the broiler Do not cover the broiler insert with aluminum foil Exposed fat and grease could ignite Cold temperatures can damage the electronic control When using the appliance for the first time or when the appliance has n...

Page 5: ...TTON Used to select the preheat temperature BAKE Used to enter the normal baking mode temperature The oven can be programmed to Bake normally Time bake with automatic on and off times Vari Broil Self clean Preheat For a silent control panel When choosing a function a beep will be heard each time a button is pushed If desired the controls can be programmed for silent operation Push and hold After 7...

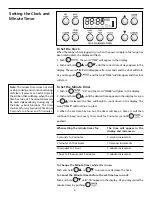
Page 6: ... It will then continue to beep once every 10 seconds for 5 minutes or until is pushed When setting the minute timer for The time will appear in the display and increase in 5 seconds to 2 minutes 5 second increments 2 minutes to 10 minutes 10 second increments 10 minutes to 1 hour 1 minute increments 1 hour to 9 hours and 55 minutes 5 minute increments To Change the Minute Timer while it is in use ...

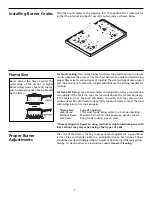
Page 7: ...ll be undercooked Do not attempt to deep fat fry too much food at once as the food will neither brown nor cook properly Flame Size Type of Cooking High Flame Start most foods bring water to a boil pan broiling Medium Flame Maintain a slow boil thicken sauces gravies steam Low Flame Keep foods cooking poach stew These settings are based on using medium weight aluminum pans with lids Settings may va...

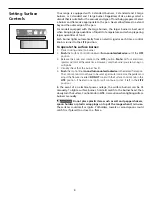
Page 8: ...ase the knob and rotate to the LITE position Note All four electronic ignitors will click at the same time However only the burner you are turning on will ignite 3 Visually check that the burner has lit 4 Pushthecontrolknobinandturn counterclockwisetothedesiredflamesize The control knobs do not have to be set at a particular mark Use the guides and adjust the flame as needed DO NOT cook with the S...

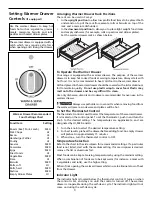
Page 9: ...re designated by HI MED and LO 1 Turn the knob to select the desired temperature setting 2 For best results preheat the drawer before adding food An empty drawer will preheat in approximately 15 minutes 3 When done turn the thermostat control to OFF Temperature Selection Refer to the chart in the side column for recommended settings If a particular food is not listed start with the medium setting ...

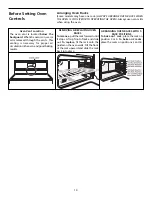
Page 10: ...nd slide out To replace fit the rack onto the guides on the oven walls Tilt the front of the rack upward and slide the rack back into place ARRANGING OVEN RACKS WITH 5 RACK POSITIONS To bake on 1 rack place the rack on position 3 or 4 To bake on 2 racks place the racks on positions 2 and 4 Oven Vent Location The oven vent is located below the backguard When the oven is on warm air is released thro...

Page 11: ... show PrE and the words BAKE and ON will appear in the display 5 When the oven has finished preheating the control will beep 3 times and the display will change from PrE to the programmed set temperature 6 When the control beeps and the control displays the set temperature the oven enters the bake mode To Set or Change the Temperature for Normal Baking The oven can be programmed to bake at any tem...

Page 12: ...d the word BAKE will glow in the display 6 Push and hold or until the desired baking temperature appears in the display Once the Controls are Set a Theovenwillcomeonandbeginheatingtotheselectedbakingtemperature b The words BAKE and ON will appear in the display c The main display will show the oven baking time and will count down by minutes until it reaches 00 When the Set BAKE TIME Runs Out a 00 ...

Page 13: ... If the baking temperature is not set the control will beep will flash and the word BAKE will appear in the display Once the Controls are Set a Theovenwillcomeonandbeginheatingtotheselectedbakingtemperature b The words BAKE and ON will appear in the display c The main display will show the oven baking time and will count down by minutes until it reaches 00 When the Set BAKE TIME Runs Out a 00 will...

Page 14: ...in the display 3 Push and hold or until the desired broil setting level appears in the display The broiling temperature can be set at 2 different levels HI or LO Most foods can be broiled at the HI broil setting Select the LO broil setting to avoid excess browning or drying of foods that should be cooked to the well done stage 4 Place the grid on the broiler pan then place the food on the cool bro...

Page 15: ...lovers in the oven cavity before starting the self cleaning cycle To clean use hot soapy water and a cloth Large spillovers can cause heavy smoke or fire when subjected to high temperatures DO NOT allow food spills with a high sugar or acid content such as milk tomatoes sauerkraut fruit juices or pie filling to remain on the surface as they may cause a dull spot even after cleaning 5 Clean any soi...

Page 16: ...correct time of day 2 Push CLN TIME will appear in the display 3 Push and hold or until 3 HR 00 appears in the display Set the cleaning time based on the amount of soil you have light medium or heavy See above 4 Push The time of day that the self cleaning cycle ends will appear in the display The words CLN STOP TIME will glow in the display 5 Push and hold or until the time of day that you want th...

Page 17: ...ecome damaged during future heating DO NOT use spray oven cleaners on the range top Clean with hot soapy water and a dishcloth Rinse with clean water and a cloth Cover stubborn spots with an ammonia soaked paper towel for 30 40 minutes Rinse Cleaners made especially for stainless steel are recommended Be sure to rinse the cleaners as bluish stains may occur during heating and cannot be removed Rem...

Page 18: ... following combinations burner cap and trim ring burner cap and burner pan or burner cap trim ring and burner pan Remove in the following order 1st burner cap 2nd trim ring and 3rd burner pan Do not operate the burners without the burner cap assembly in place To Clean the Burner Cap Burner Pan some models and Trim Ring some models Use a soap filled scouring pad or a mild abrasive cleanser to clean...

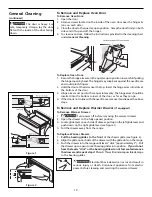
Page 19: ...bove steps The door is heavy For safe temporary storage lay the door flat with the inside of the door facing down To Remove and Replace Warmer Drawer if equipped To Remove Warmer Drawer 1 Turn power off before removing the warmer drawer 2 Open the drawer to the fully opened position 3 Locate glide lever on each side of drawer pull up on the left glide lever and push down on the right glide lever s...

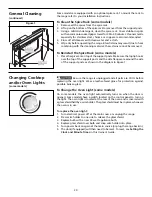
Page 20: ...und the side of the support posts as shown in the diagram in Figure 1 Figure 1 Changing Cooktop and or Oven Lights some models Be sure the range is unplugged and all parts are COOL before replacing the oven light Wear a leather faced glove for protection against possible broken glass To Change the Oven Light some models On some models the oven light automatically turns on when the door is opened S...

Page 21: ...temperature to 550 F 287 C by pushing and holding the 3 Within 2 seconds push and hold until the special 2 digit display appears Release The display now indicates the amount of degrees offset between the original factory temperature setting and the current temperature setting If the oven control has the original factory calibration the display will read 00 4 The temperature can now be adjusted up ...

Page 22: ...ports with a small gauge wire or needle Range power cord is disconnected from outlet Electric Ignition Models only Be sure cord is securely plugged into the outlet Electrical power outage electric ignition models only Burners can be lit manually See Setting Surface Controls in this Owner s Guide Burner ports are clogged With the burner off clean ports by using a small gauge wire or needle Moisture...

Page 23: ... rack position is used Center food in the oven and space pans to allow air to circulate Allow the oven to preheat to the set temperature before placing food in the oven Try adjusting the recipe s recommended temperature or baking time If you feel the oven is too hot or cool see Adjusting Oven Temperature in this Owner s Guide Controls are not set properly Follow instructions under Oven Cleaning Se...

Page 24: ...lation 6 Replacement of light bulbs and or fluorescent tubes on models with these features This warranty does not cover the following 1 CONSEQUENTIAL OR INCIDENTAL DAMAGES SUCH AS PROPERTY DAMAGE AND INCIDENTAL EXPENSES RESULTING FROM ANY BREACH OF THIS WRITTEN OR ANY IMPLIED WARRANTY Note Some states do not allow the exclusion or limitation of incidental or consequential damages so this limitatio...

Reviews: