background image

9

Surfaces

Aluminum (Trim Pieces)

Glass, Painted and Plastic

Body Parts and Decorative Trim

Control Panel

Porcelain Enamel

Broiler Pan and Grid, Door
Liner, Broiler Drawer

Oven and Broiler Rack(s)

Oven Door

How to Clean

Use hot, soapy water and a cloth. Dry with a clean cloth. 

DO NOT

 scour or use all-purpose

cleaners, ammonia, powdered cleansers or commercial oven cleaner. They can scratch
and discolor aluminum.

For general cleaning

, use hot soapy water and a cloth. 

For more difficult soils and built-

up grease

, apply a liquid detergent directly onto the soil. Leave on soil for 30 to 60 minutes.

Rinse with a damp cloth and dry. 

DO NOT 

use abrasive cleaners, spray cleaners or scouring

pads on any of these materials. These cleaners can permanently damage the control pad
surface.

Before cleaning the control panel, 

turn control to OFF and remove the control knob. To

remove, pull knob straight off the shaft. Clean as instructed above. Squeeze excess water
from the cloth before wiping the panel; especially when wiping around the control. Excess
water in or around the control may cause damage to the appliance. To replace knob after
cleaning, line up the flat sides of both the knob and the shaft, then push the knob into place.

Gentle scouring with a soapy scouring pad will remove most spots. Rinse with a 1:1 solution
of clear water and ammonia. 

If necessary

, cover difficult spots with an ammonia-soaked

paper towel for 30 to 40 minutes. Rinse with clean water and a damp cloth, and then scrub
with a soap-filled scouring pad. Rinse and wipe dry with a clean cloth. Remove all cleaners
or the porcelain may become damaged during future heating.

For Non Self-Clean Models

: Clean by using a mild, abrasive cleaner following manufacturer's

instructions. Rinse with clean water and dry. After cleaning the racks, rub the sides of the
racks with wax paper or a cloth containing a small amount of baby oil or salad oil (this
will make the racks glide easier into the rack position).

For Self-Clean Models: 

Oven racks may be removed or left in the oven during the self-clean

cycle for cleaning. If removed, follow instructions above.

If the racks are cleaned in the self-clean cycle, their color will turn slightly blue and the
finish will be dull. After the self-clean cycle is completed and the oven has cooled, rub the
sides of the racks with wax paper or a cloth containing a small amount of baby oil or salad
oil (this will make the racks glide easier into the rack positions).

To clean oven door, wash with hot, soapy water and a clean cloth. 

DO NOT

 immerse the

door in water. 

DO NOT

 clean the oven door gasket. The oven door gasket is made of a

material which is essential for a good seal.

Care should be taken not to damage or remove the oven door gasket.

General Cleaning

Cleaning Various Parts of Your Appliance

Before cleaning any part of the appliance, be sure all controls are turned OFF and the appliance is COOL. REMOVE SPILLOVERS
AND HEAVY SOILING AS SOON AS POSSIBLE. REGULAR CLEANING WILL REDUCE THE NUMBER OF MAJOR CLEANING LATER.

Summary of Contents for FGB24T3ASA

Page 1: ...e Oven 6 Oven Cleaning 7 8 Setting the Controls for a Clean Cycle 8 General Cleaning 9 Single Oven Models Before Setting Oven Controls 10 Setting Oven Controls 10 AdjustingOvenTemperature 10 General Cleaning 10 11 Changing Oven Light 11 Double Oven Models Setting the Clock and Minute Timer 12 Before Setting Oven Controls 13 Setting Oven Controls 14 General Cleaning 14 15 Changing Oven Light 16 Adj...

Page 2: ...er Your Product The PRODUCT REGISTRATION CARD should be filled in completely signed and returned to Electrolux Home Products North America If the information in this manual is not followed exactly a fire or explosion may result causing property damage personal injury or death FOR YOUR SAFETY Do not store or use gasoline or other flammable vapors and liquids in the vicinity of this or any other app...

Page 3: ...ve model serial number plate Proper Installation Be sure your appliance is properly installed and grounded by a qualified electrician or installerinaccordancewiththeNationalElectricalCode ANSI NFPA No 70 U S A or CSA C22 1 PART 1 Canada latesteditionsandlocalcoderequirements Install only per installation instructions provided in the literature package for this appliance Ask your dealer to recommen...

Page 4: ...moving the rack SAVE THESE INSTRUCTIONS IMPORTANT SAFETY INSTRUCTIONS continued Do not use the broiler pan without its insert The broiler panandgridallowdrippingfattodrainandbekeptawayfrom the high heat of the broiler Do not cover the broiler grid or oven bottom with aluminum foil Exposed fat and grease could ignite Do not touch a hot oven light bulb with a damp cloth Doing so could cause the bulb...

Page 5: ...LATION AND GROUNDING INSTRUCTIONS DO NOT OPERATE THE OVEN USING A TWO PRONG ADAPTER OR AN EXTENSION CORD Oven Ignition When you turn the oven on the glow bar igniter begins to heat When the lighter is hot enough in less than 1 minute the gas flows into the burner and is ignited The igniter glows bright orange when hot It cycles on and off with the thermostat and will glow whenever the burner is on...

Page 6: ...ize suggested in recipe Use proper rack position and place pan so there is 2 4 5 10 cm of space on all sides of pan Place a marked glass measuring cup filled with some water on the center of the oven rack If the water level is uneven refer to the installation instructions for leveling the range Be sure to allow 2 4 5 10 cm of clearance on all sides of each pan in the oven Do not use pans that are ...

Page 7: ... oven bottom Clean with hot soapy water Rinse well using clean water and a cloth Adhere to the following precautions when using oven cleaners 1 DO NOT spray on the electrical controls or switches because it could cause a short circuit and result in sparking or fire 2 DONOT allowafilmfromthecleanertobuilduponthetemperaturesensingbulb itcouldcausetheoventoheatimproperly The bulb is located in the re...

Page 8: ...pillovers can cause heavy smoke or fire when subjected to high temperatures DO NOT allow food spills with a high sugar or acid content such as tomatoes sauerkraut fruit juice or pie filling to remain on the surface as they may cause a dull pot even after cleaning 2 Clean any soil from the oven frame and the door liner These areas heat sufficiently during a self clean cycle to burn soil on Clean wi...

Page 9: ...Rinsewithcleanwaterandadampcloth andthenscrub withasoap filledscouringpad Rinseandwipedrywithacleancloth Removeallcleaners or the porcelain may become damaged during future heating ForNonSelf CleanModels Cleanbyusingamild abrasivecleanerfollowingmanufacturer s instructions Rinse with clean water and dry After cleaning the racks rub the sides of the racks with wax paper or a cloth containing a smal...

Page 10: ...s from the lower racks of the oven and prevent hands from contacting the hot oven door Always use the offset rack in the lower position Setting Oven Controls For setting the oven controls refer to the section on the timer or Electronic Oven Control Guide Adjusting Oven Temperature For instructions on how to adjust the oven temperature refer to Timer Section or Electronic Oven Control Guide General...

Page 11: ...pushthedrawerinuntilitstops thenlifttoallowtherollerstocleartherollerguidestopandpushin largerstoragedrawer models only Flammable materials should not be stored in an oven or in the storage or broiler drawer or compartment if equipped This includes paper plastic and cloth items such as cookbooks plasticware and towels as well as flammable liquids Do not store explosives such as aerosol cans on or ...

Page 12: ...ropriate time Adjusts in one minute increments by tapping UP or DOWN ARROW or 10 minute increments by pressing and holding UP or DOWN ARROW Set mode is exited and timer begins counting down 5 seconds after last entry Flashing colon indicates timer is active Timer set mode is canceled if no button is push for 5 seconds 4 A single beep will be heard 1 minute before the end of the selected time When ...

Page 13: ...e to the wall oven Arranging Oven Racks ALWAYS ARRANGE OVEN RACKS WHEN THEOVENISCOOL PRIORTO OPERATING THE OVEN Always use oven mitts when using the oven To remove an oven rack pull the rack forward until it stops Lift up front of rack and slide out To replace an oven rack fit the rack onto the guides on the oven walls Tilt the front of the rack upward and slide the rack back into place Some model...

Page 14: ...ed turnandcookonthesecondside Season and serve Note Always pull the rack out to the stop position before turning or removingfood 6 When broiling is finished turn the Temperature Control knob to OFF Should an oven fire occur leave the oven door closed and turn the ovenoff Ifthefirecontinues throwbakingsodaonthefireoruseafireextinguisher DO NOT put water or flour on the fire Flour may be explosive G...

Page 15: ...he rear of the oven bottom 2 Lower the front of the oven bottom and slide into place 3 Replace wire guides Note If oven bottom fits too tightly place your hand under the bottom through the lower cavity and push up on each side of the front end To Remove the Oven Bottom lower oven 1 Remove racks broiler pan and wire guides 2 Pull out and lift up the oven bottom To Replace the Oven Bottom lower oven...

Page 16: ... using a higher or lower temperature than the recommended temperature The baking results should help you to decide how much of an adjustment is needed To Adjust Oven Temperature 1 Check to be sure the Temperature control knob is in the OFF position 2 Pull Temperature control knob straight off the shaft 3 Loosen but do not remove the two screws at the back of the knob Note Ifknobdoesnothave2screws ...

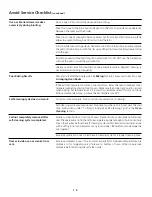
Page 17: ...kfuseorengagecircuitbreakersecurely House fuse has blown or circuit breaker has tripped after the oven has been installed and previously operating Call an authorized servicer Wallovenisnotproperlyconnectedtogassupply Checkconnection seeInstallation Instructions Make sure gas supply shut off valve is opened before turning on the oven after installing the wall oven Burnedoutorloosebulb Followinstruc...

Page 18: ...Arranging Oven Racks If baked food items are too dark on top or bottom allow the oven to preheat to set temperaturebeforeplacingfoodinoven Makesuretheproperrackpositionisused when baking Set temperature 25 F lower than recommended If food is not done after recommended time increase the set temperature 25 F Controls not set properly Follow instructions under Oven Cleaning Self cleaning cycle was in...

Page 19: ...1 9 Notes ...

Page 20: ...ce companies or external causes such as abuse misuse inadequate power supply accidents fires or acts of God DISCLAIMER OF IMPLIED WARRANTIES LIMITATION OF REMEDIES CUSTOMER S SOLE AND EXCLUSIVE REMEDY UNDER THIS LIMITED WARRANTY SHALL BE PRODUCT REPAIR OR REPLACEMENT AS PROVIDED HEREIN CLAIMS BASED ON IMPLIED WARRANTIES INCLUDING WARRANTIES OF MERCHANTABILITY OR FITNESS FOR A PARTICULAR PURPOSE AR...

Reviews: