background image

9

WARNING

To avoid electric shock, which can cause 

death or severe personal injury, disconnect 

the refrigerator from electrical power before 

connecting a water supply line to the refrigerator.

NOTE

Check with your local building authority for 

recommendations on water lines and associated 

materials prior to installing your new refrigerator.  

Depending on your local/state building codes, Frigidaire 

recommends for homes with existing valves its Smart 

Choice® water line kit 5305513409 (with a 6 ft. 

Stainless Steel Water Line) and for homes without an 

existing valve, Frigidaire recommends its Smart Choice 

water® line kit 5305510264 (with a 20 ft. Copper Water 

Line with self-tapping saddle valve).  Please refer to 

www.frigidaire.com/store for more information.

CAUTION

To Avoid Property Damage:
• Copper or Stainless Steel braided tubing is 

recommended for the water supply line. Water 

supply tubing made of ¼ inch plastic is not 

recommended to be used. Plastic tubing greatly 

increases the potential for water leaks, and the 

manufacturer will not be responsible for any 

damage if plastic tubing is used for the supply line.

• DO NOT install water supply tubing in areas 

where temperatures fall below freezing.

• Chemicals from a malfunctioning softener 

can damage the ice maker. If the ice maker 

is connected to soft water, ensure that the 

softener is maintained and working properly.

IMPORTANT

Ensure that your water supply line connections comply 

with all local plumbing codes.

IMPORTANT

After connecting the water supply, refer to “How to Prime 

the Water Supply System” for important information about 

priming an empty water supply system. 
Your refrigerator’s water supply system includes several tubing 

lines, a water filter, a water valve, and a water tank. To ensure 

that your water dispenser works properly, this system must be 

completely filled with water when your refrigerator is first 

connected to the household water supply line.

CONNECTING THE WATER SUPPLY

Before Installing The Water Supply Line, You Will Need:

  •  Basic Tools: adjustable wrench, flat-blade 

screwdriver, and Phillips

TM

 screwdriver

  •  Access to a household cold water line with water 

pressure between 30 and 100 psi.

  •  A water supply line made of ¼ inch (6.4mm) OD, 

copper or stainless steel tubing. To determine the 

length of tubing needed, measure the distance 

from the ice maker inlet valve at the back of the 

refrigerator to your cold water pipe. Then add 

approximately 7 feet (2.1 meters), so the refrigerator 

can be moved out for cleaning (as shown). 

  •  A shutoff valve to connect the water supply line to 

your household water system. DO NOT use a self-

piercing type shutoff valve.

  •  A compression nut and ferrule (sleeve) for connecting 

a copper water supply line to the ice maker inlet valve.

To Connect Water Supply Line To Ice Maker Inlet Valve

  1.  Disconnect refrigerator from electric power source.
  2.  Place end of water supply line into sink or bucket. 

Turn ON water supply and flush supply line until 

water is clear. Turn OFF water supply at shutoff valve.

  3.  Remove plastic cap from water valve inlet and 

discard cap.

 4. 

If you use copper tubing

 - Slide brass compression 

nut, then ferrule (sleeve) onto water supply line. Push 

water supply line into water valve inlet as far as it will 

go (¼ inch/6.4 mm). Slide ferrule (sleeve) into valve 

inlet and finger tighten compression nut onto valve. 

Tighten another half turn with a wrench; DO NOT 

over tighten. See Figure 1.


If you use stainless steel tubing

 - The nut and 

ferrule are already assembled on the tubing. Slide 

compression nut onto valve inlet and finger tighten 

compression nut onto valve. Tighten another half turn 

with a wrench; DO NOT over tighten. See Figure 2.

  5.  With steel clamp and screw, secure water 

supply line (copper tubing only) to rear panel of 

refrigerator as shown. 

  6.  Coil excess water supply line (copper tubing only), 

about 2½ turns, behind refrigerator as shown and 

arrange coils so they do not vibrate or wear against 

any other surface. 

  7.  Turn ON water supply at shutoff valve and tighten 

any connections that leak.

  8.  Reconnect refrigerator to electrical power source.
  9.  To turn ice maker on, lower wire signal arm (side 

mounted) or set the ice maker’s On/Off power 

switch  to the “

I

” position (rear mounted).

Figure 2

Figure 1

Copper water line
from household water supply

(Include enough tubing in loop to allow

moving refrigerator out for cleaning.)

Ferrule

(Sleeve)

Copper

water line

Water Valve

Valve Inlet

Water Valve

Bracket

Steel

Clamp

Plastic Water Tubing

to Ice Maker

Fill Tube

Brass

Compression

Nut

Summary of Contents for DGUS2645LF

Page 1: ... Important Safety Instructions 2 Features at a Glance 4 Installation 5 Door Removal Instructions 7 Connecting Water Supply 9 Controls 10 Storage Features 12 242111902 August 2011 Automatic Ice Water Dispenser 13 Changing the Filter 15 Normal Operating Sounds and Sights 16 Care and Cleaning 17 Before you Call 18 Major Appliance Warranty 20 ...

Page 2: ...ged in Ice Maker House water supply connected to refrigerator No water leaks present at all connections recheck in 24 hours Ice maker is turned ON Ice water dispenser operates correctly Front filter must be flush with filter housing select models Final Checks Shipping material removed Fresh food and freezer temperatures set Crisper humidity controls set Registration card sent in Installation Check...

Page 3: ...preads plastic sheets or stretch wrap may become airtight chambers and can quickly cause suffocation Proper Disposal of your Refrigerator or Freezer Risk of child entrapment Child entrapment and suffocation are not problems of the past Junked or abandoned refrigerators or freezers are still dangerous even if they will sit for just a few days If you are getting rid of your old refrigerator or freez...

Page 4: ...res not included with your refrigerator can be purchased at www frigidaire com or by calling 1 800 944 9044 FEATURES AT A GLANCE Features may vary according to model SpillSafe Adjustable Shelf SpillSafe Adjustable Shelf ...

Page 5: ...washer or other heat sources The refrigerator must be installed on a floor that is level and strong enough to support a fully loaded refrigerator Consider water supply availability for models equipped with an automatic ice maker If you do not hook up water to the refrigerator remember to turn the ice maker off Installation Installation clearances Allow the following clearances for ease of installa...

Page 6: ...e a flat blade screwdriver or 3 8 inch socket wrench to raise or lower the front rollers 3 Ensure both doors are bind free with their seals touching the cabinet on all four sides Hinge Flange Set Screw some models Door Stop Flange Hinge Open Door 7 16 Wrench and 3 32 Hex Key some models 6 Replace the toe grille by fitting it into place see Toe Grille Installation and Removal in the Installation se...

Page 7: ... the three screws from each cover over the top door hinges 2 Lift hinge cover straight up and off To remove the refrigerator door 1 Trace lightly around the door s top hinge with a pencil This makes reinstallation easier 2 Remove the two screws from the top hinge Lift the door off of the bottom hinge and set it aside 3 Remove the two bottom hinge screws and hinge if necessary Adjustable Wrench Soc...

Page 8: ... off of the bottom hinge 5 Remove the two bottom hinge screws and hinge if necessary 6 Lay the door on its side to avoid damage to the water tube extending from the bottom hinge To reinstall the freezer door reverse the above steps Once both doors are in place ensure they are aligned with each other and level Please see To level the doors using the lower hinge for models with adjustable lower hing...

Page 9: ...between 30 and 100 psi A water supply line made of inch 6 4mm OD copper or stainless steel tubing To determine the length of tubing needed measure the distance from the ice maker inlet valve at the back of the refrigerator to your cold water pipe Then add approximately 7 feet 2 1 meters so the refrigerator can be moved out for cleaning as shown A shutoff valve to connect the water supply line to y...

Page 10: ...Mode is a feature that disables portions of the refrigerator and its controls in accordance with observance of the weekly Sabbath and religious holidays within the Orthodox Jewish community Sabbath Mode is turned ON and OFF by pressing and holding on freezer temp and on refrigerator temp for five seconds The display shows Sb while in Sabbath mode In the Sabbath Mode the High Temp alarm is active f...

Page 11: ...just the temperature to the desired setting After five 5 seconds of inactivity the display will beep to accept the new temperature Sabbath Mode The Sabbath Mode is a feature that disables portions of the refrigerator and its controls in accordance with observance of the weekly Sabbath and religious holidays within the Orthodox Jewish community Sabbath Mode is turned ON and OFF by pressing and hold...

Page 12: ...short term storage of cheese spreads or butter Fresh Drawers with Humidity Control some models The fresh drawers located under the bottom refrigerator shelf are designed for storing fruits vegetables and other Crisper Drawer Crisper Humidity Control Cool Drawer some models Some models are equipped with a Cool Drawer for storage of luncheon meats spreads cheeses and other deli items This drawer doe...

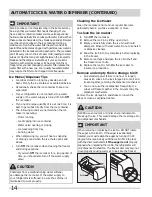
Page 13: ...maker hook up water supply immediately or turn ice maker OFF by lifting the wire signal arm until it clicks and locks in the UP position side mounted or turn the On Off switch to the Off 0 position rear mounted If the ice maker is not turned off and the water supply is not connected the water valve will make a loud chattering noise Using the Ice Maker after Installation Before making ice for the f...

Page 14: ...e Poor quality household water may require the filter to be changed more frequently Ice Maker Dispenser Tips Ice cubes stored too long may develop an odd flavor Empty the ice container as explained below Occasionally shake the ice container to keep ice separated If your refrigerator is not connected to a water supply or the water supply is turned off turn Off the ice maker If you need a large quan...

Page 15: ...pushing on the end face of the filter 3 Slide the old water filter cartridge straight out of the housing and discard it 4 Unpackage the new filter cartridge Using the alignment guide slide it gently into the filter housing until it stops against the snap in connector at the back of the housing 5 Push firmly until the cartridge snaps into place you should hear a click as the cartridge engages the s...

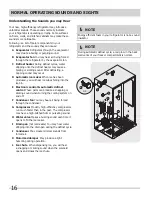
Page 16: ...er When ice has been produced you will hear ice cubes falling into the ice bin E Electronic control automatic defrost control These parts can produce a snapping or clicking sound when turning the cooling system on and off F Condenser fan You may hear air being forced through the condenser G Compressor Modern high efficiency compressors run much faster than in the past The compressor may have a hig...

Page 17: ...hat To Use Tips and Precautions Interior Door Liners Soap and water Baking soda and water Use 2 tablespoons of baking soda in 1 quart of warm water Be sure to wring excess water out of sponge or cloth before cleaning around controls light bulb or any electrical part Door Gaskets Soap and water Wipe gaskets with a clean soft cloth Drawers Bins Soap and water Use a soft cloth to clean drawer runners...

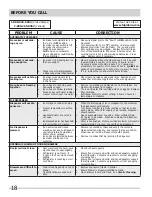
Page 18: ...y be clogged Replace filter cartridge Set freezer control to colder setting Allow 24 hours for temperature to stabilize ICE DISPENSER Dispenser will not dis pense ice Ice storage container is empty Freezer temperature is set too warm Household water line valve is not open Ice dispensing arm has been held in for more than 4 5 minutes When the first supply of ice is dropped into the container the di...

Page 19: ...ret any messages or number codes flashing on the digital displays WATER DISPENSER Dispenser will not dis pense water Household water line valve is not open Ice and water filter cartridge is clogged Filter not fully installed Open household water line valve See PROBLEM column AUTOMATIC ICE MAKER Replace filter cartridge Push filter in until you hear a click Water has an odd taste and or odor Water ...

Page 20: ...ther than authorized service companies or external causes such as abuse misuse inadequate power supply accidents fires or acts of God DISCLAIMER OF IMPLIED WARRANTIES LIMITATION OF REMEDIES CUSTOMER S SOLE AND EXCLUSIVE REMEDY UNDER THIS LIMITED WARRANTY SHALL BE PRODUCT REPAIR OR REPLACEMENT AS PROVIDED HEREIN CLAIMS BASED ON IMPLIED WARRANTIES INCLUDING WARRANTIES OF MERCHANTABILITY OR FITNESS F...

Reviews: