background image

27

CARE AND CLEANING

Í

NOTE

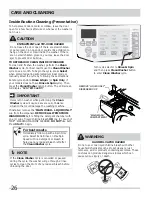
Detergent and fabric softener may build up in the 

dispenser drawer. Residue should be removed once or 

twice a month.

Remove the drawer by pulling the drawer out until it 

• 

stops.
Reach back into the left rear corner of the drawer cav-

• 

ity and press down fi rmly on the lock tab. Pull out the 

drawer.
Remove the insert from the bleach and fabric softener 

• 

compartments.
Rinse the drawer and inserts with a combination of ¾ 

• 

cup liquid chlorine bleach and 1 gallon hot tap water 

to remove traces of accumulated powders and liquids. 

Large amounts of fabric softener residue may indicate 

improper dilution or more frequent cleaning is required. 

Rinse well with tap water.
To clean the drawer opening, use a small brush to 

• 

clean the recess. Remove all residue from the upper 

and lower parts of the recess.
Replace the insert by pressing it in place until you hear 

• 

a slight click. Return the dispenser drawer.

Cleaning Dispenser Drawer Area

Daily Preventative Maintenance

Other Inside Routine Cleaning (Preventative)

Remove items from the washer as soon as the cycle 

• 

ends. Excess wrinkling, color transfer, and odors may 

develop in items left in the washer.
If there are no small children or pets present, you may 

• 

leave the door ajar when the washer is not in use.
Leave the dispenser drawer open slightly at the end of 

• 

the wash day.
Dry around the washer door opening, fl exible gasket, 

• 

and door glass. These areas should always be clean to 

ensure a water tight seal. 
When extremely soiled items have been washed, a dirty 

• 

residue may remain on the drum. Remove this by wip-

ing the drum with a nonabrasive household cleanser. 

Rinse thoroughly with water.
Periodically, wipe dry the folds in the bottom of the 

• 

fl exible gasket to remove lint and other debris.

Summary of Contents for Affinity FAFS4473L R

Page 1: ...bout the Use Care of your Washer Important Safety Instructions 2 4 Features 5 Operating Instructions 6 20 Washer Settings Chart 21 23 Stain Removal Guide 24 25 Care and Cleaning 26 29 Solutions to Common Problems 30 34 Warranty 35 Notes 36 Français 37 TABLE OF CONTENTS 137338000B 1003 ...

Page 2: ...not try to light any appliance Do not touch any electrical switch do not use any phone in your building Clear the room building or area of all occu pants Immediately call your gas supplier from a neighbor s phone Follow the gas supplier s instructions If you cannot reach your gas supplier call the fire department Installation and service must be performed by a qualified installer service agency or...

Page 3: ...he hot water system has not been used for such a period before using the washer turn on all hot water faucets and let the water flow from each for several minutes This will release any accumulated hydrogen gas Hydrogen gas is flammable do not smoke or use an open flame during this time Do not store or use gasoline or other flammable vapors or liquids in the vicinity of this or any other appliance ...

Page 4: ...nd servicing must be performed by an authorized servicer unless specifically recommended in this Use Care Guide Use only authorized factory parts Do not tamper with controls Do not install or store the washer where it will be ex posed to the weather Do not install on carpet Install washer on a solid floor It may be necessary to reinforce the floor to prevent vibration or movement To reduce the ris...

Page 5: ...nes for energy efficiency Control Lock Drum Light Door Latch with Safety Lock Cycle Selector Laundry Product Dispenser Drawer Door Striker Cascading Wash Vanes Vent Latch Stainless Steel Wash Drum Inner glass with small article redistribution ramp Adjustable Leveling Legs LCD Display Not all models are available with drum light ...

Page 6: ...g washer failure and should be investigated by a qualified technician Normal Operating Sounds You may or may not hear the following sounds from your new washer A DRAIN HOSE The washer has a flexible drain hose to carry water from the washer to the stand pipe of your home You will hear water flowing into your stand pipe This is a normal part of the operation of the washer B WATER VALVES DISPENSER A...

Page 7: ...ocks in a mesh bag See Stain Removal Guide in this guide for safe successful stain removal instructions 4 Add laundry load to washer 3 Pretreat stains and heavy soil Combine large and small items in a load Load large items first Large items should not be more than half the total wash load Washing single items such as a sweater towel or jeans is inefficient and may cause an out of bal ance load Add...

Page 8: ...ORTANT Open and close the dispenser drawer slowly Closing the drawer too quickly could result in early dispensing of the bleach or fabric softener IMPORTANT Save the liquid cup insert for future use DO NOT discard it while you are using powder detergent Use the cap or scoop provided by the detergent manufacturer to measure the amount recommended Detergent dosage may need to be adjusted for water t...

Page 9: ...products with powder detergent in the Main Wash deter gent chamber IMPORTANT Do not mix liquids and powders Detergent for Prewash For heavily soiled or stained loads select the Pre wash option and add the recommended amount of detergent to the Pre Wash detergent cup Liquid Chlorine Bleach If desired add liquid chlorine bleach to the cham ber labeled Liquid Bleach and marked with this symbol Fill t...

Page 10: ...and Soil Level buttons to scroll to the desired settings To select or delete an option press the button for that option The indicator will be illuminated when the option has been selected The indicator will no longer be lighted when the option has been deleted Adjustments to a cycle will be remembered and re called each time that cycle is selected in the future when the buttons are pressed To chan...

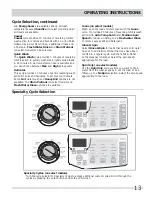
Page 11: ...he cycle Cycle Selection Follow the fabric care label instructions on items to be washed For best results This manual covers many models and not all cycles options or features listed are available on every model Consoles shown above for reference only Your model may differ Specialty Cycles may include but not limited to Jeans Kids Wear Stuffed Toys Active Wear Quick Sanitize on select models Speci...

Page 12: ...nal spin Fresh Water Rinse and Stain Pretreat on select models are available with this cycle Heavy Bulky on select models The Heavy Bulky cycle provides 20 minutes of reversing tumble wash action for heavily soiled items Hot water is recommended to remove heavy soil and most stains Stain Pretreat on select models Fresh Water Rinse and Energy Saver are available options Heavy on select models The H...

Page 13: ...ions are not available The Stain Pretreat on select models and Fresh Water Rinse options are available Jeans on select models Wash an entire load of denim jeans with the Jeans cycle It provides 20 minutes of reversing tumble wash action with Auto Temp Cold water Medium Spin Speed to reduce wrinkling and a Freshwater Rinse to remove excess dirt and detergent Rinse Spin Select Rinse Spin for loads t...

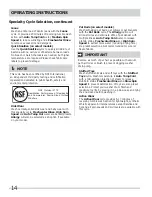
Page 14: ... Commercial Family Sized Clothes Washers ÍNOTE This cycle has been certified by NSF International an independent third party testing and certification organization dedicated to public health safety and environmental protection Kids Wear Wash normally soiled kids wear and baby wear with this specialty cycle Freshwater Rinse High Spin Speed and Auto Temp Hot water are default presets Allergy will al...

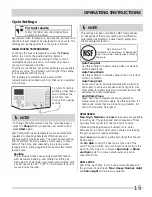
Page 15: ... Temp Warm Use this setting for normally soiled white or colorfast cottons or blends Auto Temp Cold Some warm water will automatically blend with cold tap supply to achieve a precise Auto Temp Cold Use this setting for lightly soiled non colorfast items knits delicates and hand washables Cold Water Clean Wash and rinse temperatures are equivalent to temperature of cold tap supply Use this selectio...

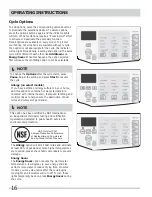
Page 16: ...ed with internal heater fast speed tumbling and multiple rinses to help ensure the destruction of dust mites and removal of pet dander ÍNOTE To change the Options after the cycle starts press Pause adjust the setting and press Start to resume the cycle The Allergy option will kill all dust mites and eliminate at least 95 of pet dander Since higher temperatures are required please check fabric care...

Page 17: ... than 3 minutes On models with Press Hold features you can activate the drum light during a cycle by pressing and holding the button under Options with the symbol The light will stay on during the cycle for 3 minutes To turn it off press and hold the button again Stain Pretreat on select models Stain Pretreat uses a special 10 minute soak pretreat agitation before the main wash It fills initially ...

Page 18: ...shwater Rinse Use this option when additional rinsing is desired to remove excess dirt and detergent It is recommended for heavily soiled loads or if household members have sensitive skin Clean Washer To clean and freshen the washer perform the Clean Washer cycle If you wish to begin the cycle press select when prompted This maintenance cycle uses hot water and two rinses to remove residue that ma...

Page 19: ...nutes to the cycle display time If an excessive amount of detergent has been added and additional rinsing has not corrected the issue TOO MUCH DETERGENT will be displayed Vent Latch Help prevent odor buildup and mildew between washes by utilizing your washer s vent latch feature To apply the vent lock 1 open the door slightly 2 lift the latch arm and then 3 press the arm down onto the plastic door...

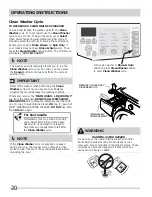
Page 20: ...ycle once a month To begin the cycle press Select when prompted during automated reminder mode or manually select the cycle by following these directions Rotate cycle knob to Rinse Spin or Spin Only if your models does not have Rinse Spin cycle Then press the Clean Washer option button The LCD screen will display SYSTEM CLEAN If installed remove the MAIN WASH LIQUID ONLY cup from the dispenser REM...

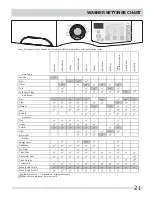
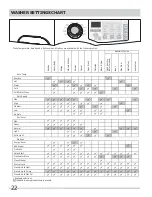
Page 21: ...9 9 9 Medium 9 9 9 9 9 9 9 9 9 9 Low 9 9 9 9 9 9 9 9 9 No Spin 9 9 9 9 9 9 Soil Level Max 9 9 9 9 9 9 Heavy 9 9 9 9 9 9 9 Normal 9 9 9 9 9 9 9 9 Light 9 9 9 9 9 9 Extra Light 9 9 9 9 9 Options Energy Saver 9 9 9 9 9 Add Steam 9 9 9 9 9 9 9 Pre Wash 9 9 9 9 Delay Start 9 9 9 9 9 9 9 9 9 9 9 Freshwater Rinse 9 9 9 9 9 9 9 9 9 91 Clean Washer 9 91 Control Lock 9 9 9 9 9 9 9 9 9 9 9 Press Hold Chime 9...

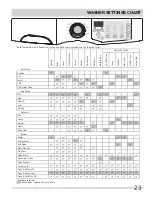
Page 22: ... 9 9 9 9 9 9 9 9 9 High 9 9 9 9 9 9 9 9 9 Medium 9 9 9 9 9 9 9 9 9 Low 9 9 9 9 9 9 9 9 No Spin 9 9 9 9 Soil Level Max 9 9 9 9 9 Heavy 9 9 9 9 9 9 Normal 9 9 9 9 9 9 9 9 9 9 Light 9 9 9 9 9 9 Extra Light 9 9 9 9 9 9 Options Energy Saver 9 9 9 9 Add Steam 9 9 9 9 9 9 9 Pre Wash 9 9 9 Delay Start 9 9 9 9 9 9 9 9 9 9 9 9 9 9 Freshwater Rinse 9 9 9 9 9 9 9 9 9 9 9 9 Clean Washer 9 Control Lock 9 9 9 9 ...

Page 23: ... 9 9 9 9 Medium 9 9 9 9 9 9 9 9 9 Low 9 9 9 9 9 9 9 No Spin 9 9 9 9 Soil Level Max 9 9 9 9 9 Heavy 9 9 9 9 9 9 9 Normal 9 9 9 9 9 9 9 9 9 9 9 Light 9 9 9 9 9 9 Extra Light 9 9 9 9 9 9 Options Allergy 9 9 9 9 Energy Saver 9 9 9 9 9 Add Steam 9 9 9 9 9 9 9 9 Stain Pretreat 9 9 9 9 9 9 Pre Wash 9 9 9 9 Delay Start 9 9 9 9 9 9 9 9 9 9 9 9 9 9 9 Freshwater Rinse 9 9 9 9 9 9 9 9 9 9 9 9 9 Clean Washer 9...

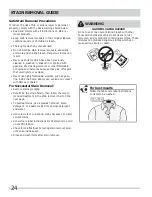
Page 24: ...that could ignite or explode Never use highly flammable solvents such as gaso line inside the home Vapors can explode on contact with flames or sparks For Successful Stain Removal Remove stains promptly Determine the kind of stain then follow the recom mended treatment in the stain removal chart on the next page To pretreat stains use a prewash product liquid detergent or a paste made from powder ...

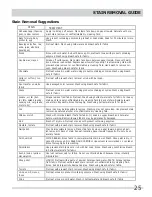
Page 25: ...tain frequently Rinse thoroughly Wash using hottest water safe for fabric Ink Some inks may be impossible to remove Washing may set some inks Use prewash stain remover denatured alcohol or nonflammable dry cleaning fluid Mildew scorch Wash with chlorine bleach if safe for fabric Or soak in oxygen bleach and hot water before washing Badly mildewed fabrics may be permanently damaged Mud Brush off dr...

Page 26: ...ted during automated reminder mode or manually select the cycle by following these directions Rotate cycle knob to Rinse Spin or Spin Only if your models does not have Rinse Spin cycle Then press the Clean Washer option button The LCD screen will display SYSTEM CLEAN If installed remove the MAIN WASH LIQUID ONLY cup from the dispenser REMOVE ALL ITEMS FROM WASH DRUM before filling the detergent ch...

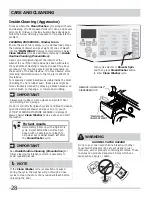
Page 27: ... the upper and lower parts of the recess Replace the insert by pressing it in place until you hear a slight click Return the dispenser drawer Cleaning Dispenser Drawer Area Daily Preventative Maintenance Other Inside Routine Cleaning Preventative Remove items from the washer as soon as the cycle ends Excess wrinkling color transfer and odors may develop in items left in the washer If there are no ...

Page 28: ...oblem CLEANING PROCEDURE Washer Drum Ensure the wash tub is empty or no clothes load Open the detergent drawer and pour eight 8 cups of bleach into the MAIN WASH detergent compartment Select Clean Washer cycle as described previously in Inside Routine Cleaning Preventative Upon cycle completion inspect the interior of the washer to see if the odor residue has been eliminated If any additional clea...

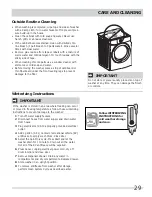
Page 29: ...ng IMPORTANT If the washer is stored in an area where freezing can occur or moved in freezing temperatures follow these winterizing instructions to prevent damage to the washer IMPORTANT Do not store or place laundry products on top of washer at any time They can damage the finish or controls 1 Turn off water supply faucets 2 Disconnect hoses from water supply and drain water from hoses 3 Plug ele...

Page 30: ...t with prewash stain remover or liquid detergent Increase detergent and wa ter temperature Rewash Rub fabric softener stains with bar soap Use correct amount of detergent and hottest water safe for fabric Do not pour liquid fabric softener directly on fabric See Operating Your step 5 Holes tears or snags Incorrect use of chlorine bleach Unfastened zippers hooks buckles Rips tears and broken thread...

Page 31: ...nse in cold water with liq uid fabric softener using the casual or delicate cycle Do not overload washer Remove items from washer as soon as cycle is com pleted Use liquid fabric softener Yellow buildup of body soil on synthetic fabrics Agitation time too short Wash water temperature too low Not enough detergent Soak in detergent booster or product containing en zymes Wash in hottest water safe fo...

Page 32: ...up liquid chlorine bleach and one gallon hot water Rinse well and repeat if necessary Return drawer to location NOTE Wear rub ber of latex gloves Protect floor and clothing from bleach damage Use only HE high efficiency detergent along with rec ommended dosage Avoid overfilling detergent and fabric softener compart ments of dispenser Water in fold of flexible gasket Result of washing and part of n...

Page 33: ...NS for details Shipping bolts and foam block have not been removed during installation See INSTALLATION INSTRUCTIONS for removing ship ping bolts and foam block Wash load unevenly distributed in drum Stop washer and rearrange wash load OPERATING Washer does not start Electrical power cord may not be plugged in or connection may be loose Make sure plug fits tightly in wall outlet House fuse blown c...

Page 34: ...r is set too low or is a distance from washer Measure hot water temperature at nearby faucet with candy or meat thermometer Water temperature should be at least 120 F 49 C Adjust water heater as neces sary Hot water is being used elsewhere in the house Avoid using hot water elsewhere before or during washer use There may not be enough hot water avail able for proper cleaning If problem persists yo...

Page 35: ...om persons other than authorized service companies or external causes such as abuse misuse inadequate power supply accidents fires or acts of God DISCLAIMER OF IMPLIED WARRANTIES LIMITATION OF REMEDIES CUSTOMER S SOLE AND EXCLUSIVE REMEDY UNDER THIS LIMITED WARRANTY SHALL BE PRODUCT REPAIR OR REPLACEMENT AS PROVIDED HEREIN CLAIMS BASED ON IMPLIED WARRANTIES INCLUDING WARRANTIES OF MERCHANTABILITY ...

Page 36: ...36 NOTES ...
Reviews: