background image

6

Care and Cleaning

Proper Care

Before cleaning, be sure to turn off and unplug unit.

1.

Dust outer cabinet with an oil-free cloth, or wash with warm water.

2.

Use a vacuum cleaner and brush attachment to clean grill.

N

No

otte

e:: 

Fan motor has been permanently lubricated at the factory.

Air passing through dehumidifier may carry quantities of dust, lint and fungus
spores. Much of this matter will be deposited on the coil and then flushed away
by natural drainage.

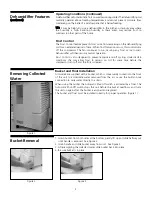
Direct Draining

If you want the water to flow directly to a drain, you must first remove the hose cap
(Figure 2). To remove hose cap, use a standard screwdriver and turn counter-
clockwise. Connect any standard garden hose to the bucket connection, or
place the dehumidifier over the drain. A standard garden hose has a 3/4”
(19 mm) diameter connection with 11

1

¼

2

inch threads per inch.

N

No

otte

e:: 

When using either of the above direct draining methods, you must first drill

a 3/8” (10 mm) hole in the center of the bucket connection. (For ease of drilling use
locating mark to center drill bit for hole (Figure 3).) This will allow water to flow
freely through the connection. To reseal the hose connection to the bucket, use any
standard hose end cap. 

T

Th

he

e h

ho

osse

e cca

ap

p cca

an

nn

no

ott b

be

e u

usse

ed

d tto

o rre

esse

ea

all tth

he

e h

ho

olle

e..

Figure 5

Figure 4

Locating

Hole

Direct Draining

Summary of Contents for 327000009

Page 1: ...our best interest to obtain and keep all receipts Register Your Product The self addressed PRODUCT REGISTRATION CARD should be filled in completely signed and returned to the Frigidaire Company Contents 2 Warranty 3 Important Safety Instructions 3 Location 3 How It Works 4 Operating Steps 4 5 Dehumidifier Features 5 6 Removing Collected Water 6 Care and Cleaning 7 Avoid Service Checklist Operate d...

Page 2: ...a part of the appliance when it was shipped from the factory 5 Damages to finish after installation 6 Replacement of light bulbs and or fluorescent tubes on models with these features EXCLUSIONS This warranty does not cover the following 1 CONSEQUENTIAL OR INCIDENTAL DAMAGES SUCH AS PROPERTY DAMAGE AND INCIDENTAL EXPENSES RESULTING FROM ANY BREACH OF THIS WRITTEN OR ANY IMPLIED WARRANTY Note Some ...

Page 3: ... pe en ni in ng gs s t to o t th he e r ro oo om m T Th he e e ef ff fe ec ct ti iv ve en ne es ss s o of f t th he e d de eh hu um mi id di if fi ie er r d de ep pe en nd ds s o on n t th he e r ra at te e a at t w wh hi ic ch h n ne ew w m mo oi is st tu ur re e l la ad de en n a ai ir r e en nt te er rs s r ro oo om m 2 2 P Pl la ac ce e d de eh hu um mi id di if fi ie er r i in n a a l lo oc c...

Page 4: ...g for three to four days During this time observe the dampness conditions in the area being dried When the sweating has stopped and the dampness odors are gone adjust Humidistat Control to the position between OFF and MAX DRY that provides a dryness condition suitable to your needs comfort Fan Speeds The Fan Speed adjusts fan speed When humidity has been reduced to the desired level and quiet oper...

Page 5: ...ed to prevent excessive on off cycling Under certain conditions this may allow frost to remain on coil for some time before the compressor turns off and the frost is cleared Removing Collected Water Bucket and Float Installation All models are supplied with a bucket which is conveniently tucked into the front of the unit to accumulate water removed from the air or use the built in hose connection ...

Page 6: ... hose cap use a standard screwdriver and turn counter clockwise Connect any standard garden hose to the bucket connection or place the dehumidifier over the drain A standard garden hose has a 3 4 19 mm diameter connection with 111 2 inch threads per inch N No ot te e When using either of the above direct draining methods you must first drill a 3 8 10 mm hole in the center of the bucket connection ...

Page 7: ... Cleaning Dehumidifier must be placed in a space that does not restrict air flowing into the rear coil or out of the front grill Dehumidifier has been installed or restarted recently The higher the moistuire in the room the longer the dehumidifier will operate Humidistat Control is set at MAX DRY Dehumidifier will not turn off if Humidistat Control is at MAX DRY D DE EH HU UM MI ID DI IF FI IE ER ...

Page 8: ...ory it signifies that the rating is certified by Frigidaire Company and verified by the Association of Home Appliance Manufacturers as complying with American National Standard B149 1 CERTIFIED RATING WATER REMOVAL AHAM association of home appliance manufacturers Manufacturer Certified to ASSOCIATION OF HOME APPLIANCE MANUFACTURERS ANSI AHAM DH 1 1992 ...

Reviews: