background image

66

Morgan Olson Service Parts   1.800.233.4823

WIRING DIAGRAMS

Summary of Contents for MT45 2019

Page 1: ...WWW MORGANOLSON COM 1 800 233 4823 2019 Morgan Olson Body 2019 Freightliner MT45 Chassis Service Manual DRAFT ...

Page 2: ... 233 4823 www morganolsonparts com NOTE USE ONLY GENUINE MORGAN OLSON PARTS USE OF NON OEM PARTS MAY VOID YOUR WARRANTY And or violate FMVSS SAFETY STANDARDS Latest version of all documents available at www morganolsonparts com ...

Page 3: ...HIELD Windshield Removal and Installation 41 WINDSHIELD WIPERS MOTOR 42 43 360 CAMERA systems 44 56 KEY LESS ENTRY SYSTEM 57 58 ELECTRICAL WIRING DIAGRAMS 59 89 Caution Before beginning maintenance park vehicle on level ground apply parking brake turn all power off and secure keys fobs Read all instructions before starting maintenance Always maintain firm footing and control of tools Follow your C...

Page 4: ...heck The floor of the truck is fastened to bolsters that extend the length of the floor The lower flanges of the bolsters are mounted to the chassis frame rails Both sets of fasteners are torqued to specifications All cab and body tie downs should be checked after 3 months and annual ly ...

Page 5: ...mooth operation the locking mechanism should be oiled every 3 months or as needed Grease should also be added at the contact points of locking mechanism arm and strik er At opened and closed positions Lubricate latch internal mechanism Grease on the latch contact points ...

Page 6: ...pper track is mounted to the header channel Remove the nuts and the track Reinstall by reversing the removal sequence Weather Seal Removal 1 The forward and rear weather seals are installed simply by sliding into a mated part To remove simply pull straight out from the top of the door or door frame Install by feeding into the mated part and sliding into place Handle Mechanism Removal 1 To remove t...

Page 7: ...e forward of door Return mirror to previous position 6 For proper door adjustment see page 8 Door Track and Hanger Plate removal without door removal 1 Remove access cover located on upper rear corner of the door pocket 2 Remove the the door hanger nuts and bolts slide the door hanger plate to the rear of the door pocket and remove 3 Remove the door track nuts lower the track away from the header ...

Page 8: ...er track Op erate the sliding door to ensure that it slides and latches properly 5 When the door is operating properly tighten all the remaining fasteners in the up per door tracks 6 Replace any broken studs with 25 20x1 00 truss head screw 7 Adjust Anti Rattle Clips as needed to reduce door vibration 8 See illustration on the following page Door Latch Adjustment 1 The door latches strikers and th...

Page 9: ...9 2019 Amazon P80 Package Delivery Vehicle ...

Page 10: ...10 Genuine OEM Parts 1 800 233 4823 www morganolsonparts com Blank ...

Page 11: ...ent sticking Grease should be applied at con tact points of the latch and striker for smooth operation This should be done every 3 months 2 Lubricate hanger bearings and body of finger catch latch with penetrating oil apply a light film of lithium grease to the striker 3 Adjust bottom guide to within 1 16 from bottom of the channel Bulkhead Door ...

Page 12: ...g bars screwdrivers or punches for spring winding Read all instructions before starting Preventive Maintenance Checklist Always maintain firm footing and control of tools Adjustments and repairs must be made by trained service personnel using proper tools and instructions DO NOT use the rear door pull strap to support yourself when entering or exiting the rear The strap can break or pull the door ...

Page 13: ...r intervals Do NOT use any petroleum based lubricant on rubber door seals TGS1000 ADVANTAGES Long lasting non toxic non static non staining non conductive contains no petroleum distillates no silicones no acids no carcinogens no halogens and no allergens Will not dry out or wash off with water Will not damage plastics paints metals fiberglass enamels or neoprene seals No petroleum smell H Register...

Page 14: ...EM Parts 1 800 233 4823 www morganolsonparts com Copyright 2017 by Transglobal Inc 3 LUBRICATION OF END HINGES 2 POINT CENTER CONTROL END LATCHES END HINGE 2 POINT END LATCH ASSEMBLY 2 POINT CENTER CONTROL ASSEMBLY ...

Page 15: ...15 2019 Amazon P80 Package Delivery Vehicle LUBRICATION OF TOP FIXTURE CENTER HINGE BOTTOM FIXTURE TOP FIXTURE CENTER HINGE BOTTOM FIXTURE ...

Page 16: ...233 4823 www morganolsonparts com 6 LUBRICATION OF SINGLE AND DUAL SPRING ASSEMBLIES On single and dual spring assemblies lubricate spring s along their entire length to prevent rusting SINGLE SPRING ASSEMBLY DUAL SPRING ASSEMBLY ...

Page 17: ... roller to keep the door from contacting the track See Figure 1 5 Are the side seals installed in a manner that the seal uniformly contacts the door but doesn t bind or impede the door operation 6 Inspect Roll up Door Side Seals for wear damage and replace if needed 7 Does the top seal contact the header at the ends well as the middle while keeping the top panel in a vertical position See Figure 2...

Page 18: ...emblies adjust the top fixture slides until the top door panel is in the same plane as the rest of the door panels and retighten 5 16 nuts FIGURE 2 TOP FIXTURE ASSEMBILY REAR STRUCTURE TOP HEADER VIEW OF INCORRECT TOP PANEL SEAL CONTACT TO HEADER VIEW OF CORRECT TOP PANEL SEAL CONTACT TO HEADER TOP PANEL SEAL ...

Page 19: ...19 2019 Amazon P80 Package Delivery Vehicle PULL STRAP Failure to replace worn or frayed door pull strap may result in injury FIGURE 3 PULL STRAP INSIDE MOUNT SHOWN PULL STRAP RETAINER ...

Page 20: ... same number of turns FIGURE 4 CABLE ANCHOR BRACKET CABLE x 1 CABLE ANCHOR PIN 3 32 x 1 COTTER PIN SPRING BALANCER PLEASE INSPECT THE FOLLOWING Note All spring systems are designed to assist in the operation of opening and closing the door The door should never free fall or fly open buy itself All spring systems are designed for both cables to have uniform pull so the door doesn t pull to one side...

Page 21: ...ight 2017 by Transglobal Inc 13 LOCATIONS OF TRANSGLOBAL S SERIAL NUMBER PLATES Transglobal has 2 location Outside mount bottom panel RS Standard and inside mount top panel RS When ordering parts for roll up door specify the serial number of the door ...

Page 22: ...cement 1 With the hood safely propped remove the upper and lower retainer clips Once the clips have been removed a slight tap will remove the gas spring from the ball studs 2 For safety reasons when replacing the gas springs use only Morgan Olson OEM replacement parts Gas Spring ...

Page 23: ...the impeller wheel 4 Take out the set screw to remove the impeller wheel squirrel cage 5 For installation reverse the sequence Plenum Replacement 1 Detach air inlet hose from plenum 2 Disconnect wiring harness at heater box and instrument panel harness 3 Remove fasteners from plenum diffuser located on top of the windshield rail 4 Remove the fasteners located on top of the windshield rail 5 Instal...

Page 24: ...all air is discharged through the dash louvers Bi Level With this setting air is discharged through the dash louvers and onto the floorboard This is the ideal mode for rapid warm up in cold weather Floor This mode will direct all air to the floorboard This mode is most frequently selected when driving in cold weather with a clear windshield Floor Windshield When this mode is selected air is discha...

Page 25: ...25 2019 Amazon P80 Package Delivery Vehicle WIRING DIAGRAM ...

Page 26: ...26 Genuine OEM Parts 1 800 233 4823 www morganolsonparts com WIRING DIAGRAM Enlargement 1 of 3 ...

Page 27: ...27 2019 Amazon P80 Package Delivery Vehicle WIRING DIAGRAM Enlargement 2 of 3 ...

Page 28: ...28 Genuine OEM Parts 1 800 233 4823 www morganolsonparts com WIRING DIAGRAM Enlargement 3 of 3 ...

Page 29: ... Inspect for any evidence of entrapped debris or a broken blower wheel that might have prevented rotation If no such evidence exists replace the blower motor POSSIBLE CAUSE 2 Blown fuse due to short in wire harness CORRECTIVE ACTION Refer to the HVAC Wiring Diagram and the Chassis Manufacturer s wiring infor mation Trace the entire HVAC wiring for an electrical short Replace or repair as required ...

Page 30: ...30 Genuine OEM Parts 1 800 233 4823 www morganolsonparts com Figure 3 ...

Page 31: ...y snapped into motor s connector If the connection is viable verify that the three wire connector is delivering the correct signal to the motors With the ignition switch turned to Accessory unplug each of the servo connectors and test according to the information in the Electrical Connection To Plenum Servo Motors Diagram Figure 4 If the electrical check is in agreement with the Diagram and if the...

Page 32: ...ow red signal wire will provide 12V full cold position dropping to zero volts full hot position as the temperature control knob is rotated clockwise If the condition at the connector is in agreement with the Diagram proceed as follows Step 1 Disconnect the water valve from the 5 8 heater hoses Step 2 Carefully inspect the four small terminal pins on the motor make sure that they are not dam aged S...

Page 33: ...re rise to approx imately 400 psi or a pressure drop to 28 psi With the system fully charged there should be conti nuity through both switches Replace pressure switches as required Step 3 If no voltage is present at the pressure switches check for voltage at the thermostat locat ed externally on the HVAC housing Assuming that the evaporator coil is fully warmed to ambient conditions the thermostat...

Page 34: ...lsonparts com SECTION C DIAGNOSIS OF REFRIGERANT RELATED PROBLEMS Consult the following Refrigerant System Evaluation chart Figure 7 for a list of refrigerant relat ed symptoms and their recommended resolution Refrigerant System Evaluation Figure 7 ...

Page 35: ...ONTROL PANEL ASSEMBLY 1 EA 2 47008706 KNOB 2 EA 3 47008777 KNOB MODE SELECTOR SWITCH 1 EA 4 46023202 SWITCH BLOWER SPEED 1 EA 5 47008710 SWITCH TEMPERATURE CONTROL 1 EA 6 47008774 SWITCH MODE SELECTOR 1 EA 7 47008711 HARNESS ILLUMINATION 1 EA 8 47008778 HARNESS 1 EA 9 47008775 ROCKER SWITCH BLUE 1 EA 10 47008776 ROCKER SWITCH GREEN 1 EA ...

Page 36: ...ESISTOR 1 EA 9 47008731 VENT TUBE ADAPTOR 1 EA 10 46032339 BLOWER MOTOR 1 EA 11 47008769 BLOWER WHEEL 1 EA 12 Call CLIP BLOWER MOTOR SHAFT 1 EA 13 47008730 VENT TUBE 1 EA 15 47008716 RELAY 1 EA 16 47008768 HARNESS 1 EA 17 Call GASKET 1 EA 18 Call GASKET 1 EA 19 47008763 EVAPORATOR COIL ASSEMBLY 1 EA 20 47008138 EXPANSION VALVE 1 EA 21 47008705 ACTUATOR MOTOR 1 EA 22 47008615 THERMOSTAT 1 EA 23 197...

Page 37: ...tor Condensor 47008138 Expansion Valve ITEM PART DESCRIPTION 1 47008789 6 HOSE ASSEMBLY CONDENSER TO RECEIVER 2 47008790 6 HOSE ASSEMBLY RECEIVER TO EVAPORATOR 3 47008791 8 HOSE ASSEMBLY COMPRESSOR TO CONDENSOR 4 47008792 10 HOSE ASSEMBLY EVAPORATOR TO COMPRESSOR 5 47008355 RECEIVER DRIER 6 990002211 BRACKET RECEIVER DRIER 7 Call HARNESS JUMPER WIRE 8 Call WIRE HARNESS PRESSURE SWITCH JUMPER 9 990...

Page 38: ...install the completed assembly 2 For installation of the gas springs see page 28 3 Reconnect all wiring 4 Reconnect hood prop Hinge Replacement 1 To replace hood hinge remove three bolts attached to hood assembly 2 Remove two bolts attached to windshield rail 3 Slide hinge out to the side of the truck 4 To replace hinge install in reverse order Hood Stop Adjustment 1 The stops that support the hoo...

Page 39: ...d screw driver and pry lamp from rubber grommet 2 Remove wiring plug from back of lamp 3 Install new lamp by reconnecting wiring plug to new lamp and pushing lamp into rubber grommet until properly seated Apply a small amount of soapy water to grommet for ease of installation Clearance Marker and ICC Light Replacement 1 From inside unplug the lamp push lamp out of the grommet To replace from the o...

Page 40: ... Use an awl and a mallet to tap the rivet shank out 3 If you accidentally drill through the material see the following instructions Re Riveting 1 When replacing new panels use 19 diameter rivets The correct length rivet will measure 25 38 beyond the material being joined See diagram below 2 When ever rivets are removed there is always some enlargement to the hole To ensure the strength of the new ...

Page 41: ...he truck will get the removal process started NOTE For safety reasons this task should be performed by two people Windshield Installation 1 Special tools are required for windshield removal Glass and Bead Tools 2 Insert rubber seal into window frame 3 A soap and water solution should be applied around the rubber seal This will al low the tools to move smoothly when in contact with the rubber seal ...

Page 42: ... Windshield Wipers and Wiper Drive Assembly 1 Replace the wiper arm by removing the acorn nut and washer hose To insure proper placement of the new wiper mark the position of the old wiper arm before removing 2 Reinstall in reverse order WINDSHIELD WIPERS MOTOR ...

Page 43: ...e on the new wiper assembly if need ed 5 To install the new wiper assembly position the spacers on the pivot shafts and position the assembly into place Align the assembly so the pivot shafts protrude to the exterior 6 From the outside install the pivot covers and the retaining nut 7 From the inside install the bolts to the mounting bracket Reconnect the washer hoses 8 Connect the power cable and ...

Page 44: ...44 Genuine OEM Parts 1 800 233 4823 www morganolsonparts com 360 CAMERA SYSTEM ...

Page 45: ...45 2019 Amazon P80 Package Delivery Vehicle 360 CAMERA SYSTEM ...

Page 46: ...46 Genuine OEM Parts 1 800 233 4823 www morganolsonparts com 360 CAMERA SYSTEM ...

Page 47: ...47 2019 Amazon P80 Package Delivery Vehicle 360 CAMERA SYSTEM ...

Page 48: ...48 Genuine OEM Parts 1 800 233 4823 www morganolsonparts com A 360 CAMERA SYSTEM ...

Page 49: ...49 2019 Amazon P80 Package Delivery Vehicle Wiring Diagram ...

Page 50: ...50 Genuine OEM Parts 1 800 233 4823 www morganolsonparts com 360 CAMERA SYSTEM ...

Page 51: ...51 2019 Amazon P80 Package Delivery Vehicle 360 CAMERA SYSTEM ...

Page 52: ...52 Genuine OEM Parts 1 800 233 4823 www morganolsonparts com 360 CAMERA SYSTEM ...

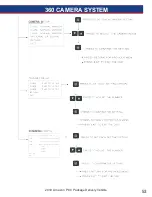
Page 53: ...53 2019 Amazon P80 Package Delivery Vehicle 360 CAMERA SYSTEM ...

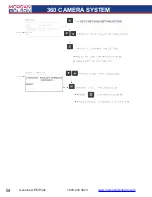
Page 54: ...54 Genuine OEM Parts 1 800 233 4823 www morganolsonparts com 360 CAMERA SYSTEM ...

Page 55: ...55 2019 Amazon P80 Package Delivery Vehicle 360 CAMERA SYSTEM ...

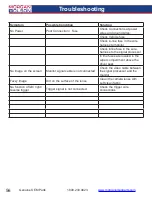
Page 56: ... Check inline fuse in the wire harness to the signal processor In line fuses are located in the wiper compartment above the driver seat No image on the screen Monitor signal cable is not connected Check the video cable between the signal processor and the monitor Fuzzy image Dirt on the surface of the lense Clean the camera lense with soft clean fabric No function of left right reverse trigger Tri...

Page 57: ... door and manually open it 4 Rear door must be manually closed 5 Door automatically latches and locks when door closes KEYLESS START STOP Standard Start 1 Tap fob button once 2 Back light on Engine Start Stop switches begin flashing This indicates that a Valid ID has been detected 3 Within 5 seconds press the Engine Start button once to initiate truck start sequence 4 Press the Engine Start button...

Page 58: ...back light will turn ON solid 4 After 5 seconds has elapsed Engine Start Stop switch back light will flicker flash indicating receiver is in Learn mode 5 RELEASE the Engine Stop switch 6 Press the button on NEW fob that is being enrolled 7 If code enrollment is successful Engine Start Stop switch back light will double flash and receiver will exit Learn mode 8 Test the new fob to verify it has bee...

Page 59: ...59 2019 Amazon P80 Package Delivery Vehicle Blank ...

Page 60: ...60 Morgan Olson Service Parts 1 800 233 4823 WIRING DIAGRAMS ...

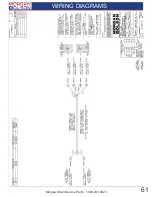
Page 61: ...61 Morgan Olson Service Parts 1 800 233 4823 WIRING DIAGRAMS ...

Page 62: ...62 Morgan Olson Service Parts 1 800 233 4823 WIRING DIAGRAMS ...

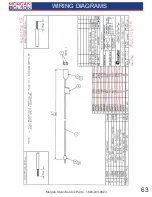
Page 63: ...63 Morgan Olson Service Parts 1 800 233 4823 WIRING DIAGRAMS ...

Page 64: ...64 Morgan Olson Service Parts 1 800 233 4823 WIRING DIAGRAMS ...

Page 65: ...65 Morgan Olson Service Parts 1 800 233 4823 WIRING DIAGRAMS ...

Page 66: ...66 Morgan Olson Service Parts 1 800 233 4823 WIRING DIAGRAMS ...

Page 67: ...67 Morgan Olson Service Parts 1 800 233 4823 WIRING DIAGRAMS ...

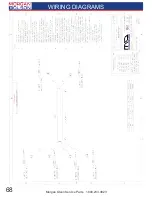
Page 68: ...68 Morgan Olson Service Parts 1 800 233 4823 WIRING DIAGRAMS ...

Page 69: ...69 Morgan Olson Service Parts 1 800 233 4823 WIRING DIAGRAMS ...

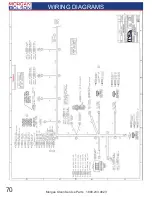
Page 70: ...70 Morgan Olson Service Parts 1 800 233 4823 WIRING DIAGRAMS ...

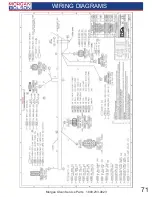
Page 71: ...71 Morgan Olson Service Parts 1 800 233 4823 WIRING DIAGRAMS ...

Page 72: ...72 Morgan Olson Service Parts 1 800 233 4823 WIRING DIAGRAMS ...

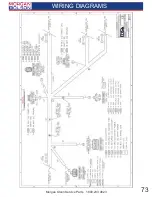
Page 73: ...73 Morgan Olson Service Parts 1 800 233 4823 WIRING DIAGRAMS ...

Page 74: ...74 Morgan Olson Service Parts 1 800 233 4823 WIRING DIAGRAMS ...

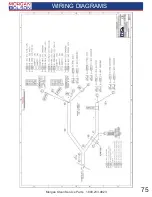
Page 75: ...75 Morgan Olson Service Parts 1 800 233 4823 WIRING DIAGRAMS ...

Page 76: ...76 Morgan Olson Service Parts 1 800 233 4823 WIRING DIAGRAMS ...

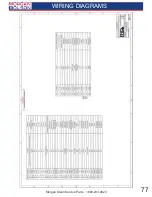
Page 77: ...77 Morgan Olson Service Parts 1 800 233 4823 WIRING DIAGRAMS ...

Page 78: ...78 Morgan Olson Service Parts 1 800 233 4823 WIRING DIAGRAMS ...

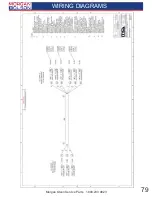
Page 79: ...79 Morgan Olson Service Parts 1 800 233 4823 WIRING DIAGRAMS ...

Page 80: ...80 Morgan Olson Service Parts 1 800 233 4823 WIRING DIAGRAMS ...

Page 81: ...81 Morgan Olson Service Parts 1 800 233 4823 WIRING DIAGRAMS ...

Page 82: ...82 Morgan Olson Service Parts 1 800 233 4823 WIRING DIAGRAMS ...

Page 83: ...83 Morgan Olson Service Parts 1 800 233 4823 WIRING DIAGRAMS ...

Page 84: ...84 Morgan Olson Service Parts 1 800 233 4823 WIRING DIAGRAMS ...

Page 85: ...85 Morgan Olson Service Parts 1 800 233 4823 WIRING DIAGRAMS ...

Page 86: ...86 Morgan Olson Service Parts 1 800 233 4823 WIRING DIAGRAMS ...

Page 87: ...87 Morgan Olson Service Parts 1 800 233 4823 WIRING DIAGRAMS ...

Page 88: ...88 Morgan Olson Service Parts 1 800 233 4823 WIRING DIAGRAMS ...

Page 89: ...89 Morgan Olson Service Parts 1 800 233 4823 WIRING DIAGRAMS ...

Reviews: