


Support: 855-473-7449 or 408-943-4100 Email: [email protected]
Page 3
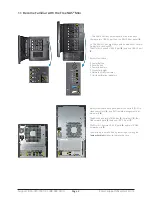
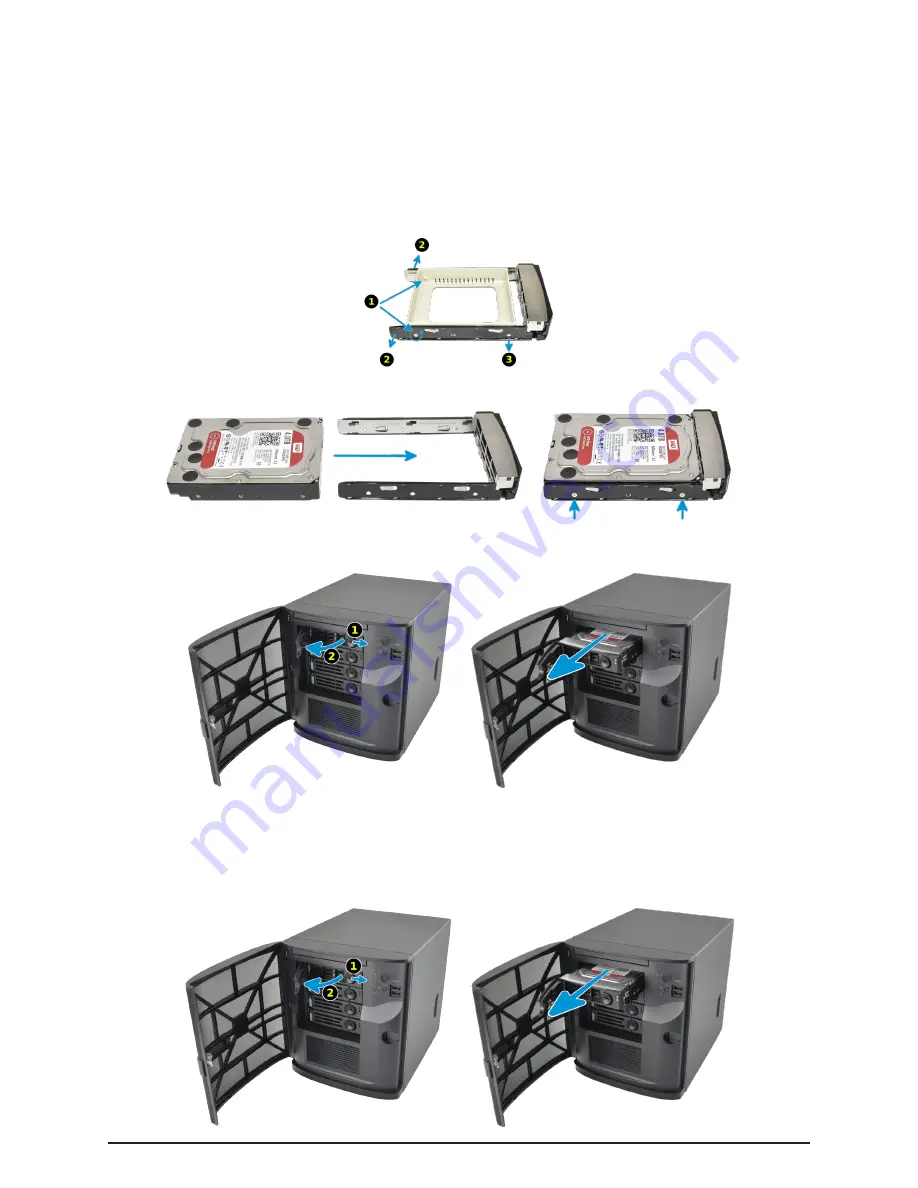
1.2 Installing Hard Drives
The FreeNAS
®
Mini and Mini XL support hard drives up to 10 TiB. Drives designed for Network Attached Storage (NAS) are re-
quired. These drives run cooler and quieter than desktop drives. NAS hard drives are available direct from iXsystems or retailers.
When ordered without hard drives, drive trays are shipped with filler inserts to protect them. If not all bays will be filled with drives,
keep the fillers in the empty trays to protect them.
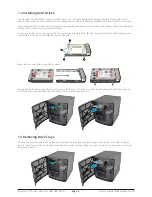
To mount a hard drive in a tray, remove the two rear screws holding the filler (
1
). Gently spread both sides of the tray away from
the filler (
2
) until the pins release (
3
), then remove the filler.
Starting with the bottom bay, gently insert a tray into a drive bay until it stops. Swing the latch closed until it locks. Repeat for all
hard drives to be mounted. Load trays with fillers into any remaining empty bays.
Mount the hard drive in the tray with four screws.
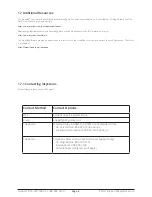
1.3 Removing Drive Trays
If a drive tray must be removed to replace a drive, release the latch by pushing the large circular button to the right. Swing the
latch to the left to eject the tray, then pull outwards on the latch to begin sliding the tray out. Grip the top and bottom of the tray
and gently remove it.


