PURA PRONTO & FRESCO
Original Operating Instructions
Read the operating instructions and the chapter
on safety information before operating the machine. Keep
the operating instructions near the machine.
Page 1: ...PURA PRONTO FRESCO Original Operating Instructions Read the operating instructions and the chapter on safety information before operating the machine Keep the operating instructions near the machine ...
Page 2: ......
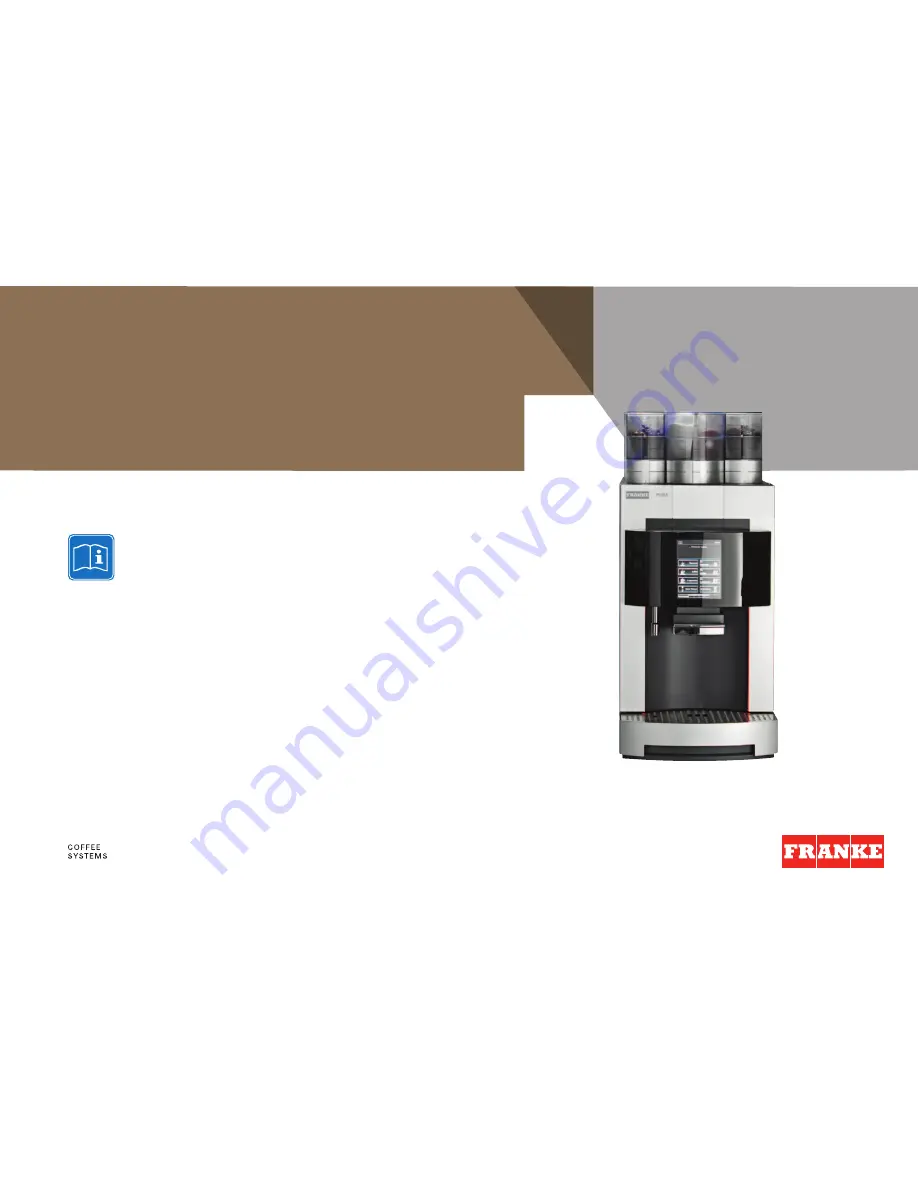
Page 3: ...is a powerful and space saving coffee machine It adapts to your needs perfectly Your customers will be impressed as you quickly prepare high quality customized coffee specialties We hope you enjoy your coffee machine and that it will bring you consistently happy customers Sincerely FRANKE Kaffeemaschinen AG Dear customer ...
Page 4: ...e Errors 57 Help with problems concerning product quality 58 Index 59 Explanation of symbols 3 Symbols from the Operating instructions 3 Symbols used in the software 4 For your safety 6 General safety concerns when using the Pura 7 Scope of delivery and identification 9 Scope of delivery 9 Identification 11 Description of the machine 12 Pura machine 12 Pura components 13 Touch display 14 Add on un...
Page 5: ... symbol indicates tips shortcuts and additional information Steps on a background are op tional They must be performed depending on the model of your machine Thorough rinsing of removable parts Cleaning the add on unit or individual components Describes in text and pictures a step that you must perform DANGER NOTICE WARNING CAUTION NOTICE indicates possibility of dam age to the machine DANGER indi...
Page 6: ...if programmed Caring for the machine Symbol Designation Description Standby Press to put the machine in standby mode Activate wipe protec tion Deactivates the display for 20 seconds For non hazardous wiping of the control panel Rinse Press to start the rinsing process Clean Press to start the cleaning process Descale Press to start the descaling process Rinse water filter Press to rinse the water ...
Page 7: ...nformation level Coffee beans Add beans Powder Add powder Fresh milk Add fresh milk Water tank Add water Symbol Designation Description OK Press to confirm values or input DEL Press to delete individual characters in the input field CLEAR Press to clear all information in the input field EXIT Press to cancel input and exit the menu Values that have been changed will not be saved DEL CLEAR ...
Page 8: ...he conformity of your cof fee machine in the accompanying Declaration of conformity 1N330084 Additional accessories may be obtained directly from your retailer or from FRANKE Kaffeemaschinen AG in Aarburg Switzerland Pura The Pura is a coffee machine for use in food service offices and similar environments It is designed to process whole coffee beans powder and fresh milk Your coffee machine is de...
Page 9: ...he machine or injury Never put anything into the bean hopper powder container or grinder Never poke any object around in the bean hopper powder container or grinder WARNING DANGER Risk of death by electrocution Never operate a machine that has been damaged or has a dam aged power supply cable If you suspect damage to the machine for instance a hot or burning odor immediately unplug the machine fro...
Page 10: ...od residue If the machine is not cleaned regularly milk and coffee residue may accumulate in the machine clog the outlets or find its way into drinks Clean the coffee machine and add on units at least once a day Read the chapter Cleaning and Rinsing CAUTION CAUTION Damage to the machine Set the machine up out of the reach of children Do not expose the machine to the elements such as rain frost or ...
Page 11: ... and protect your cof fee system Item no 1P 315 195 Cleaning solution Pura fresco only To keep your milk system clean and hygienic Item no BK 301 732 Scope of delivery Scope of delivery and identification The Pura is a powerful coffee machine Its modern operating concept will help you keep your cool in any situation Listed below are ways to identify your machine and what is included in the standar...
Page 12: ...and protect the exter nal parts of the machine Item no 1H 325 974 Adapter for CLARIS water filter For using the CLARIS water filter in the water tank Item no 1N 330 385 The configuration of your coffee machine may differ from that shown in the instructions Please refer to your purchase agreement Additional accessories may be obtained directly from your retailer or from FRANKE Kaffeemaschinen AG in...
Page 13: ...Technical data Model for model codes see below Machine number Item number Climate zone Apparatus number Identification code Manufacturer Model code Component C Pura Model 647 648 2M Number of grinders 2P Number of double powder containers H Hot water W Water connection optional CE Milk foam warm and cold milk Pura fresco only KE Refrigeration unit optional TW Cup warmer optional CC Chill Cup refri...
Page 14: ...cups h Cappuccino 120 cups h Latte 120 cups h Latte macchiato 80 cups h Chocolate 80 cups h Hot milk 80 cups h Hot water 20 liters h The Pura is available in two models The coffee machine can be configured to use a water tank or a water connection In order for you to obtain an overview of your machine we are presenting here the standard version Please note that your coffee machine may look differe...
Page 15: ...ing unit Cover Water tank Unlocking lever coffee bean and powder container On Off switch behind door Powder drawer Mixing chamber Handle Water tank grip Housing base Housing cover Powder chute Outlet insert Dispenser head Powder drawer grip Powder drawer Grounds container grip Grounds container Pura components ...
Page 16: ... Coffee small Coffee small 2 Coffee small 2 Coffee small Coffee Coffee Detailed information on the operation and functions of the touch display can be found in the chapter Configuration Navigation toolbar Selection area Information area Information prompts Individual product Active level Available levels 4 levels Double product Product keys Status display drink preparation Product cancel Change to...
Page 17: ...s perfectly on your Pura Chill Cup optional In many regions milk is part of a good cup of coffee Chill Cup is a combination refrig eration unit and cup warmer You can connect the Chill Cup directly to your Pura so the milk doesn t spoil and you have pre warmed cups for coffee at its best Refrigeration unit optional In many regions milk is part of a good cup of coffee You can connect the milk coole...
Page 18: ... 10 35 C Preparations The power connection for the coffee machine must be protected by a ground fault circuit interrupter GFCI Each terminal of the power supply must be able to be interrupted by a switch The water connection must have a shut off with a check valve and filter and must meet the requirements of the technical data and of local regulations Only when being used with a water connection T...
Page 19: ... Prepare a stable ergonomic surface min load capacity 150 kg The control unit should be at eye level Distance to the wall must be at least 50 mm When used with a water connection we recommend a distance of 75 mm to the wall Clearance above the machine must be at least 200 mm Adjustable feet optional can be used to compensate for unevenness or height differences If optional add on units are install...
Page 20: ...epending on size Electrical connection 200 240V 1LNPE 170W 50 60Hz Fuse 10A Electric cable 1800 mm Weight approx 10kg Width 320mm Depth 490 mm Height1 540 mm Milk container 5 liters Electrical connection 220 240V 1LNPE 88W 50 60Hz Fuse 10A Electric cable 1800 mm Ambient conditions Humidity max 80 Ambient temperature 5 32 C Weight approx 13kg Width 225mm Depth 453 mm Height1 330 mm Cup warmer techn...
Page 21: ...See page 20 The machine is ready WARNING Risk of scalding from hot water splatters and hot steam Do not touch the outlets or the area under the outlets The machine automatically vents the boiler system while heating Switch on the coffee machine using the On Off switch Press the release button and open the door In this chapter you will learn how to start up your Pura coffee machine for the first ti...
Page 22: ...isk of injury eye injury and damage to the machine Objects in the bean hopper or grinder may splinter and be ejected leading to damage to the machine or injury Never put any objects in the coffee bean hopper or grinder Never poke around in the coffee bean hopper or grinder with any object Close powder container Pour in powder milk powder on the left and cocoa powder on the right Open powder contai...
Page 23: ...ions or crushing inju ries from interior components Exercise care and caution when working in an open machine Close the door Fill water tank up to fill mark Push the water tank into the machine until it hits the stop Fold open the handle Remove water tank Remove the cover Insert the water tank to the half way point and seal with the cover Pull the water tank forward until it is halfway removed Pre...
Page 24: ...en machine WARNING Remove the cover Pull the water tank forward until it is halfway removed Press the release button and open the door Formation of mildew due to coffee residue Empty and clean the grounds container at least once daily NOTICE Empty grounds container Emptying the water tank optional Replace the grounds container Empty clean and dry the grounds container Remove grounds container Pres...
Page 25: ...le Remove water tank Emptying the coffee bean hopper NOTICE The quality of the coffee may be impaired Dry the coffee bean hopper well after cleaning it There must not be any residue from cleaning agents Emptying the water tank cont Seal the coffee bean hopper with the cover Close the door Empty clean and dry the bean hopper Remove the cover Push powder container forward to limit stop and remove by...
Page 26: ...lity of drinks may be impaired Dry the powder container well after cleaning it There must not be any residues from cleaning agents Remove the cover NOTICE CAUTION Risk of injury From the powder container s screw conveyor Exercise care when cleaning the powder container Push powder container forward to limit stop and remove by pulling straight up Pull red unlocking lever for ward Press the release ...
Page 27: ...he powder container on the machine Empty clean and dry the pow der container Seal powder container with cover WARNING Risk of scalding from hot water and splatters Transport carefully and allow to cool down if necessary Empty slowly and carefully NOTICE Replace drip tray Insert the drip grid Clean and dry the drip tray and drip grid Remove the drip grid and empty the drip tray Remove the drip tray...
Page 28: ...milk is drawn back into the lines after each replacement and after cleaning Prepare milk pump prime NOTICE The priming can be interrupted with Stop The Pura starts Priming milk Insert the milk container Insert the suction tube through the opening in the cover Close the door Select Prepare milk pump prime Remove the cover Fill the milk container with milk and seal it with the cover Switch to the Ma...
Page 29: ... angezeigt oder müssen mit OK bestätigt werden Bei einer Installation mit Wasseranschluss Tropfschalenabfluss oder Satzabwurf kann es zu Abweichungen im Reinigungsablauf kommen Sind seit der letzten Reinigung keine Produkte mit Pulver oder Frischmilch bezogen worden erscheinen die entsprechenden Handlungsaufforderungen nicht Bürstenset Reinigungspinsel 02 04 03 4 4 4 4 05 06 07 4 4 4 01 4 Start up...
Page 30: ...The drink is ready Preparation begins Place an appropriate cup or glass under the outlet Setting outlet height Risk of scalding or burning The dispensers and drinks are hot Do not touch the area under the outlets In case of scalding or burns immediately cool the affected area and depending on the severity of the injury consult a doctor Preparing drinks Preparing a standard drink You chose the Pura...
Page 31: ...ed by pressing Cancel Coffee Coffee small 2 Coffee small Tea mug Coffee Latte 2 Latte 2 Coffee small Press product button desired The drinks are ready Preparation begins Place two appropriate cups or glasses under the outlet Setting outlet height Risk of scalding or burning The dispensers and drinks are hot Do not touch the area under the outlets In case of scalding or burns immediately cool the a...
Page 32: ...n begins Press product button desired Place an appropriate cup or glass under the outlet Keep appropriate cups and glasses handy for additional drinks Setting outlet height WARNING Risk of scalding The next drink starts automati cally Pay attention and work care fully Next preparation begins Other drinks can be prese lected while the drink is being prepared Risk of scalding or burning The dispense...
Page 33: ...small Press product button desired Press preselection button desired Place an appropriate cup or glass under the outlet Setting outlet height Coffee Preselection of coffee type Powder Preselection of powder type The Pura makes the following preselection possibilities available 2x Selected product is prepared twice Serial preparation 2x Powder Coffee Coffee Coffee small Select product Risk of scald...
Page 34: ...r service technician Coffee Coffee Coffee small Coffee small Product is canceled Product is canceled Hot water Teacup Tea mug Latte 2 Latte small Place an appropriate cup or glass under the hot water outlet Preparation begins Preparation of the drink can be canceled by pressing Cancel Press the Hot water product button Risk of scalding or burning The dispensers and drinks are hot Do not touch the ...
Page 35: ...achine into consideration Pura pronto Pura fresco Cleaning Instructions for daily cleaning of the coffee system 1N330014 1N330019 1N330587 1 Descaling Instructions 1N330029 1N330029 Overview of the separate instructions for cleaning and descaling Even a coffee machine like the Pura must be cared for To ensure high quality flavor the Pura must be cleaned at least once daily and serviced at regular ...
Page 36: ...nto the machine may result in abrasions or crushing inju ries from interior components Exercise care and caution when working in an open machine WARNING Fill water tank up to fill mark Clean the water tank using the 5 step method Press the release button and open the door Replace water tank Close the door Remove and empty the water tank Cleaning the water tank weekly and additionally as needed if ...
Page 37: ...ne may result in abrasions or crushing inju ries from interior components Exercise care and caution when working in an open machine WARNING Press and hold down the red button while at the same time turning the lever to the rear until it hits the stop The brewing unit is locked Pull the brewing unit right and forward to remove Push the brewing unit to the left Press and hold down the red button whi...
Page 38: ...e machine Powder left in the mixing chamber can cause clogging and lead to the formation of germs Clean the mixing chamber weekly and additionally as required Clean the powder container every two months and additionally as required if the machine is used frequently Lift the mixing chamber cover up to remove Disconnect air supply from milk foamer Remove the milk foamer from the lower part of the ho...
Page 39: ...the frothing aid in the mixer Correctly assembled milk foamer Insert the steam nozzle in the frothing aid Lock the bayonet lock Insert the milk foamer in the lower part of the housing Reassemble mixing chamber Place air feed on milk foamer Insert the mixing chamber up to limit stop The mixing chamber will lock into place with an audible click Replace check valve in air supply Insert the steam nozz...
Page 40: ...o prevent residue build up in the coffee and milk areas If the technician has programmed it the machine automatically rinses after certain time intervals as well as when it is switched on or off The machine should be rinsed before initial use when not in use for extended periods more than 2 days as well as after cleaning and descaling WARNING Risk of scalding from hot water Do not touch the outlet...
Page 41: ...oor Slide adapter into opening The adapter will lock into place with an audible click Insert water filter see page 40 The water filter ensures for consistently optimal water quality Using an upflow filtration design ensures a long service life Inserting the adapter in the water tank Set the adapter on the channel in the water tank view from above into the water tank Water filter ...
Page 42: ...Counters 3 temperatures 4 Operating mode Reset the water filter counter See page 50 Replace water tank NOTICE Damage to the machine may result from improper handling or installation The water filter must be installed correctly Remove and empty the water tank Press the release button and open the door Insert the water filter into the adapter and rotate it clockwise until it hits the stop Water filt...
Page 43: ...eps is displayed Maintenance Maintenance Info Rinse water filter Select Rinse water filter No Yes Are you sure you want to rinse the water filter Confirm the prompt Rinse wa ter filter by pressing Yes Water filter is rinsed Close the door Fill water tank up to fill mark Press the release button and open the door Remove empty and replace the drip tray Machine switches to Product level The machine i...
Page 44: ...ng it counterclock wise Insert new water filter See page 40 During occasional periods when it is not in use store the water filter in a glass of water in the refrigerator Remove and empty the water tank Press the release button and open the door Illness due to bacteria build up Using a water filter for too long can lead to build up of algae Replace the water filter as described in the maintenance ...
Page 45: ...and additionally as required Clean brewing unit See page 35 Weekly and additionally as required Clean mixing chamber Pura fresco See page 36 Monthly Clean the coffee bean hopper See page 23 Monthly Clean the powder container See page 24 Every 2 months or as necessary Change water filter See page 39 Annually after every 30 000 products or as necessary Maintenance by service technician Contact a ser...
Page 46: ...ilter Maintenance Maintenance Customer menu Maintenance 1 1 1 2 2 2 Please enter PIN 2010 01 01 Program Select menu item Select function Teacup Hot water Latte Coffee Tea mug 2 Milk Coffee 2 Coffee small Coffee small Select product Your Pura is completely and individually programmable so that the Pura is just as flexible as you We have kept the programming simple to make your job easier Try it for...
Page 47: ...ing Prepare test product The source of supply is al ways shown under the menu item Grind quantity coffee type left Depending on the configuration the source of supply may vary Confirm changes by pressing OK Changes are canceled by pressing EXIT Next page Next page EXIT Teacup Tea mug 2 Latte Hot water Long High Medium Normal Short Low None Latte Previous page Previous page OK Coffee 2 Coffee small...
Page 48: ...own under the menu item Basic product powder left Depending on the configuration the source of supply may vary Confirm changes by pressing OK Changes are canceled by pressing EXIT Next page Next page EXIT EXIT High High Normal Normal Low Low Previous page Previous page OK OK Prepare test product Temperature Prepare test product Water quantity Prepare test product Temperature Powder quantity Water ...
Page 49: ...ntity correction Max adjustment 20 of set value Adjust quantity and tempera ture using Boiler temperature and milk quantity correction Max adjustment 20 of set value Changes can be checked without leaving the menu by pressing Prepare test product Confirm changes by pressing OK Changes are canceled by pressing EXIT EXIT EXIT OK OK Prepare test product Temperature Prepare test product Temperature Fo...
Page 50: ... switched on or off Confirm changes by pressing OK Changes are canceled by pressing EXIT Next page DEL DEL CLEAR CLEAR EXIT EXIT Daylight Saving Time Standard Time Previous page OK OK Weekdays Off Weekdays Off Time Off Time Off Daylight Saving Time Standard Time Weekdays On Weekdays On Date Time On Time On Time 2 3 Timer 2 2 2 Timer 1 2 1 Date time Next page Previous page 8 Control panel 5 Counter...
Page 51: ...ounters 4 Operating mode 3 Temperatures 2 Clock 1 Products Water connection No Select water supply Activate accounting Customer menu Customer menu Customer menu 1 2 Select menu item 4 Operating mode EXIT OK Adjust temperature with Correction of the milk tempera ture for all products Max adjustment 20 of set value Correction milk pump 1 Customer menu 3 Temperatures 3 1 Correction milk pump 1 Next p...
Page 52: ... Resetting product counters Products 25 32 Products 17 24 Products 9 16 Products 1 8 5 3 Individual products Counter status of the product groups is displayed Reset Maintenance counter by pressing CLEAR EXIT EXIT Quantity of filtered water l Counter 10000 Last reset 2010 01 01 Cleanings performed Counter 0 Last cleaning on 2010 01 01 Number of drinks prepared Counter 360 Number of coffee products ...
Page 53: ...ssing EXIT DEL CLEAR EXIT OK Sets the brightness of the display 15 Display dark 100 Display bright 8 2 Display brightness 15 Set brightness 15 100 Customer menu Continued on next page Select parameter Set language for Maintenance and Product level Next page Français Nederlandse English Deutsch Previous page Language for product level Language for maintenance level 8 1 Language 1 2 English Select L...
Page 54: ...h Select the brightness of the edge lighting Customer menu Next page Previous page 9 PINs 8 Control panel Customer menu 2 2 Select menu item You can use Next page and Previous page to scroll through the menu levels Confirm changes by pressing OK Changes are canceled by pressing EXIT If you select Custom in the Color menu the following ad ditional menu items are displayed Blue component of color Gr...
Page 55: ...s Activate prompts Activate rinsing process Activate system messages Next page Previous page 9 PINs 8 Control panel Customer menu 2 2 Select menu item 1 1 You can use Next page and Previous page to scroll through the menu levels Confirm changes by pressing OK Changes are canceled by pressing EXIT Select parameter Select the type of key tone Off No tone Tone 1 Deep tone Tone 2 High tone Ton 3 Dual ...
Page 56: ...ls Confirm changes by pressing OK Changes are canceled by pressing EXIT Change maintenance PIN Change User B PIN Change User A PIN Set or change PIN Max 6 characters DEL CLEAR EXIT OK Next page Previous page 9 PINs 8 Control panel User A PIN Customer menu Customer menu 2 2 Select menu item 9 PINs ...
Page 57: ...ng your machine again later taking advantage of our service is essential The coffee machines must be maintained installed and cleaned prior to drink preparation Proper functioning of the coffee machine cannot be ensured otherwise NOTICE Disposing of consumable materials Observe local disposal regulations when disposing of consumable materials and waste Disposing of the coffee machine You can retur...
Page 58: ...g Previous page Coffee Latte 2 Latte Please fill water tank Event no 160 Description The water tank must be filled Remedy Open door remove water tank fill water tank with fresh water replace water tank close door Coffee small 2 Coffee small Troubleshooting If a problem occurs your Pura coffee machine will give you instructions Events and information are shown on the display Should you be unable to...
Page 59: ...ds container is full Empty grounds container see page 22 168 Please empty grounds container Empty grounds container see page 22 169 The brewing unit is empty Contact a service technician 170 The brewing unit is full Contact a service technician 178 179 Boiler 2 1 temperature too low If this error message is visible for an extended period contact a service technician 180 181 Boiler 2 1 heating If t...
Page 60: ...rind Possible causes Solution Temperature too high Decrease coffee temperature Grind too fine Select a coarser grind Too little powder Increase amount of coffee Roast too dark Change coffee Coffee tastes bitter Possible causes Solution Poor grind quality Contact customer service Minimal coffee usage Load smaller amount of coffee Coffee beans bad Replace coffee beans Residual cleaning solution Rins...
Page 61: ...le 33 Description of the machine 12 Components 13 Pura 12 Touch display 14 Dimensions 17 Adjustable feet 17 18 Pura 17 Refrigeration unit 18 Dispenser head 13 Disposal 55 E Electrical connection 16 Emptying 22 Coffee bean hopper 23 Drip tray 25 Grounds container 22 Milk 27 Water tank 22 A Adapter 10 Installing 39 Removing 42 Adding milk 26 Add on units 15 Add powder 20 B Brewing unit 13 C Chill Cu...
Page 62: ...oduct setting 45 Q Queue 30 R Refrigeration unit 15 Rinse 33 Rinse coffee system 38 Rinse powder system 38 S Safety 6 Scope of delivery 9 Service 33 T Tablet insert 13 Technical data 16 Chill Cup 18 Cup warmer 18 Pura 16 Refrigeration unit 18 Installation dimensions 17 Add on units 18 Pura 17 Item number 11 M Machine errors 56 Machine number 11 Maintenance plan 43 Mixing chamber 13 Model code 11 N...
Page 63: ......
Page 64: ...Your distribution partner Franke Kaffeemaschinen AG Franke Strasse 9 4663 Aarburg Switzerland Tel 41 0 62 787 36 07 www franke com Issued 05 11 order number 1N330 004 revision A ...