Foundry IronPoint 200 Installation Guide
4-8
© 2007 Foundry Networks, Inc.
September 2007
Locking the Access Point
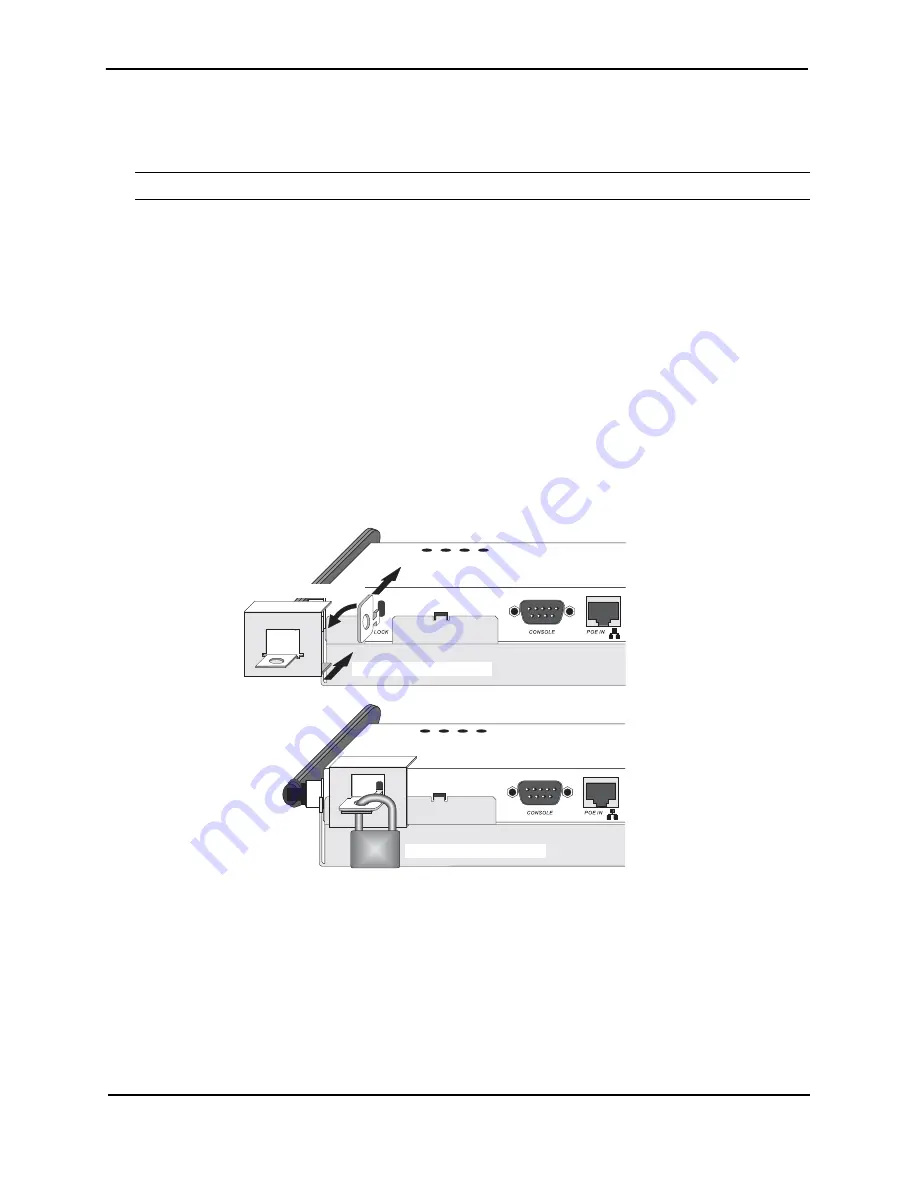
You can lock the access point on the mounting bracket by doing the following:
Note:
The access point comes with a lock clamp, but you must purchase your own lock.
1. Complete the steps in the previous sections to attach the access point to a wall or suspended
ceiling using the mounting bracket. Make sure the access point is installed in the mounting
bracket.
2. Put the lock clamp key into the top of the access point's lock hole.
3. Turn the lock clamp key to the horizontal position (about a 90 degree turn). (The key only turns
only in one direction.)
4. Push the lock key down to the bottom of the lock groove towards the mounting bracket.
5. Line up the lock clamp with the lock clamp key.
6. Insert a lock into the hole of the locking clamp and lock it into place.
Figure 4-6. Locking the Access Point
Installing the External Antenna
You can install an external antenna to extend the access point's coverage area. If you install the
external antenna while live sessions are on the access point, those sessions will be terminated.
To install the external antenna:
1. Remove the rubber grommet from the access point's right integrated antenna to expose the
external antenna connector.
1.
Insert Key
2.
Turn Key
3.
Slide clamp over Key
4.
Secure with pad lock
Summary of Contents for IronPoint 200
Page 12: ...Foundry IronPoint 200 Installation Guide xii 2007 Foundry Networks Inc September 2007...
Page 24: ...Foundry IronPoint 200 Installation Guide 3 4 2007 Foundry Networks Inc April 2007...
Page 38: ...Foundry IronPoint 200 Installation Guide 4 14 2007 Foundry Networks Inc September 2007...
Page 54: ...Foundry IronPoint 200 Installation Guide C 6 2007 Foundry Networks Inc May 2007...
Page 58: ...Foundry IronPoint 200 Installation Guide Glossary 4 2007 Foundry Networks Inc April 2007...


